Post a picture and description of anything you are working on this month at the 'Space here!
It can be anything from a small craft project to a large CNC router project to building a table to 3D printing to a science experiment and so much more. There are lots of people doing cool things at DMS all the time, but most of us don’t get to see it. Post it here and share the interesting things you are doing at Dallas Makerspace this month!
There are many wonderful projects that can be seen on last month’s Show & Tell, visible at this link.
Posting here helps not only promote Dallas Makerspace, but could inspire others to make something. It will also help PR post a monthly look at what can be done here on a blog post (with attribution to each maker of course).
NOTE: Please try to include the following on each post, to help make for richer blog content!
@frank_lima machined teeth for our 3lb combat robot’s spinning drum weapon out of S7 tool steel. We then learned how to heat treat and temper them to between 50 and 55 HRC hardness in the metal shop kiln.
I love the glaze on your cat!!! The planter is also beautiful. I had been watching that planter and it’s awesome to see it finished. I almost got rid of that planter mold - glad I took it to DMS instead. Can I post your pictures to Facebook?
It’s been a slow going project up until we got the table top glued up, and it does have some flaws that bug me, but I am happy to say this project is mostly done! The butcher block top is mostly white oak, with a little bit of poplar and walnut mixed in and a good bit of purple heart. About 60x30. The table base is just cheap 2x4 we sanded, burned, sanded, stained, then clear coated to give it that distressed gray look. My better half wanted a taller table than the one we were replacing, and insisted of 3’. So we gotta make up some chairs, but aside from that, this is about it. What do y’all think? Definitely learned a lot, and sure our next project will go a little more smoothly.
Personal observation: Whoever builds something, when they look at it all they see are the defects. Other people don’t see it they see the beauty of the work.
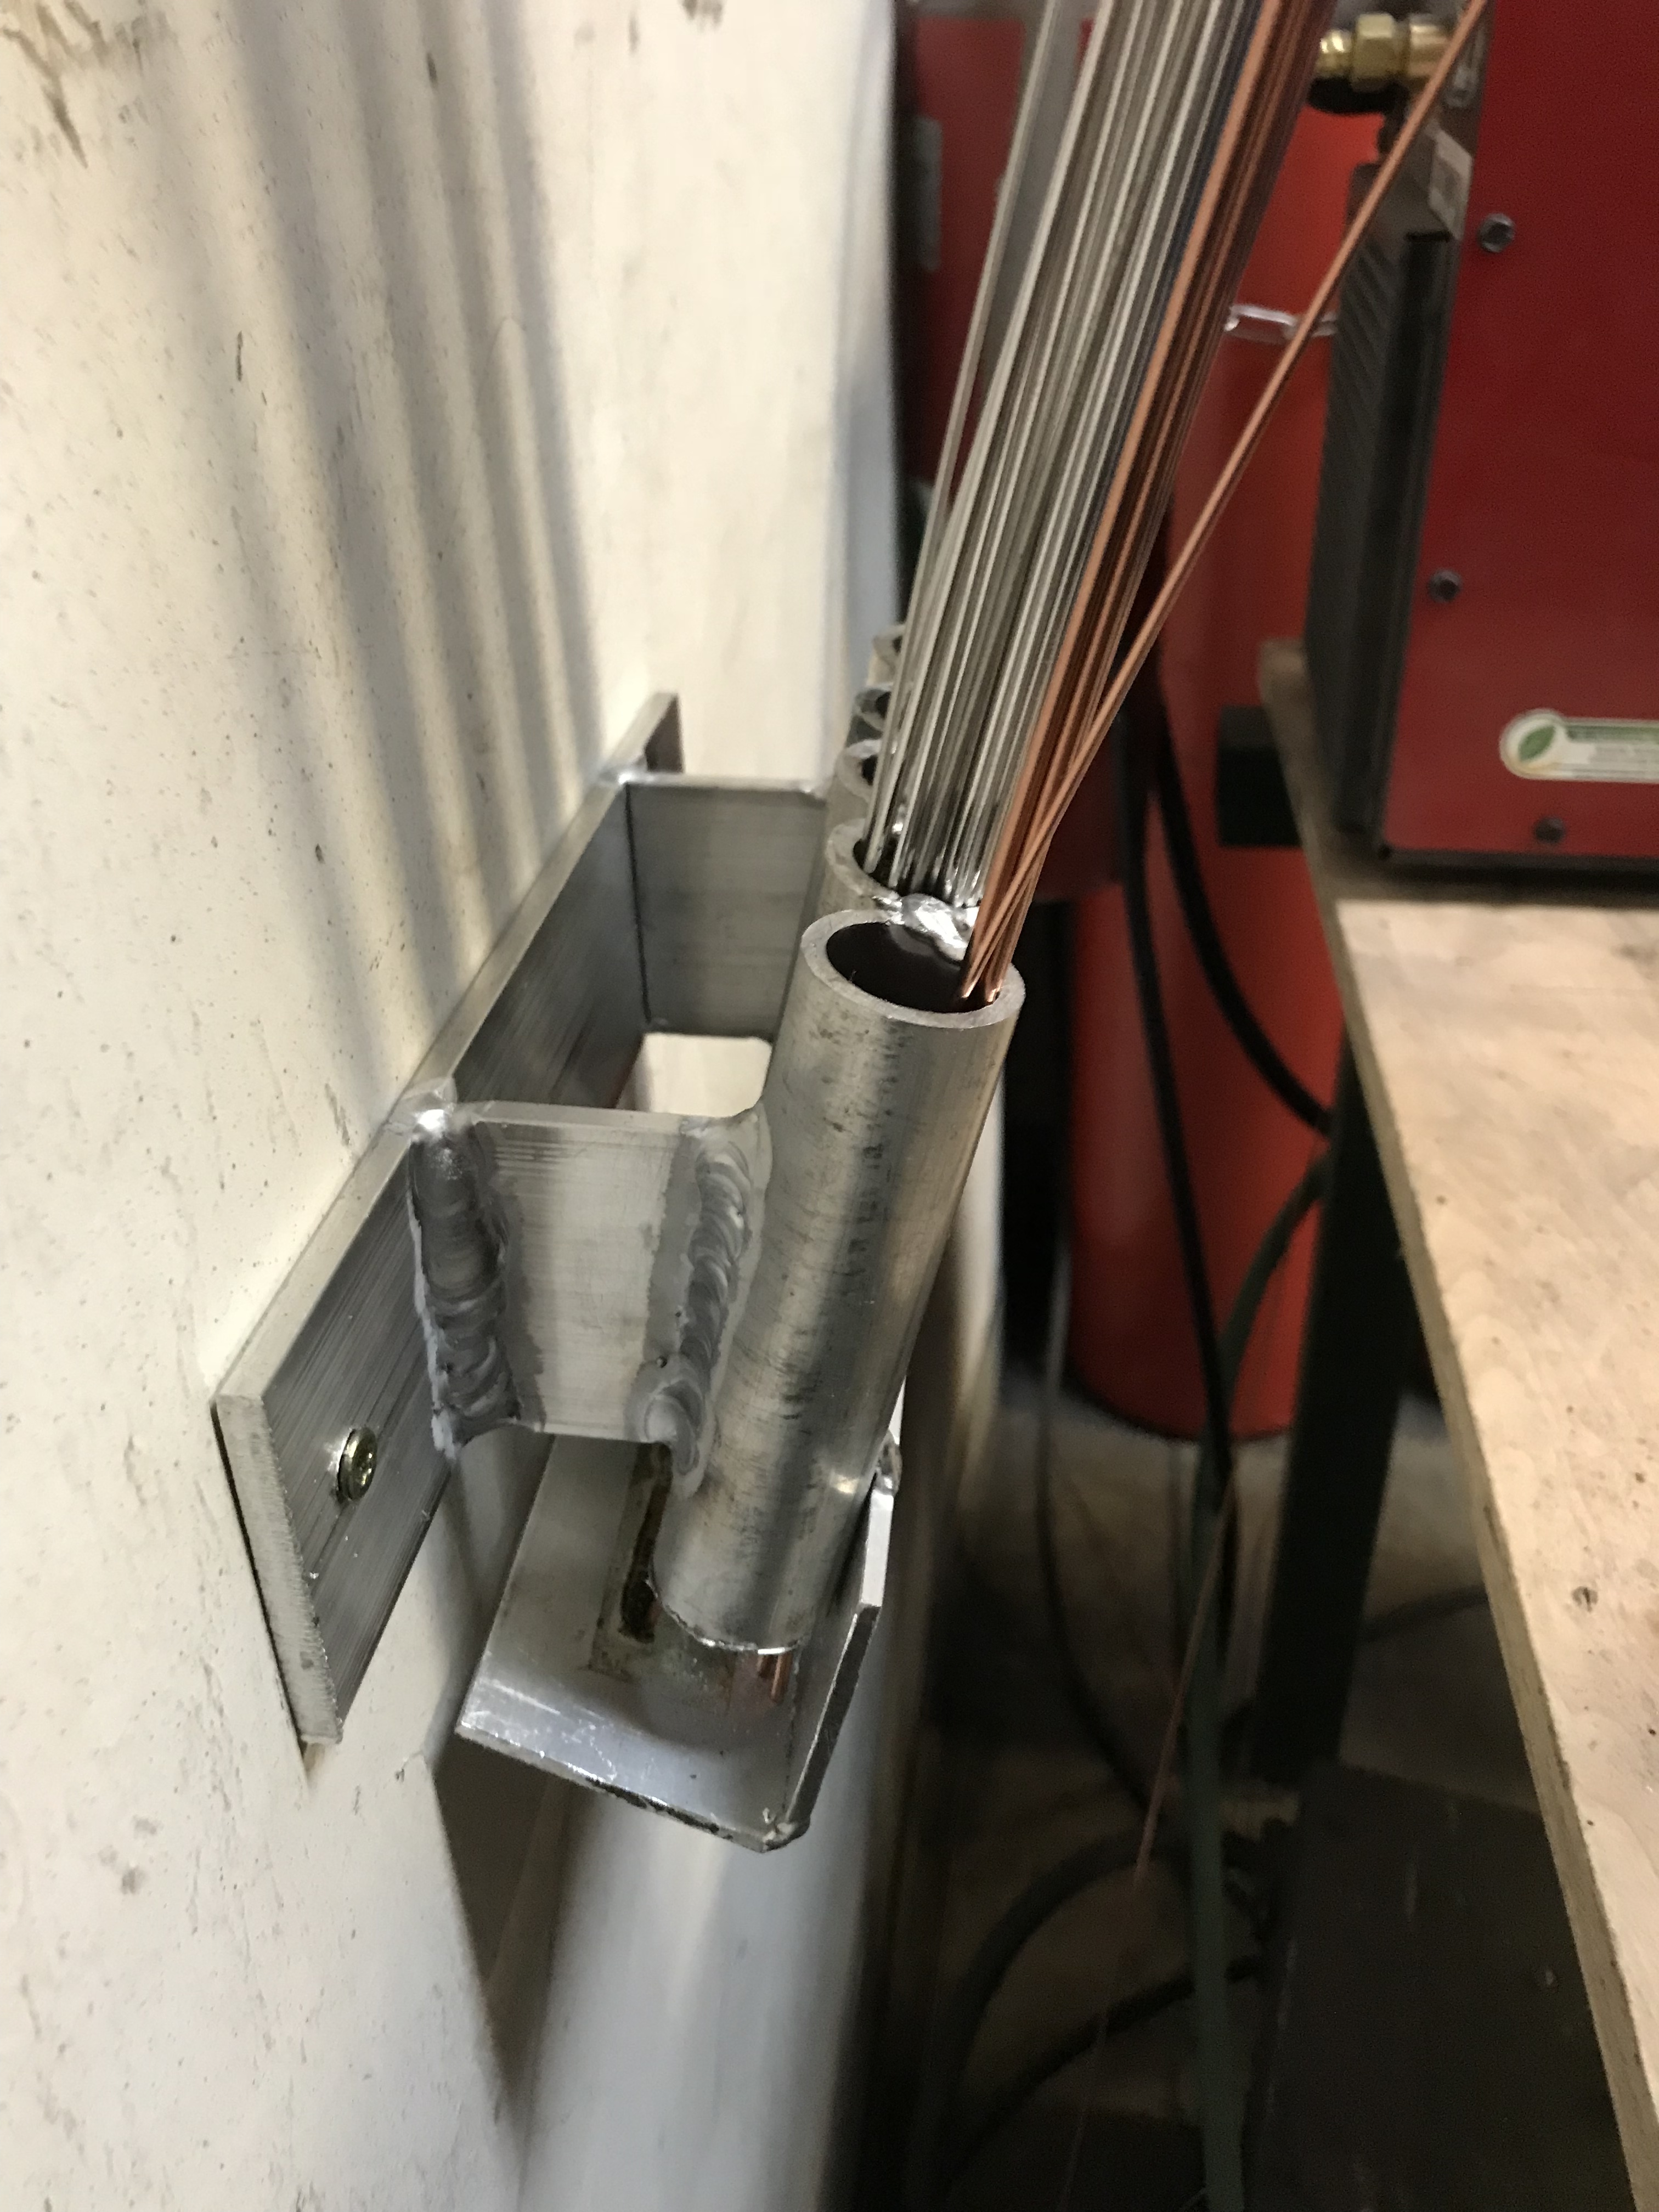
We had a metal shop cleanup on Saturday, and I noticed that all of our TIG consumables were disorganized and in need of some centralized storage.
I made basically a quiver for them, with care to make sure it wouldn’t trap metal dusts (see the bottom plate and how it doesn’t seal off the foot of the quiver).
I made it out of aluminum so it wouldn’t be magnetic, would be light, and corrosion resistant. Also it’s what we had on the shelf that we were trying to get rid of.
Sorry about the weld quality, it was thrown together in about 2 hours, and I didn’t have any plans to follow so I was filling up poor fitment and making adjustments as I went. It should be pretty sturdy, it just doesn’t look great.
I mounted it to where I think the studs are, if it falls off the wall or someone tears it up somehow, it’s pretty easy to come back and beef it up. Again, ignore the welds. They were a little cold as I was hitting the 150A limit on our air cooled torch
 NOTE: Please try to include the following on each post, to help make for richer blog content!


 Can I post your pictures to Facebook?