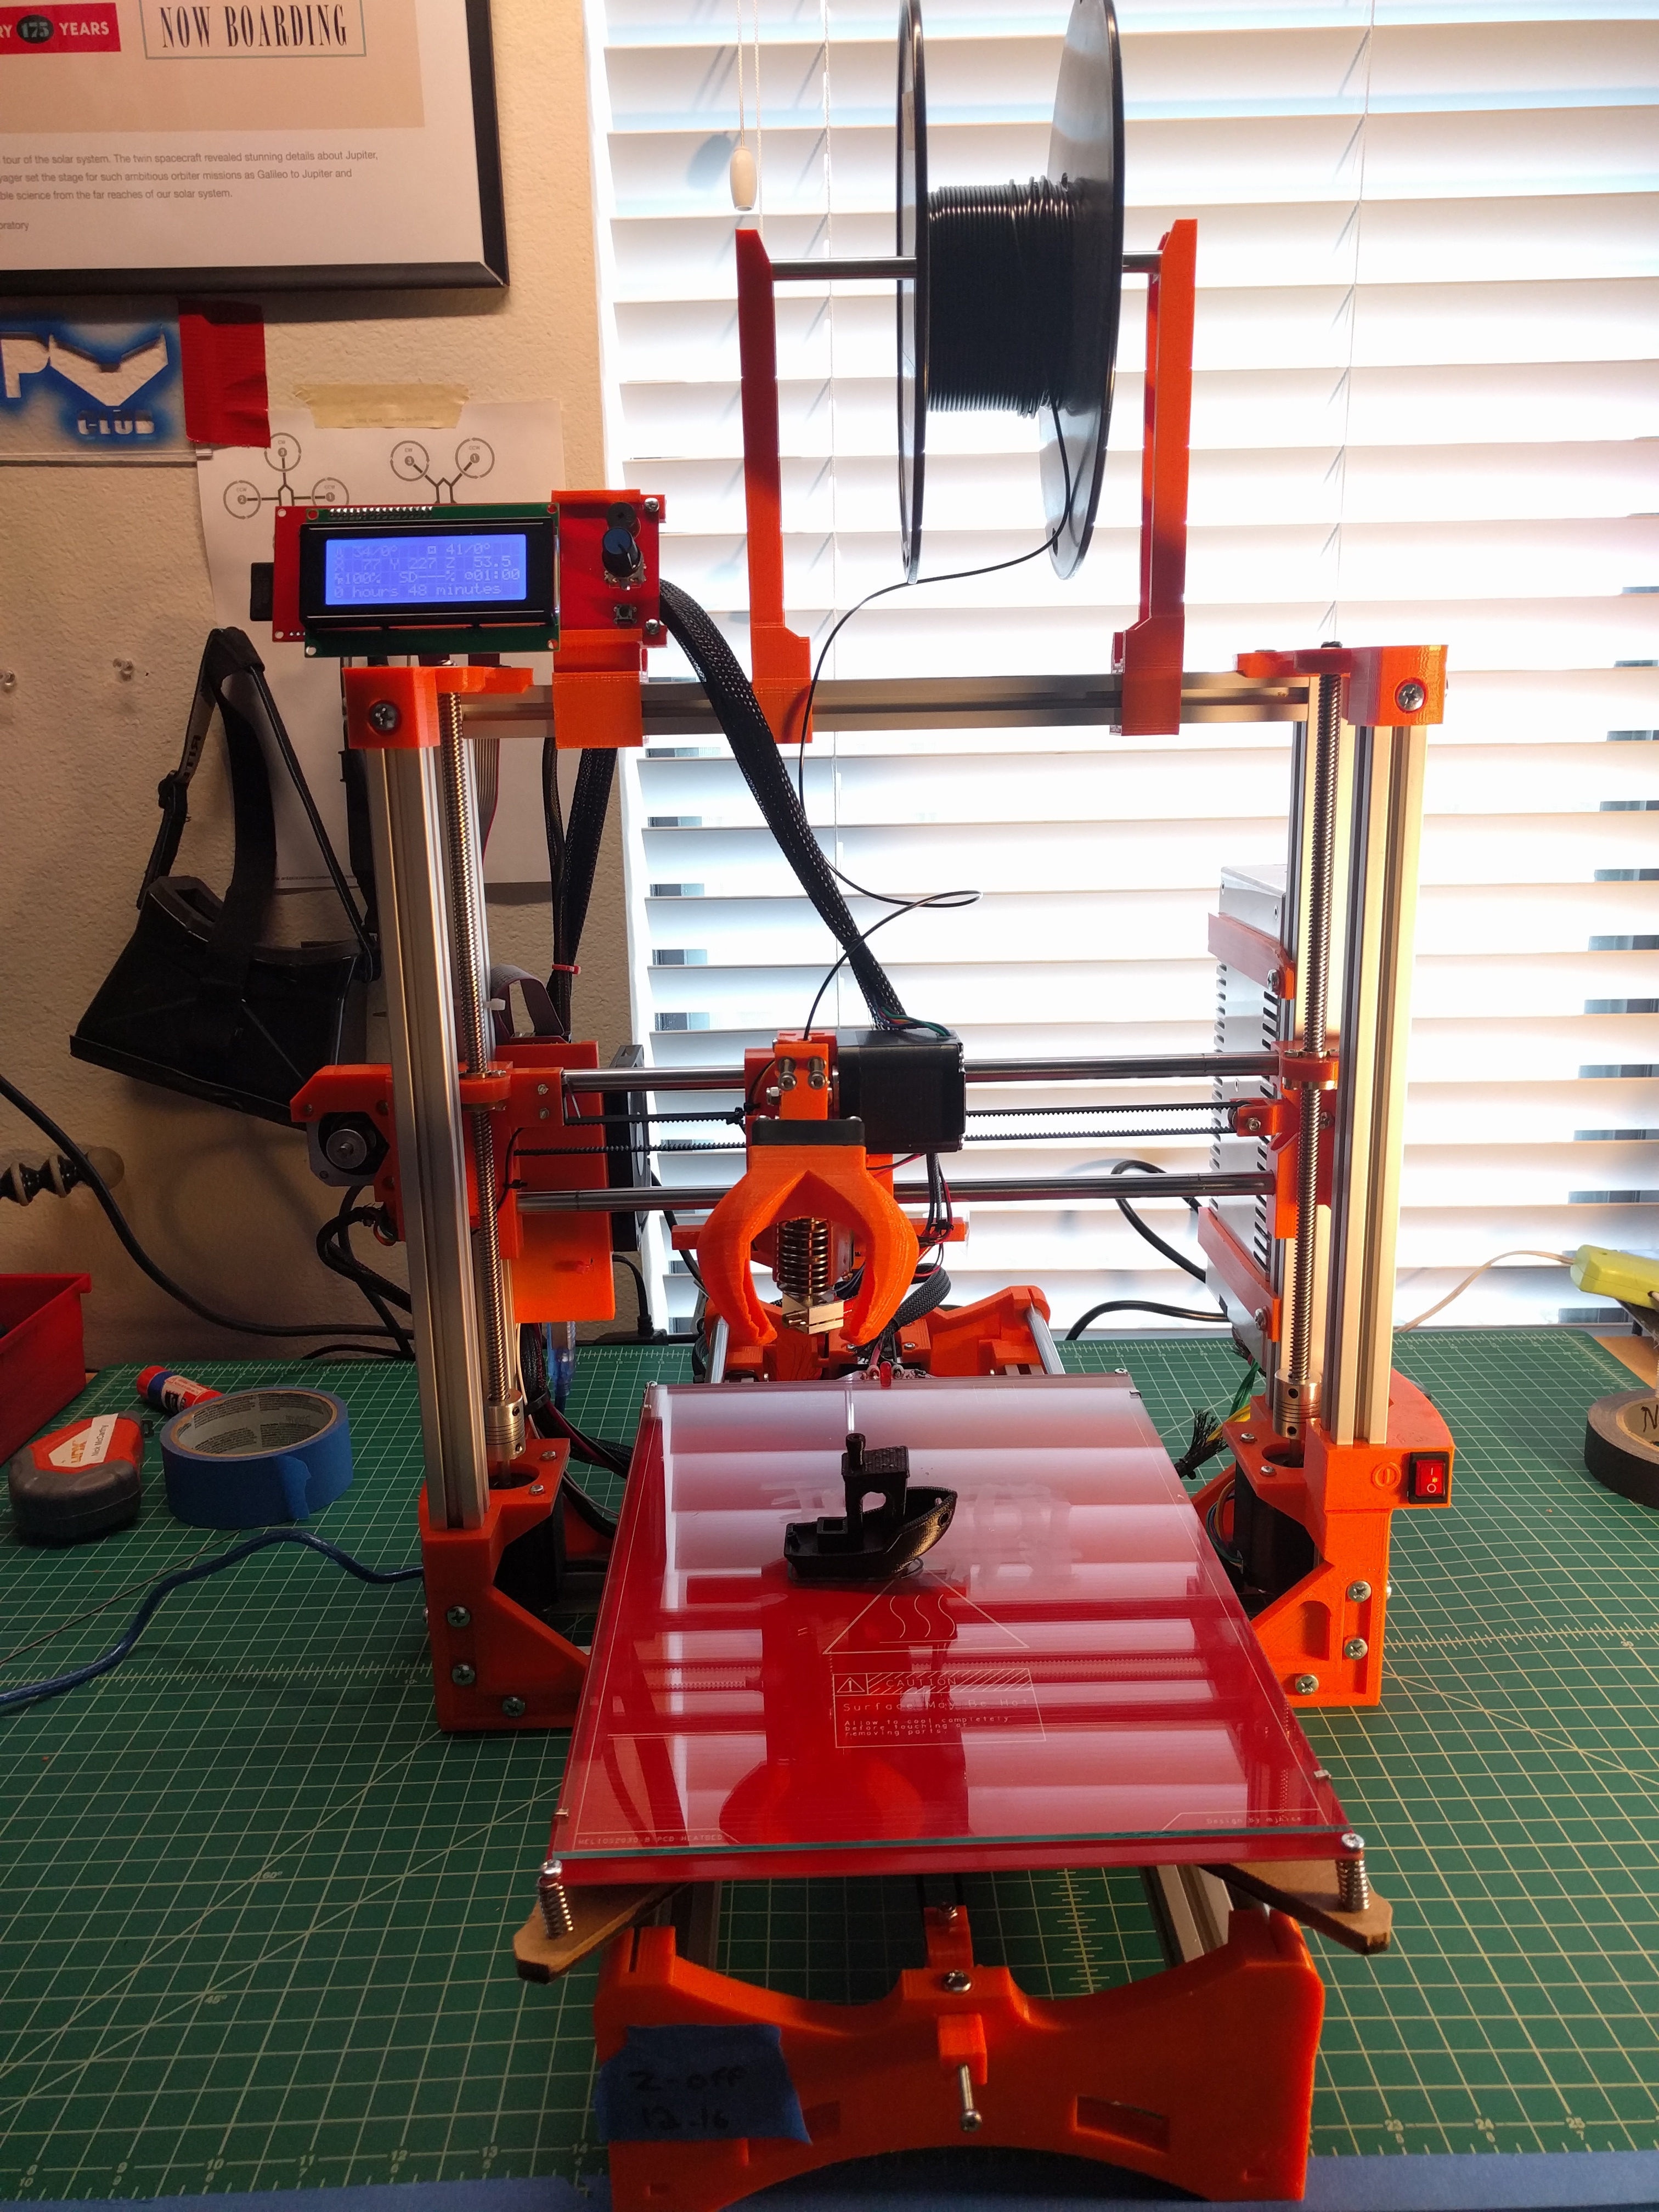
I purchased and built the Wilson II RepRap kit from here: https://www.tindie.com/products/mjrice/reprap-wilson-ii-complete-3d-printer-kit/
I came to know about the Wilson II Reprap from @hasbridge While he choose to source parts himself and print all the plastic parts, I was a little less patient and bought one of the complete kits from Marty.
As others have posted in the reviews, the kit was very thoughtfully packed, with individual boxes for plastic parts, frame components, electronics, fasteners, build plate, and some extra parts.
The first thing I did upon unpacking was to review the list of all the plastic parts, familiarizing myself with what goes where. Next, I dumped out all the screws, nuts, washers, springs and other fasteners and organized by size into small bins. This took about 10 minutes, but probably saved me an hour or so when it came time to assemble.
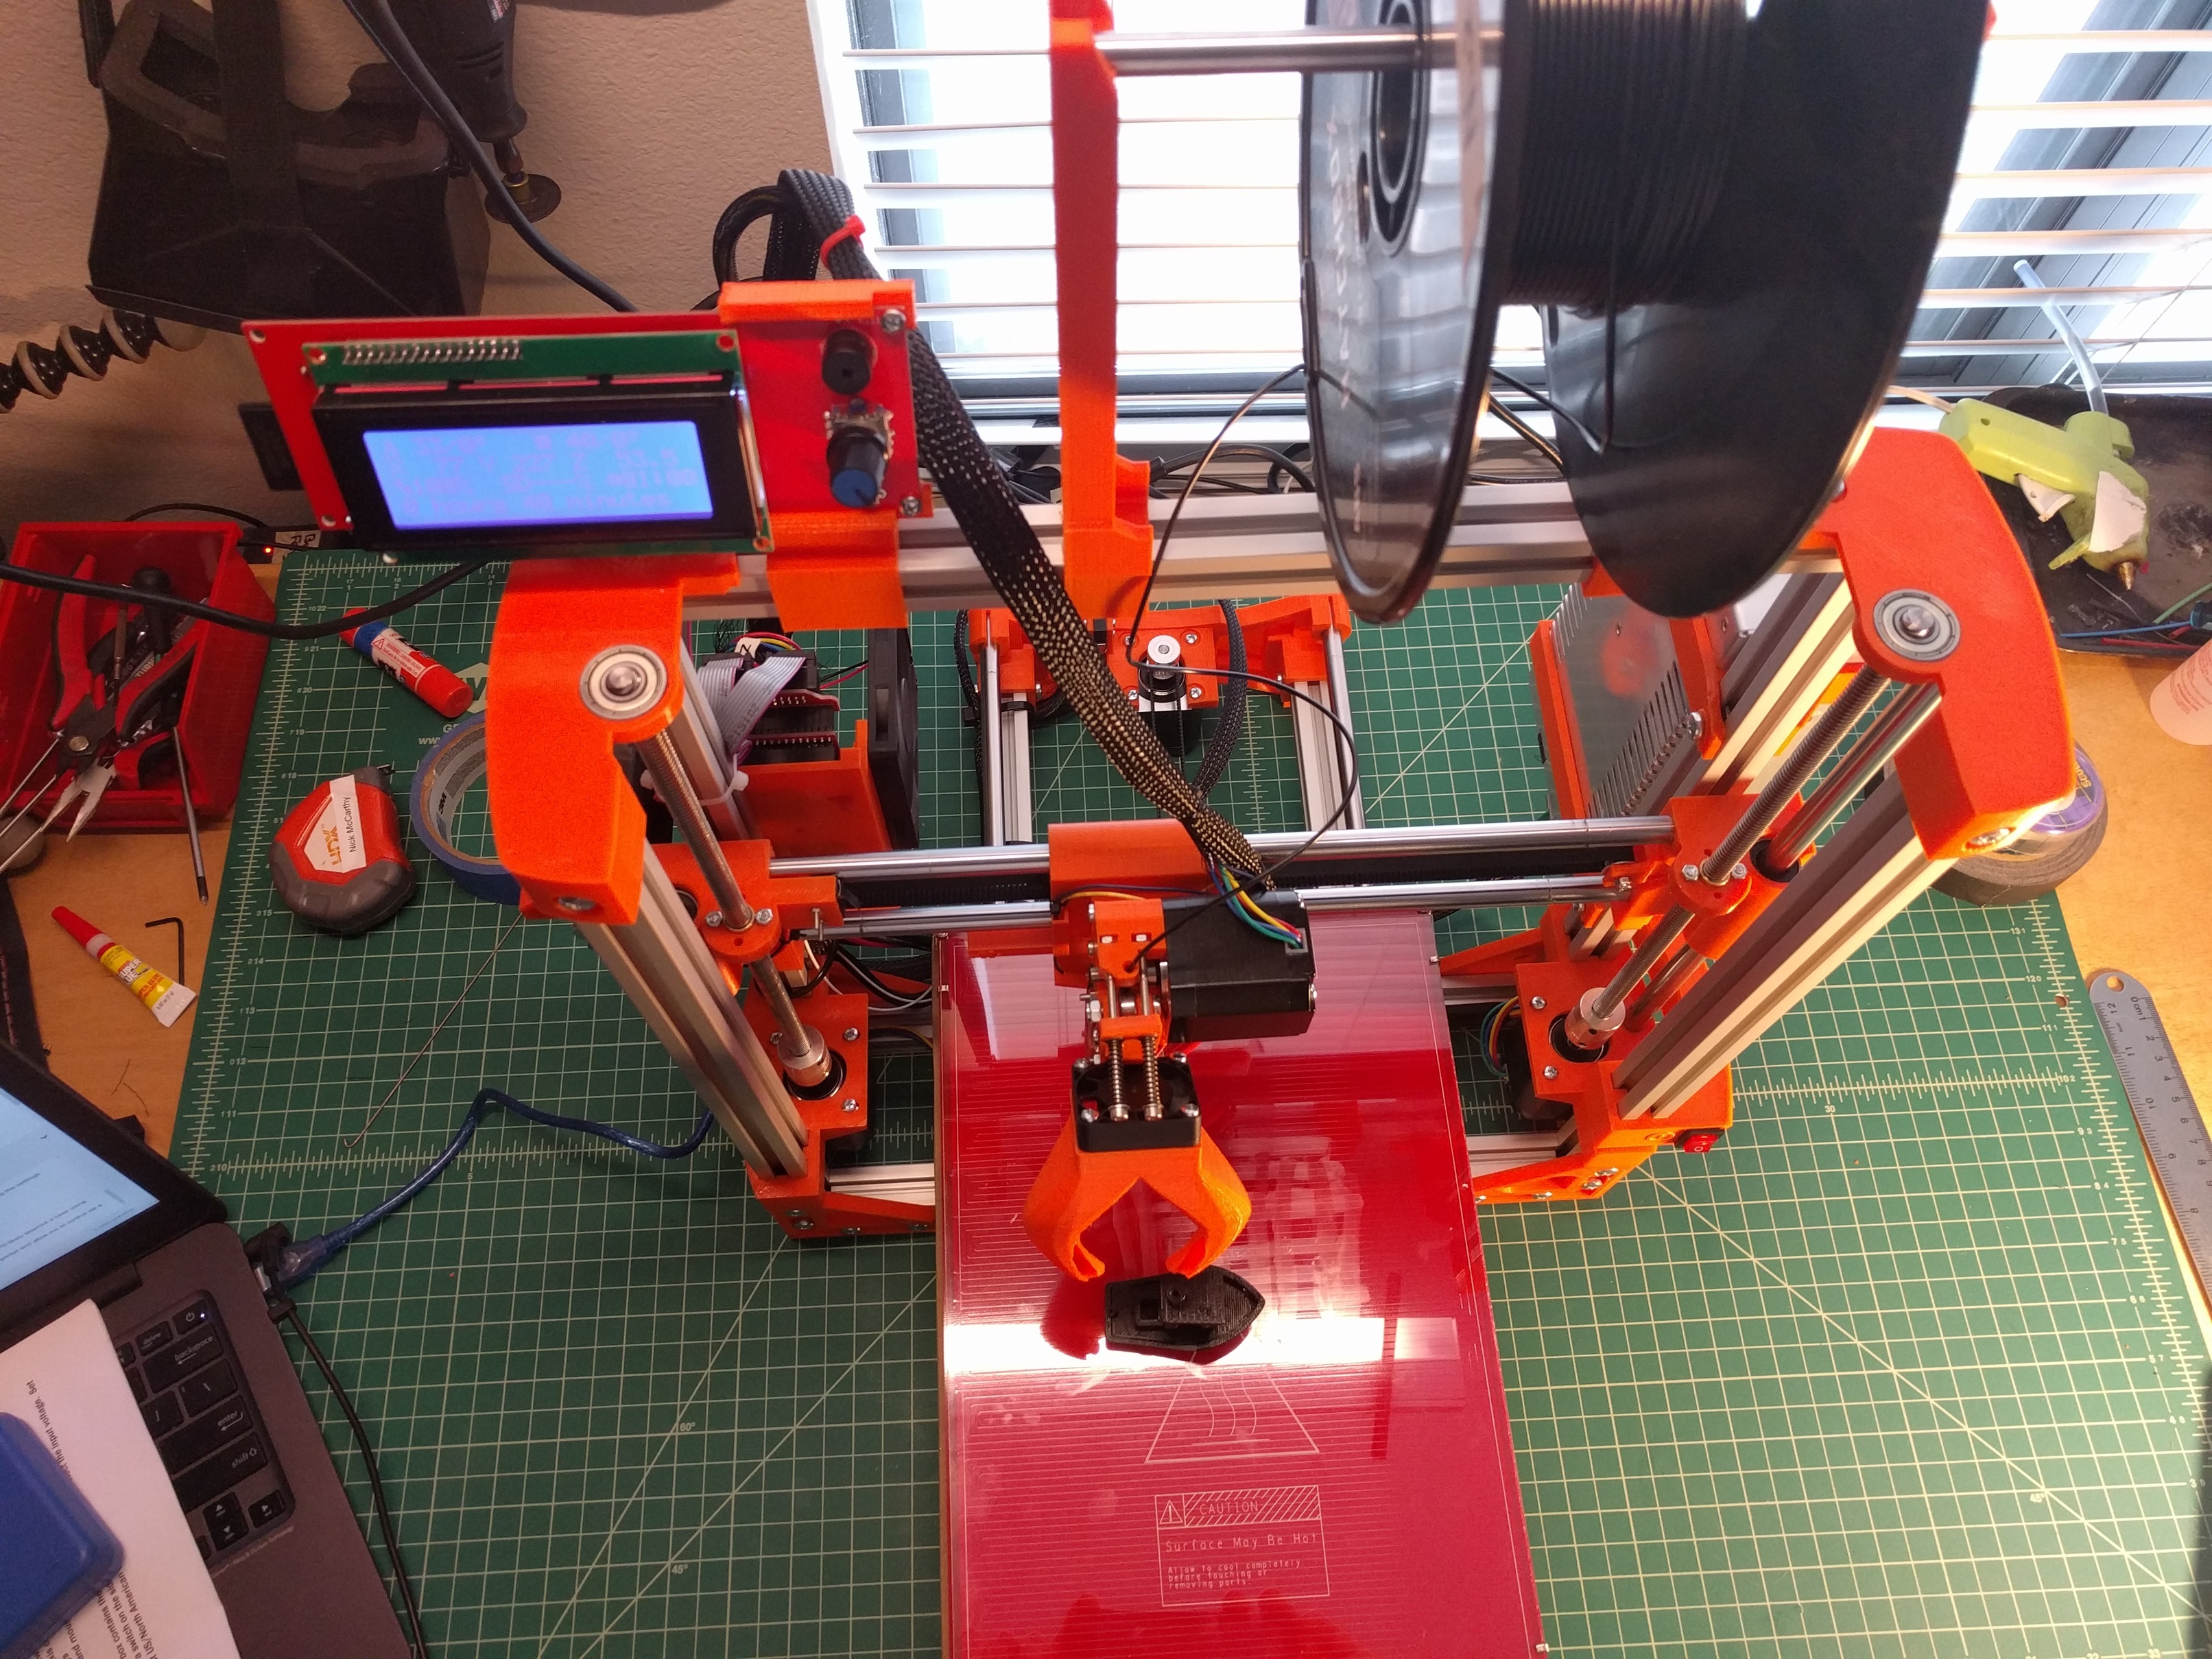
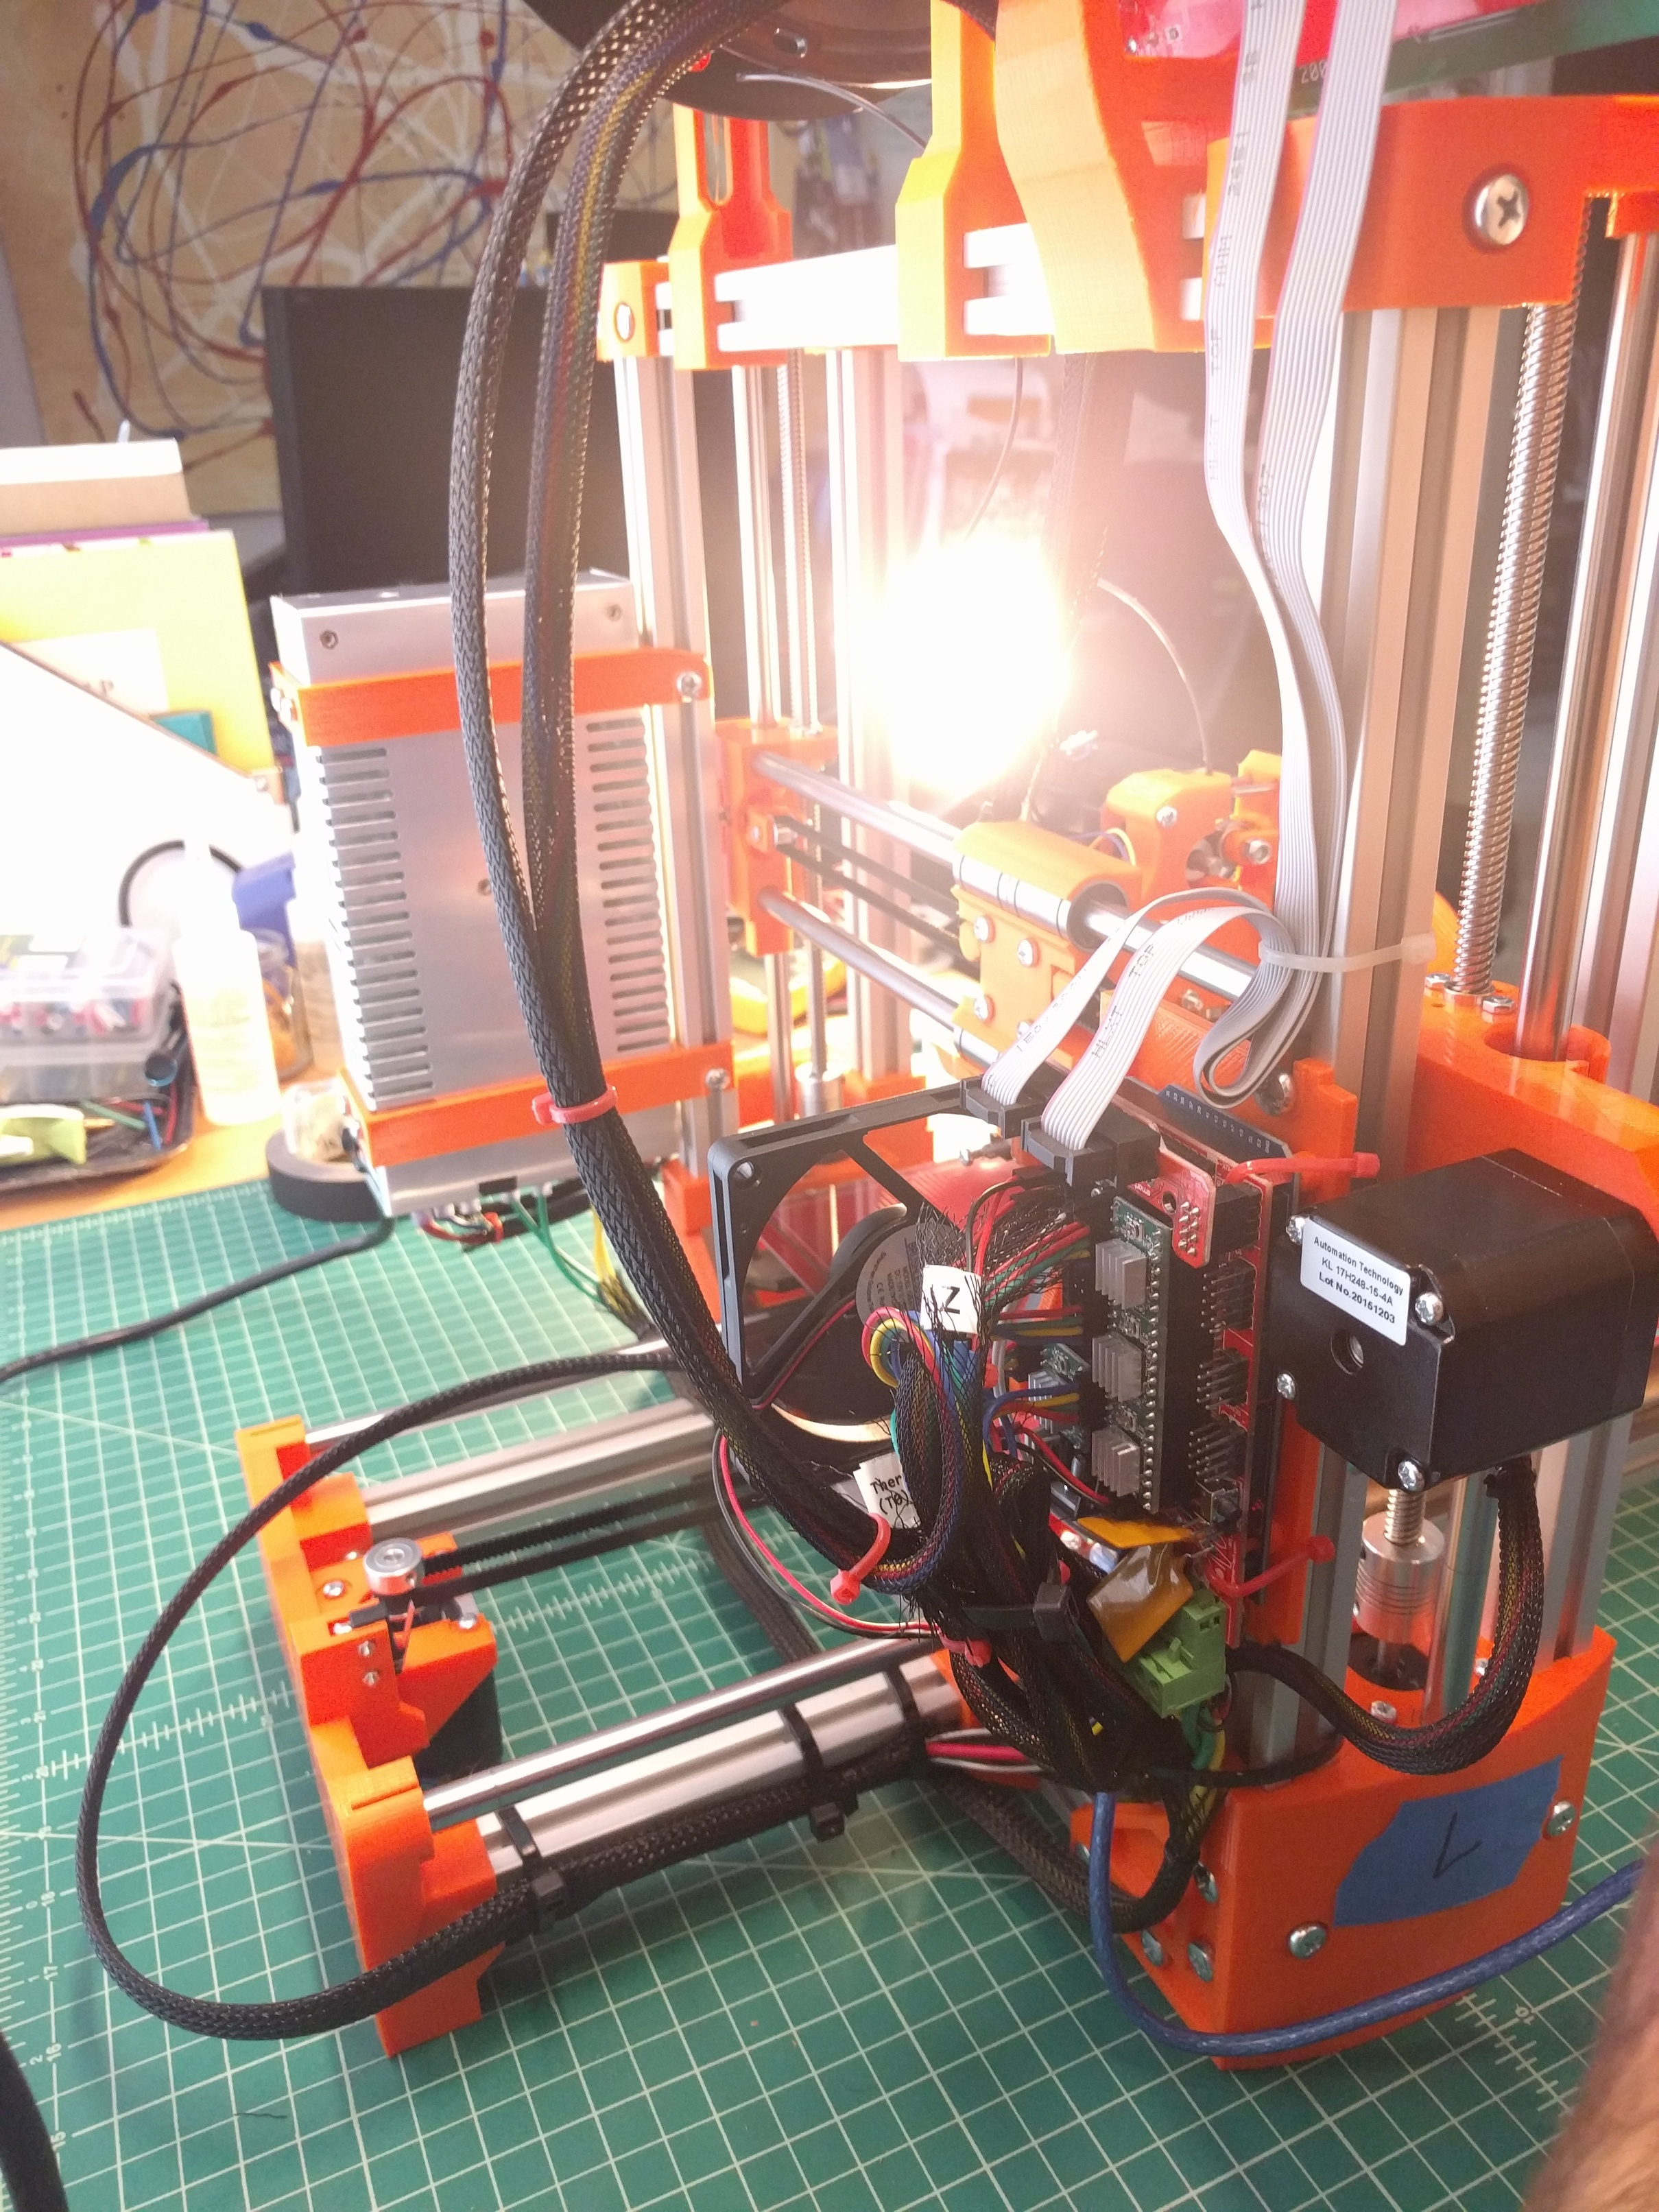
Assembly was quick and rather fun, while following along with Marty’s videos. I was able to complete the frame assembly (videos 1-3) in about 6 hours last night, and then spent another 4-5 hours today with wiring the system up, spending extra time to braid all the cables and do cable management.
Challenges
- The set screw from the (M7?) extruder pulley didn’t make it into my kit - I’m sure it fell out either before or after shipping. Luckly, I have a friend with an arsenal of fasteners and he had plenty of M4 set screws
- The new rack & pinion bed leveling mechanism ls really cool, however, when retracting (X-carriage slides all the way to the right), the arm wasn’t fully retracting. It looks like the rack could a few more mm in length. I superglued a spare nut to the right end of the rack and fixed that problem.
- The heated build plate looks like it’s going to have a hard time getting high enough for ABS (100-110 is what I’ve used on other printers). I eventually gave up on waiting for it to heat after 15 minutes and settled for 95F
- Z-Offset: I had to set the Z-Offset from the default of 11 to about 12.2 in order to get the first layer to the right height. I set this via the LCD interface, but I think I need to change it in the Marlin code as well to make it permanent.
- I was a bit confused on the wiring for the power switch, as the one shown in the video is a 4-pin and mine was only a 3-pin. I was able to figure it out, and it works okay - however I did manage to separate one of the wires from it’s crimp connector, and wasn’t able to get it re-crimped. I ended up just solding that wire directly to the power switch, which works fine.
Tuning & Settings
- The Arduino Mega is preloaded with Marty’s fork of Marlin and already has all the settings required for the components he included in the kit
- I’ve installed Pronterface for control and Cura for slicing.
- This is my first time using Cura, so I don’t know my way around it too well yet, but I’m using the settings supplied by Marty:
- https://github.com/mjrice/Wilson2/blob/master/doc/
Next Steps
- I plan to build an enclosure to help prevent warping with larger ABS parts. I’ll likely lasercut a case using MDF at the Dallas Makerspace
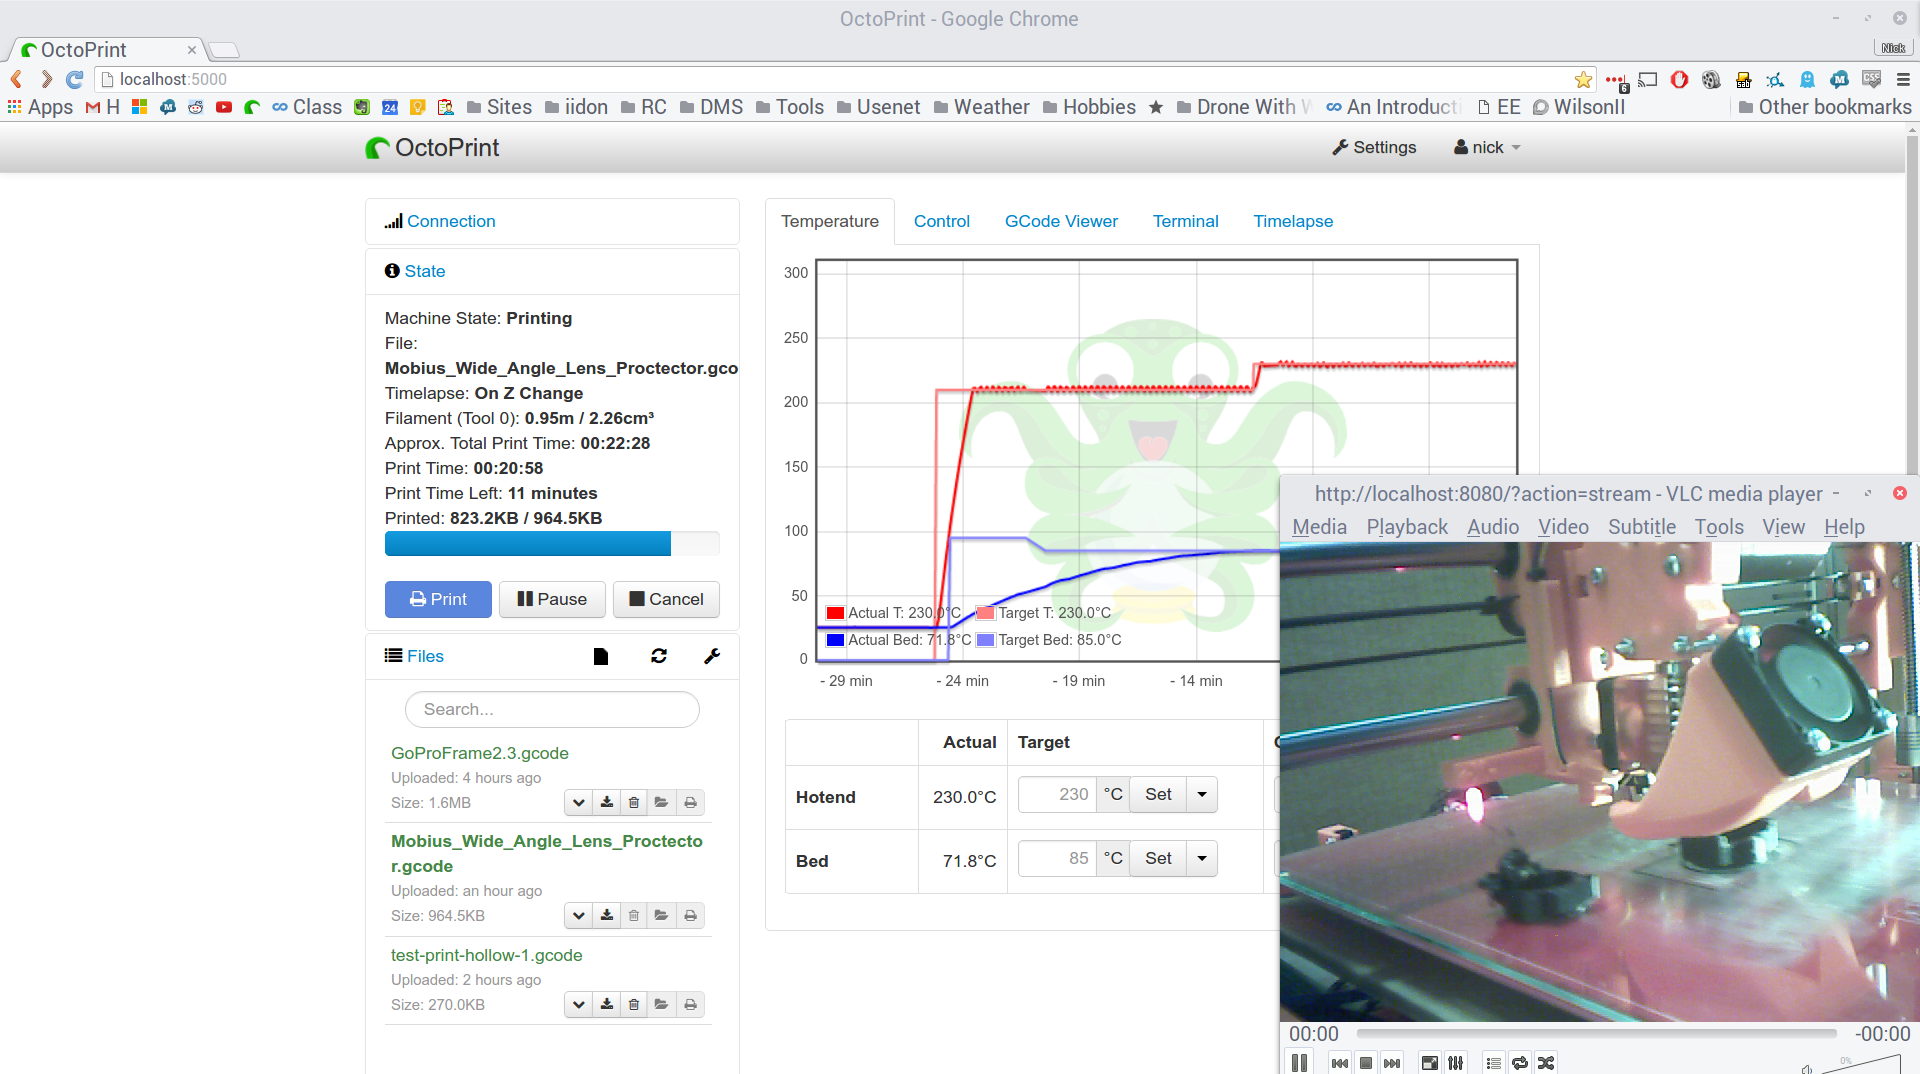
- I’ll be installing a Raspberry Pi with Octoprint to communicate with the printer and allow me to control via a web interface.
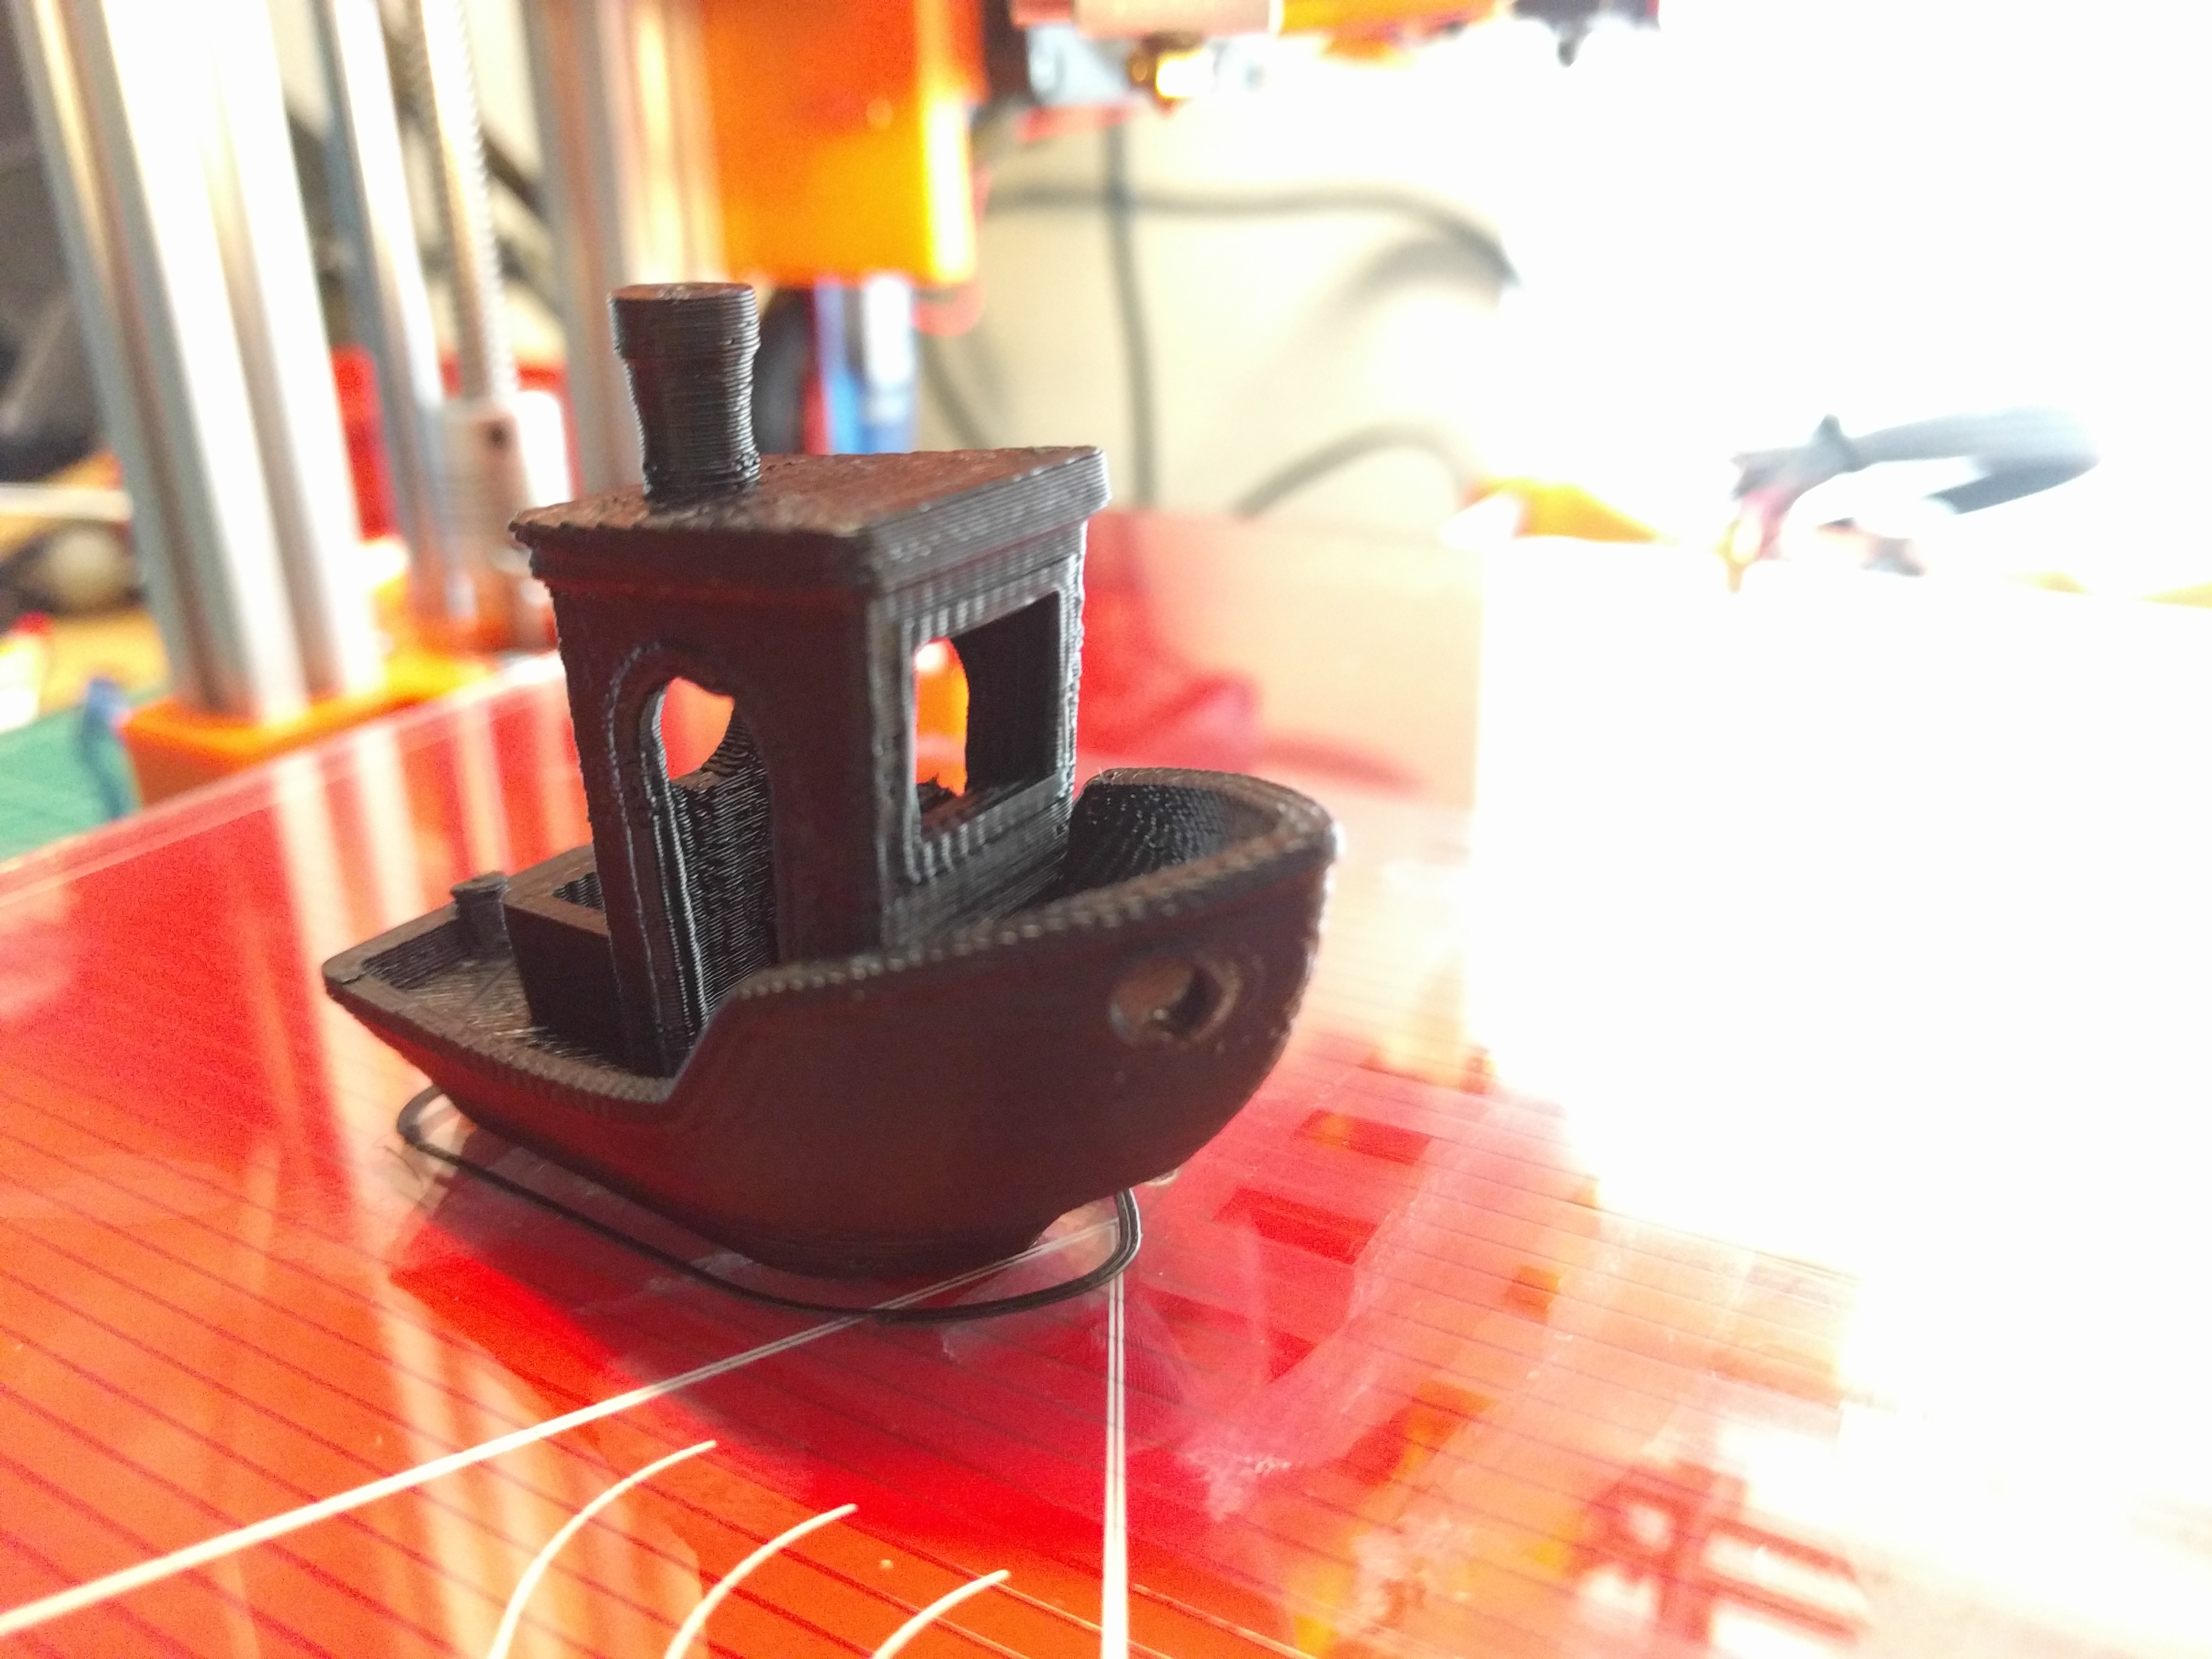
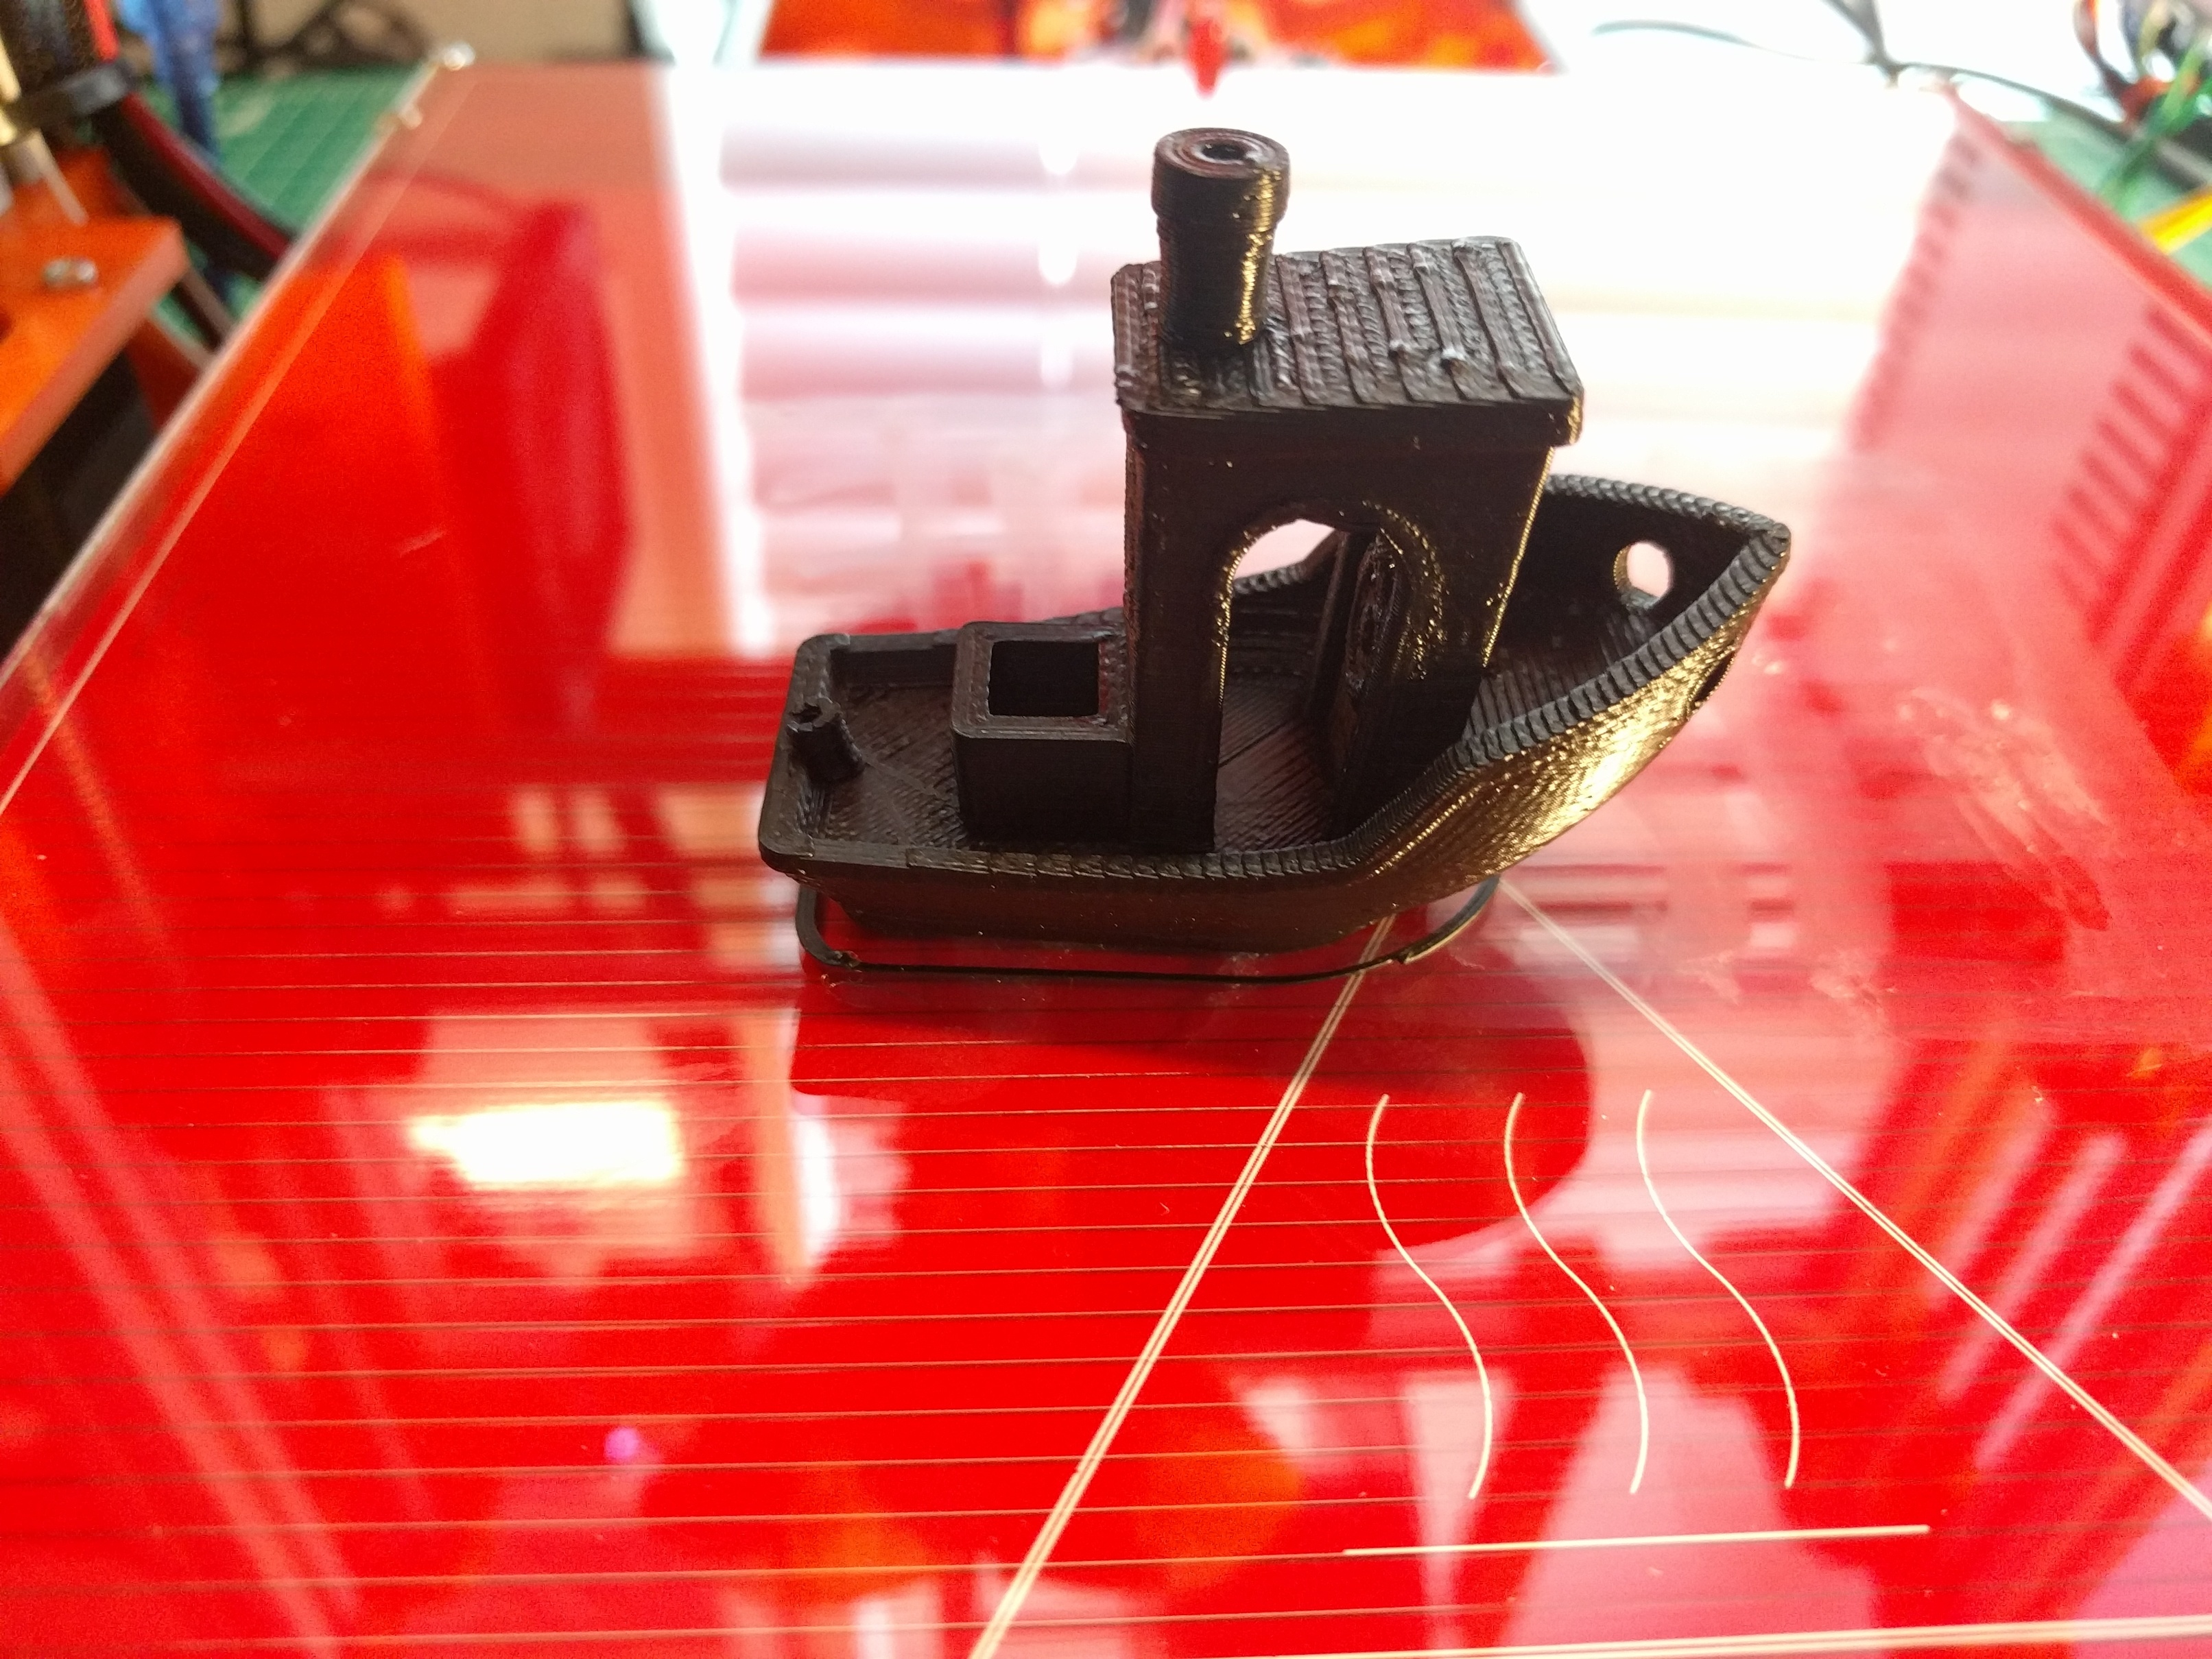
Pictures/Video
Video: https://www.facebook.com/nickmccarthy/videos/10101143317065419/?l=6286095791554862287