After a couple of passes I noticed a 1/8th inch wide ridge forming approximately 2" from the inside edge. I shut off the machine to inspect the blades and found the gouge that corresponded with my ridge. Is this a fix anybody can do or should we wait for a woodshop representative?
On a side note the woodshop was much cleaner than last week so nice job everybody with that.
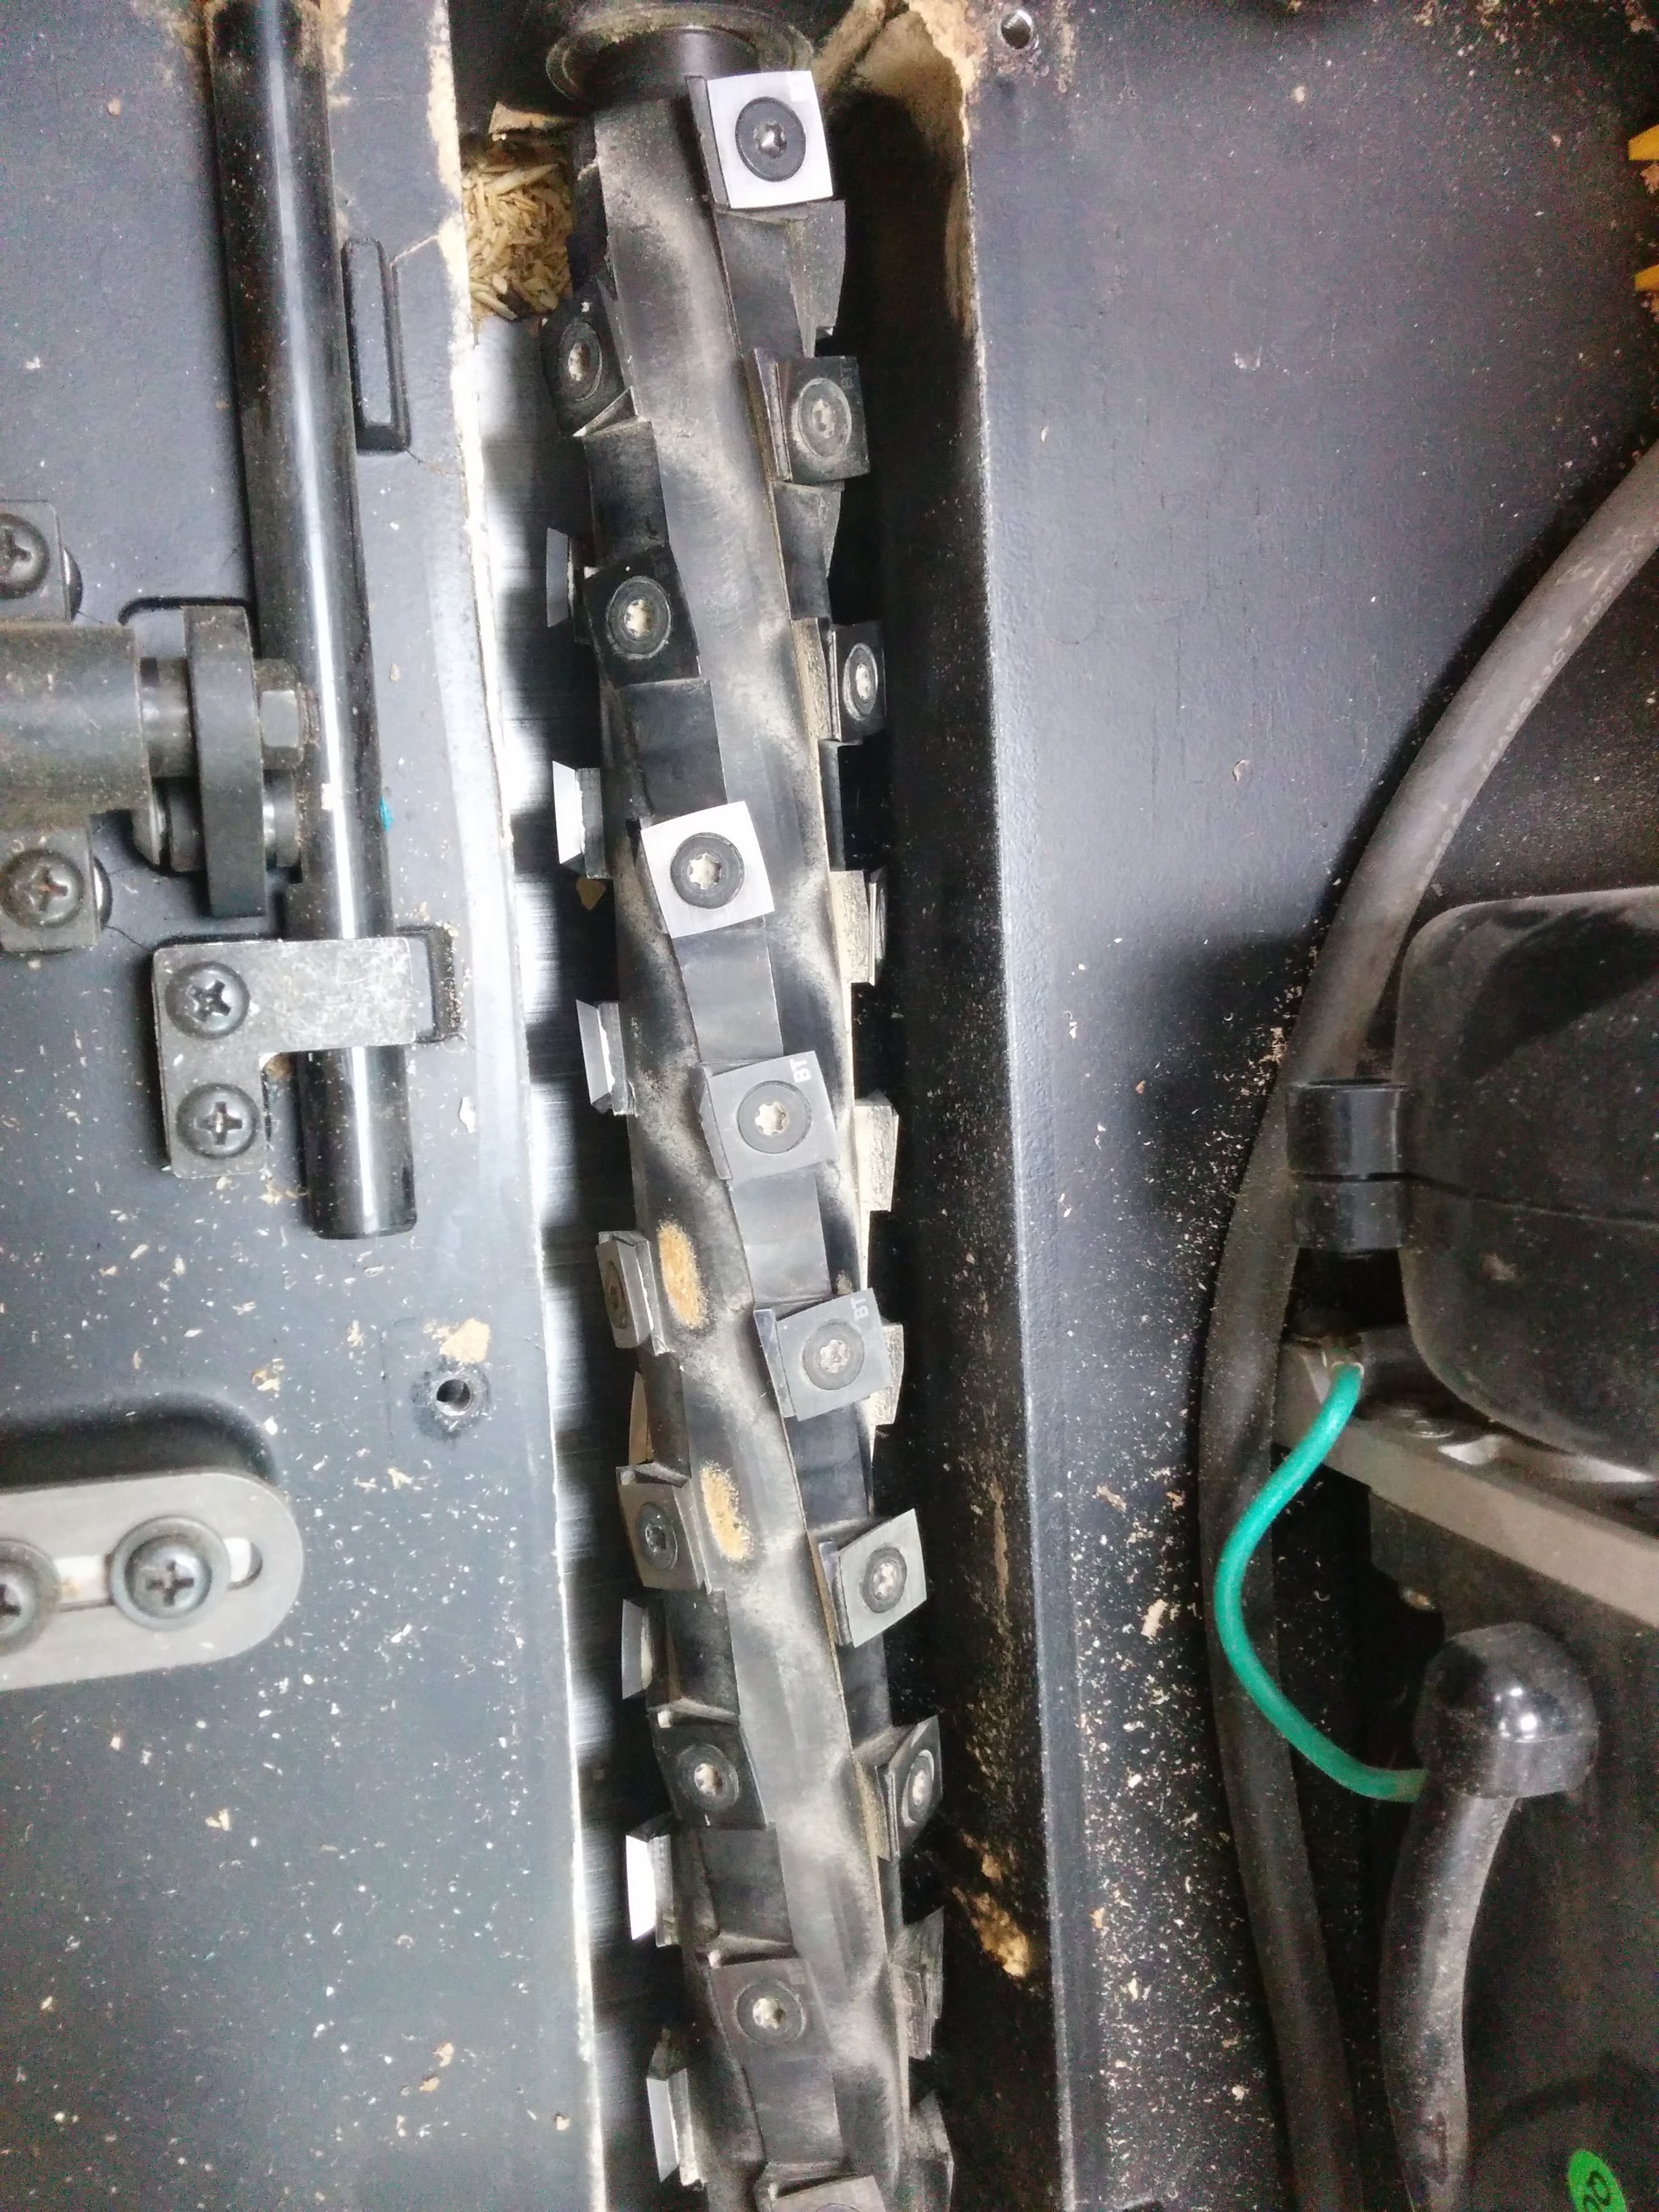
Rotating the blade is easy, but remember, you need to clean behind it. Sap accumulates there, and failing to clean it frequently results in more ridging in cut stock - the sap prevents the blade from laying in fully flush to the mount.
I use simple green, or the blade cleaner in the woodshop (might be out of it) to dissolve the sap and clean the blades and mounts.
The fully correct way to fix the problem, is to mark the current cutting surface on each blade with a sharpie, then remove all the blades and place them in the solvent to soak, Then, take a nylon brush (a firm toothbrush works great, especially if the head is angled a little), and first soak, and then scrub all the blade mounts until nice and clean. Next, wipe all the blades clean of sap, and re-install them with a fresh edge forward. Inspect each blade to ensure no nicks or problems. The idea, is to make all the blades match in height as closely as possible.
It’s a little tedious, but not hard on the planer. The jointer is a good bit more tedious, but essentially is done the same way.
I’ve found the sharpie step to be unnecessary because in the process of cleaning the blades you wash off the sharpie marker. I wish the blades came to us anodized so you could see the wear on the blade edge that has been used.
The rule of thumb I follow when rotating the blades is to take note of the marking on top of the blades and try to put them back in a 90 degree rotation from before. But I also inspect all the blades for chips, if the edge is chipped make sure that you don’t use that edge. Redundant, I know, but if you’ve never changed the blades before you might think it is good enough to just rotate the blades.
Also as far as leveling the blades, this is another none step. just make sure the cylinder is clean as there isn’t any other option for leveling other than cleaning the surface of the cylinder and blades.
Do you know if it is still leaving the ridge? I have some nice maple boards to plane and wouldn’t mind giving it a little TLS to make sure I get a good finish.
OK. Spent a couple of hours today on the planer and completely cleaned and re-set the blades. Rotated (almost) all of them 90 degrees CCW. I say almost because some still didn’t have a good edge so I used the best edge. Yes there were a lot of nicks on a lot of the leading edges. One blade broke on re-insertion so there is one missing at the very far left edge. The woodshop committee chair was there and we went through everything during and after the cleaning. So, he knows about the missing blade. It is cutting a heck of a lot better, but I could still feel one small raised area. It’s very minor and would sand right out. I think it’s likely just worn blades. We agreed these bits look like they are on their last go around and should probably all be replaced pretty soon.
We need a way to mark edges that have been used… Grooves can be caused by having one insert sharper or more dull than the others. There’s four sides, all blades should be rotated at the same time to minimize waste and help prevent grooves.