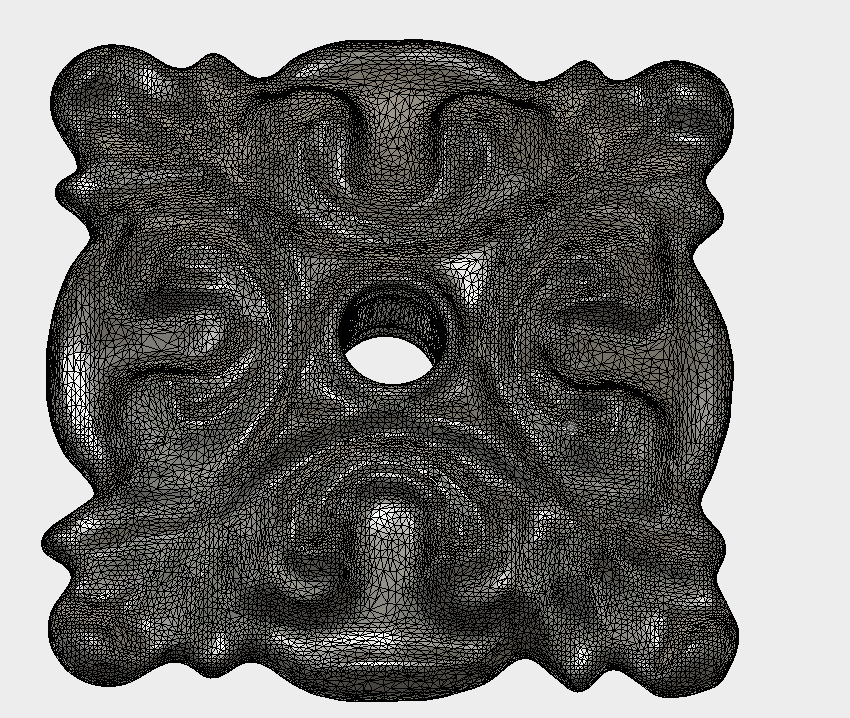
3D Scan, Upscale and Sand Casting of Backplate and Spout.
Original object was 6x6 Inches
I 3D scanned the original, clean up the model and defined features in software.
I upscaled the model and cut out the new and improved model on the CNC.
I then built a pattern board to be sand casted in brass.
Backplate and spout were cast at a foundry.
Here is the finished casting. It’s 10x10 inches
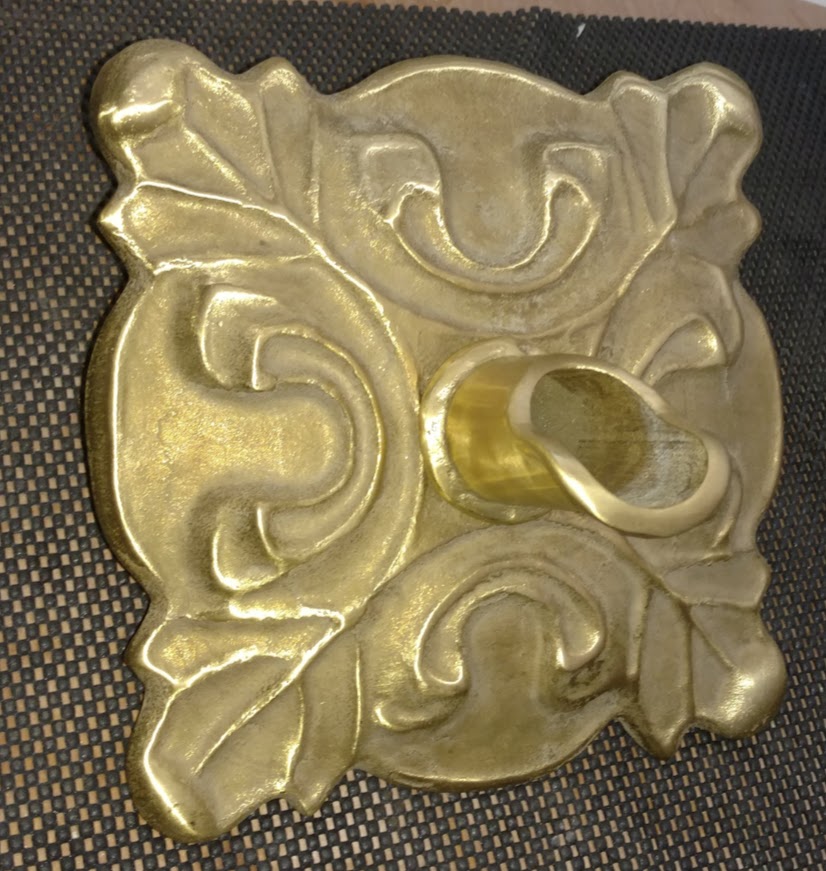
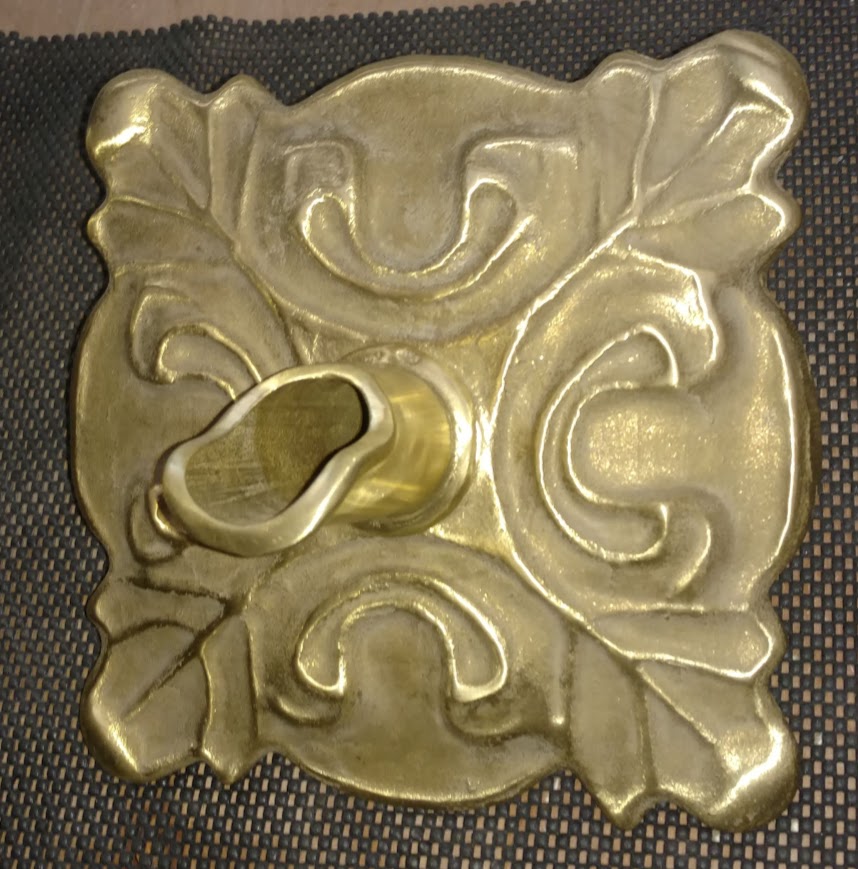
Two of them were installed in a new home being built locally.
Here is a video of the molds being cast in brass.
23 Likes
Outstanding example of using multiple diverse methods to produce final product as Makerspace. Brave.
When will you be teaching a class … or will you just lord your maker prowess over us?
6 Likes
I am getting no images ‘Talk Images “Access Denied”’ after good ones on Table Top Game table until the brass casting
1 Like
Wooden Home hacks and CA glue
iPhone holder and laptop tilt
These two quick Maker Hacks and also reflect my late arrival to using CA glue [Superglue, Cyanoacrylate] after seeing many uses on the internet. I am impressed at the small quantity needed and the quick setting.
The first use was a prop for my MacBook Pro laptop as shown in the pictures. Although I like the convenience of taking a laptop along, I hate the flat keyboard and the screen being so low when the keyboard is at elbow level - as with my desktop machines I want the touch-typing keyboard almost in my lap and the top of the screen at eye level.
So this prop replaces a simple 1x2 lift of the back from which the computer kept sliding off. It consists of just a piece of tempered pegboard (slick both sides), a catch bar to stop the sliding and a prop to raise the back 2 3/4”. All the parts were from scrap in my shop. I glued the front in place first to check the height of the back, rejecting a piece of 1x4 (about 3.5”) as too tall both on keyboard angle and screen height. I cut the catch bar at an angle from plywood rather awkwardly and had to do a bunch of sanding. I probably should have used quarter-round molding but didn’t think I had any (but see next project - found it later.) Sanded and smoothed the corners to continue wrist support built into the computer. Even more after pictures taken.
I have neuropathy in my hands and, as is often the case, the tough numbness is accompanied by extra pain sensitivity to certain pressures. When I am holding my iPhone 5s to read or play games, the corners and edges feel like they are digging in after a few minutes. There are holders on the market, often in conjunction with selfie sticks, but I wanted a big roundish handle and slide in phone.
When I went looking in my shop I found oversized shoe molding, which differs from quarter-round by being one fourth of an ellipse. While common shoe molding is 1/2” on one flat and 3/4” on the other or 0.438-in thick x 0.688-in mine is 17/32” x 25/32”  As mentioned above, I found a longer piece finished on the curved side that had been nailed down some place. I backed out the remaining nails and began cutting pieces.
Cut 2 pieces to be the front of the handle by fitting to hand.
Size back plate of plywood or masonite by laying down phone with 1/2” pieces beside it, 3/4” interferes too much with screen touch. Then other side only enough to support without reaching volume buttons.
Cut two side pieces to fit the back plate.
Cut longer handle back pieces to size of front handle plus about 3/4 of back plate.
If you wish sand ends & edges of everything.
CA gel glue with dabs - 4 pieces of handle first, then back plate and 2 sides by protecting phone with paper then holding sides against it, then glue plate to handle.
Sand and round over everything.
8 Likes
Meant to post this a while ago, but here is a table I was working on. Wood is Maple and Walnut and the base is welded 1” square tubing. The girlfriend wanted a table and drawer next to the kitchen for “junk” to get everything off of the counters, so of course I had to make it more complicated than was necessary by any means.
List of tools used: Planer, Jointer, Miter Saw, Table Saw, Track Saw, Biscuit Joiner, Domino Joiner, Drum Sander, Orbital Sander, Table Router, Hand Router, Cold Cut Saw, Drill Press, TIG Welder, Angle Grinder, Bench Grinder.
26 Likes
made soap, essential oil distillation and did a water testing class with various soft drinks
.
11 Likes
Learned the basics of semiconductor and microelectronic processing as well as used the electronics microscope to take some micrographs of industry wafers and started work on a DOE for KOH etching with vinyl masks at Makerspace! Microfluidics and other possible MEMS devices.
IMG_5549|375x500
9 Likes
Looks like the vinyl masking method has some possibility. The vinyl did mostly mask the wafer, at one point the temperature got too hot around 100C and started to char the vinyl and it stopped adhering. If we keep the temperature low like 50-70C should be a good way pattern and etch silicon at DMS.
9 Likes
Just been playing around with the Metaza today. @mreynolds was serendipitously in the CA room to help me again. I think it’s a cool little machine and I will be engraving some more Samsung flash drives soon.


16 Likes
The vinyl cutter continues to be my go to during down times or while experiencing burn out on longer term projects. Consequently, moar shirts
I’m a work in progress
Good book
most recent addition to my gasl;t series
google it
Ooo, i did a hat too!
Was asked to make a 5 tiered (cup)cake stand for a wedding. In return for making this I will not have to attend said wedding. Gave me a chance to dink around in fusion to provide client with a rendering before committing to buying material or actually making anything.
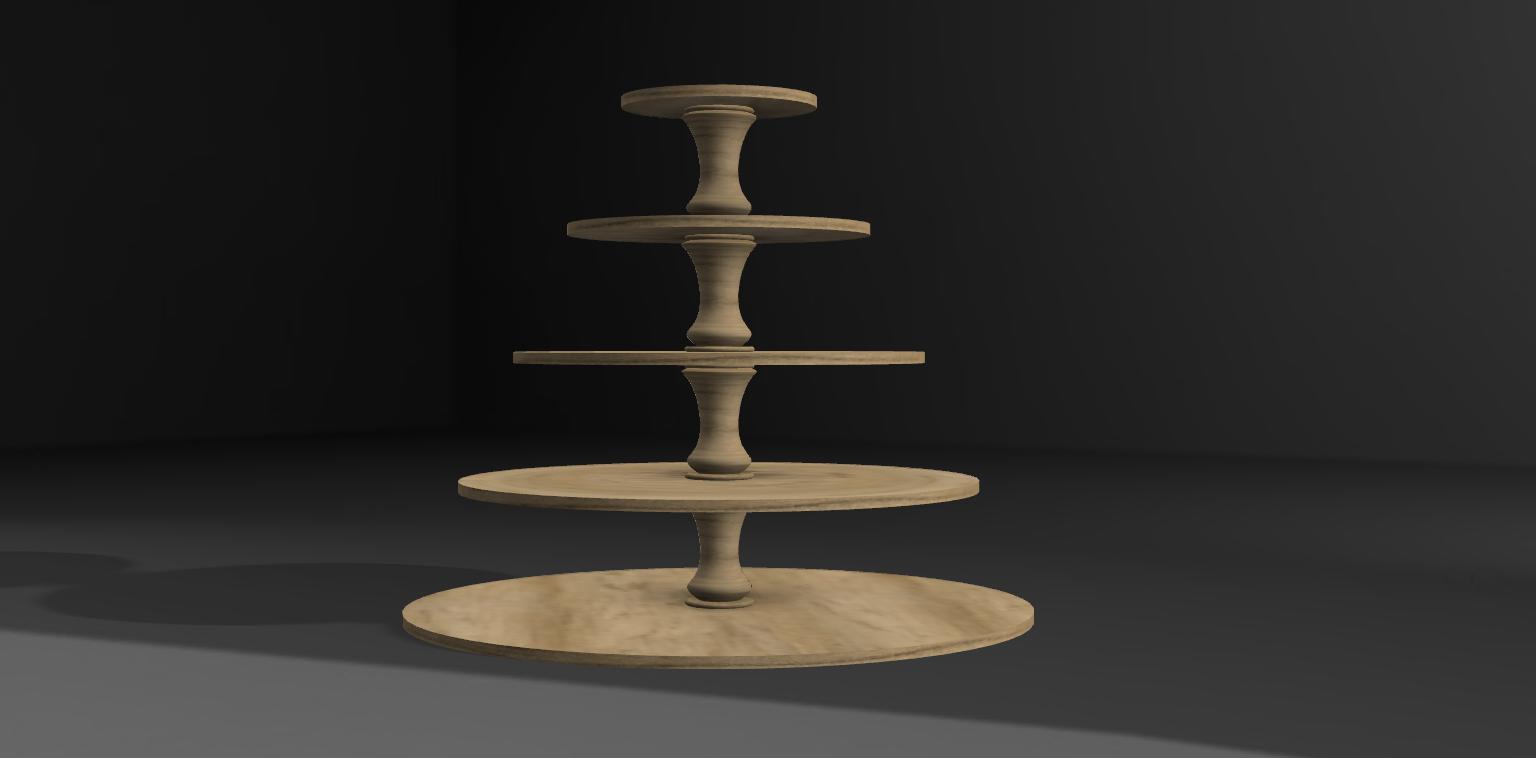
Almost final product. I just put some primer on it , somebody else is doing an antique finish on it. Cut the tiers out on cnc and got to get some lathe time in to make the spindles.
Oh, btw… I finally finished my first multicam project. My best friend made a little human so I made a toy box for him. I prefer working with metal so this was a learning experience to put it mildly. Prior to this I had never even bought hardwood. I’m a harsh critic of my own work and this is a rare occasion where I couldn’t be more pleased with how it turned out. Also, if I were to do it again I would change absolutely everything. The box is 36"x18"x15", made from hard maple panels and cherry inlays and border frames. Again, I learned so much while making this - tool paths are HUGE! Went from a 14 hr cut on 1st panel (which exploded on me later when i was trying to unwarp it outside in the sun) to getting it down to under 6 hrs on the final product.
I want to thank @fedakkee for sharing some pro tips with me - I look forward to exploring the boundaries of what this machine is capable of in the future. I also want to thank @Kriskat30 who, while I was stumbling through explaining my concept in a mealy mouth way said, “No, I get it. I like things that look like other things.” I trademarked that. Also, though I maintain I would have ended up there on my own - a begrudging thankyou for your foresight and suggesting to do the button inlays  Lastly, to the hand full of people that asked me leather related questions during final assembly last thursday night - I higher compliment could not be given - thank you so much!
Here is the little man I made it for. Don’t be fooled by his small size - he has the highest standards and is the most demanding client I’ve had to date. I’ve asked his parents to give me a heads up before they start working on siblings for him

22 Likes
Masterful. Beautiful. Super pro.
2 Likes
That wooden box is totally awesome. Saw it during the build. It looks like cloth material. Excellent craftsmanship!
3 Likes
And it will be one he can pass down to his child
2 Likes
When he gets older he’s gonna paint it tie dye 
3 Likes
From yesterdays acrylic handled safety razor class.
17 Likes
Those razors, very cool stuff!!!
2 Likes
Gorgeous!
If you didn’t already do so, you might want to put a slow-close lid hinge on it to prevent bonked heads and/or smashed/trapped little fingers.
Something like this:
https://smile.amazon.com/Sugatsune-Stay-Degree-Close-White/dp/B0006L39B0
5 Likes
Thanks @Lordrook for the class. Finally turned acrylic without shattering it.
3 Likes
Sundays blacksmithing class… Cheese cutter
18 Likes


