
Things are about to get real! Using OpenStack in containers or VMs is nice for kicking the tires, but doesn’t compare to the feeling you get with physical hardware.
What is OpenStack? Well OpenStack is a set of software tools for building and managing cloud computing platforms for public and private clouds. Backed by some of the biggest companies in software development and hosting.
The why? Virtual Machines at the space with a public api and runs docker or nearly anything else out of the box. Think free aws for DMS members.
https://computefreely.org/img/promo.jpg
Prerequirements
- usb thumbdrive (16gb)
- copy of https://rufus.akeo.ie
- copy of CentOS netinstaller
Prep OS
Burn iso to usb
Installation
Configuring the basic setup
On the installation summary page, one may see different selections with yellow exclamation or warning marks. These are areas that required some setup.
The Installation Source, Software Selection and Installation Destination are areas that will have to specified before being able to continue with the installation.
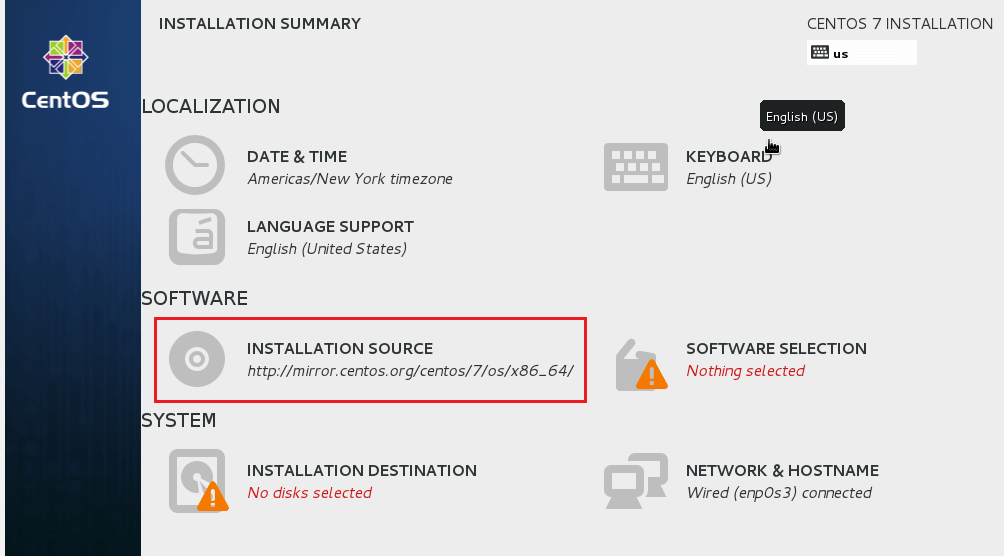
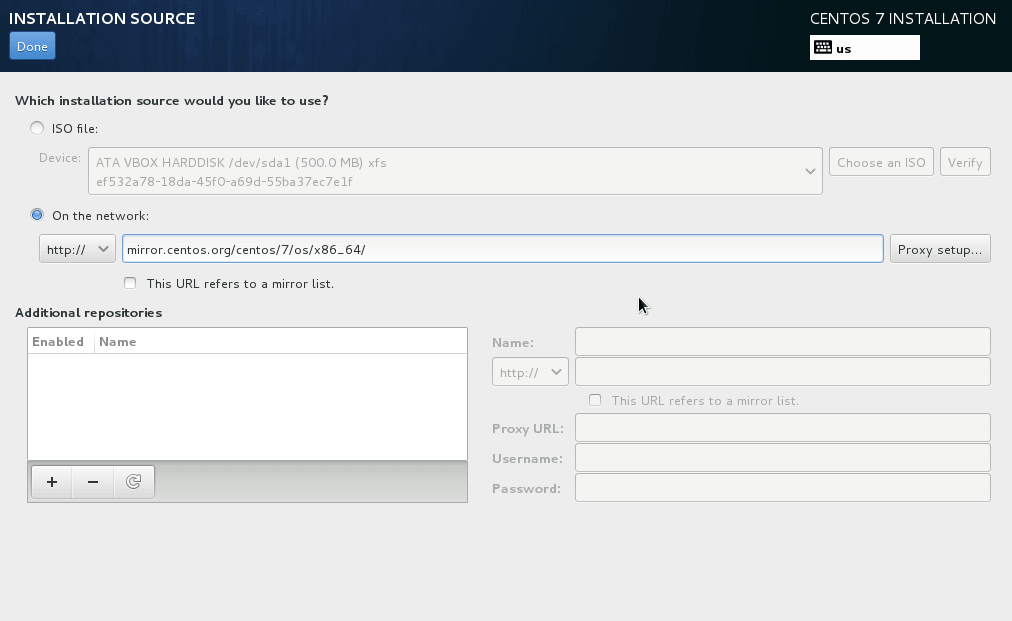
The first area one will select is the Installation Source. This is where we enter the mirror URL of CentOS. To configure it, select it and continue.
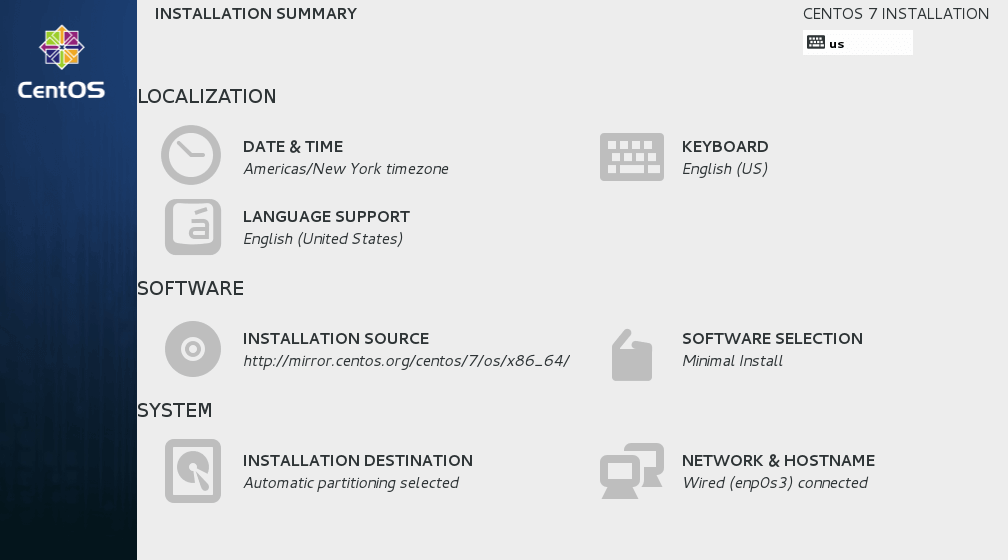
Next, select Software Selection to choose the packages and services to install. For this setup, we will chose Minimal Install. This will only install the bare minimum of packages to get your system up and running. When you’re finished, click Done to go back to the previous screen.
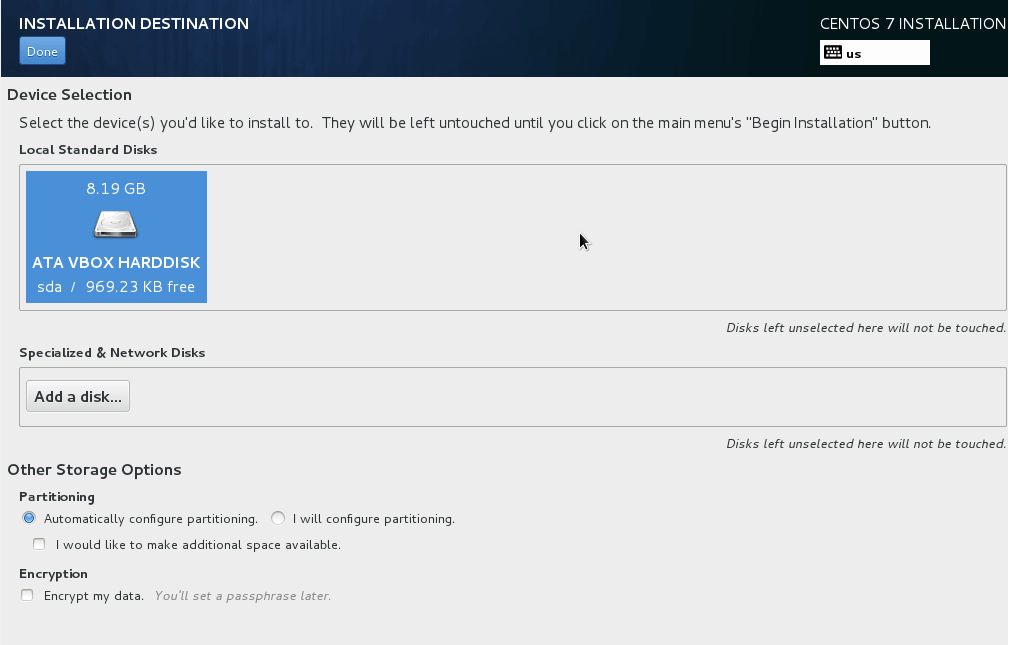
Then next area to is to select the Installation destination (Hard Drive). Select the hard drive partition and click Done with finished to go back to the previous screen.
After satisfying all the areas that required setup, your screen should look complete. Click Begin Installation to start the installation.
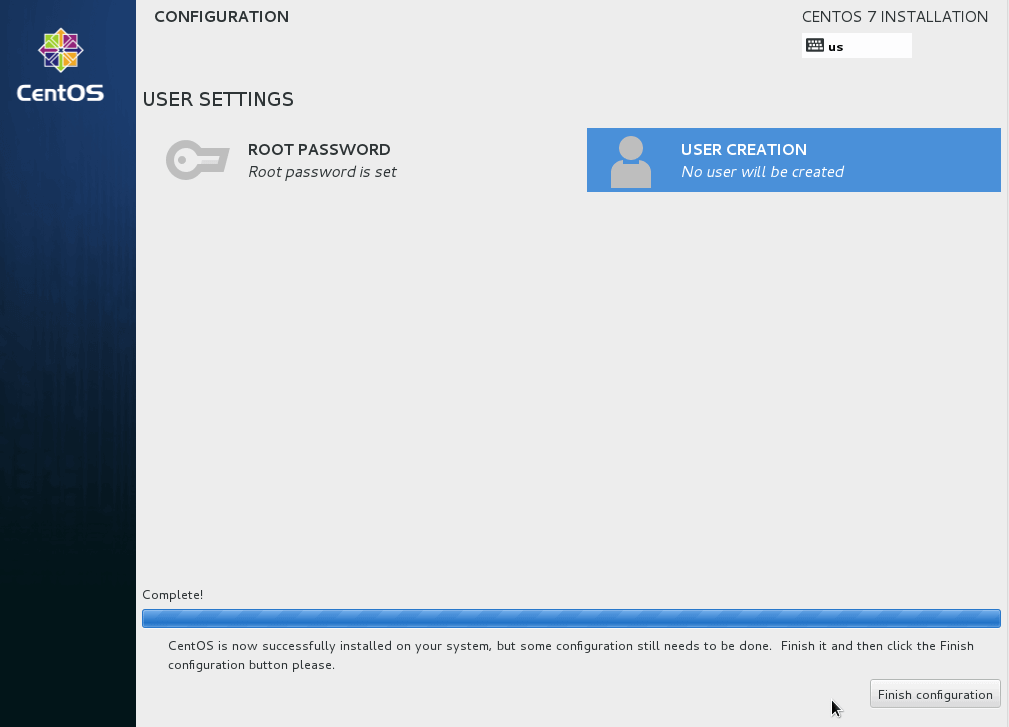
Finally, you’ll be prompted to create a new password for the root user on the next screen. Set the password and click Finish configuration
Finally Reboot the machine and we’ll get to login to install a few things to get Openstack up and running.
Provisioning
Once we’re at the login prompt and have logged we’ll start by installing, ansible, and git.
sudo yum install ansible git
Then we’ll clone a repo that is setup just for installing openstack and the roles needed:
git clone https://github.com/Dallas-Makerspace/compute compute
cd $_ && make
Configuring
At this point we’ll be presented with a few questions for configuring:
| Name | Description | Schema | Defaults |
|---|---|---|---|
| floating_range | Available IP Pool for public access | CIDR | Interactive prompt |
| fix_range | Internal IP Pool for virtual machines | CIDR | Interactive prompt |
| fix_network_size | Number of ip addresses | INT | Interactive prompt |
| flat_interface | Main networking interface | STR | Interactive prompt |
| admin_secret | Administrator’s password | STR | Interactive prompt |
| service_secret | Web Service password | STR | Same as admin_secret |
| broker_secret | Rabbit user’s password | STR | Interactive prompt |
| database_secret | Database user’s password | STR | Interactive prompt |
| swift_replicas | Number of swift replicas to spawn | INT | 1 |
Using OpenStack
At this point you should be able to access the dashboard from other computers on the local network. In this example that would be http://192.168.1.201/ for the dashboard (aka Horizon). Launch VMs and if you give them floating IPs and security group access those VMs will be accessible from other machines on your network.
Some examples of using the OpenStack command-line clients nova and glance are in the shakedown scripts in devstack/exercises. exercise.sh will run all of those scripts and report on the results.