
I also need to bring in the programming box for the Dlux ESC. It is not absolutely necessary to get the ESC working, but it is a nice-to-have because of the LCD menu system.
I got some initial wiring harnesses soldered and tested that the motor at least spins, now we need to get an axle, a 5 to 1 reduction gearing/belt, and find out if this will work or not

Also the turnigy 4mm hxt bullet connectors that came on the batteries are really annoying to work with, can anyone recommend a better replacement that is rated at 50+ amps? Or I probably should have gotten the connectors with wires already attached and not tried to use 10 gauge wire on connectors designed for 12. As this is the best I could do, it is not a good idea to have exposed 36v terminal on the Y connector…

1 Like
Large Anderson PowerPoles are available in that rating
XT-60 or XT-90 connectors are pretty nice.
http://www.hobbyking.com/hobbyking/store/uh_viewItem.asp?idProduct=64363
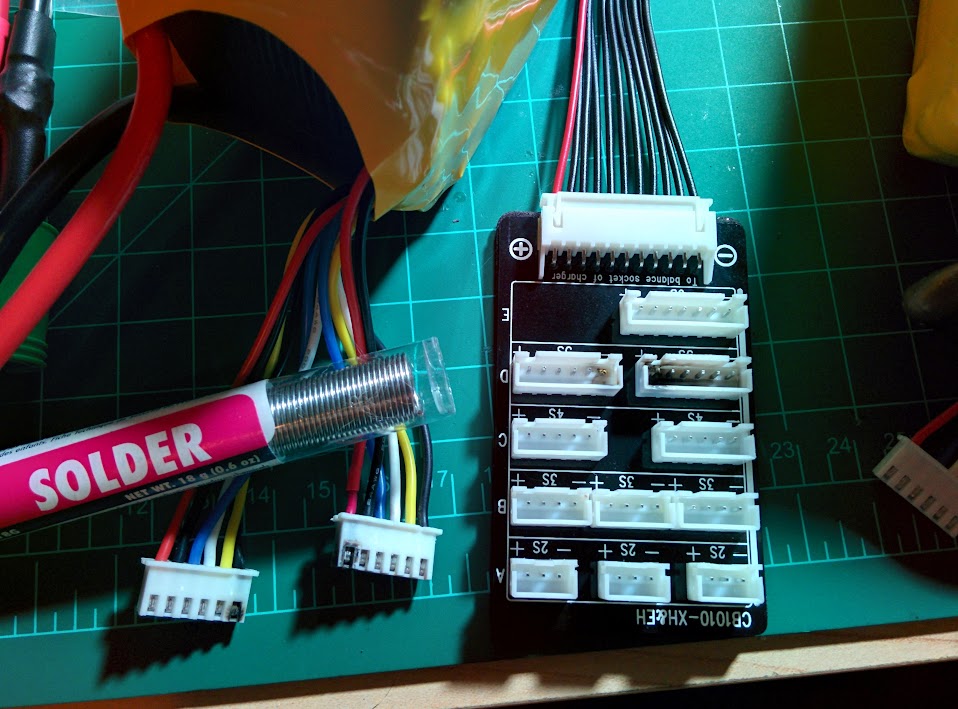
Maybe I’m dumb but I did not realize that there is a difference between the two identical looking balance plugs on a 10 cell lipo. Which plug which one goes into on the balance board is critical, I vaporized and replaced 3 pins before realizing this… Of course I just luckily got it right the first few times.
2 Likes
Can you share specifics about the motor, batteries, and the ESC? From the looks of it you’ll need connectors capable of more than 50 amps. The connectors on the batteries currently are rated for around 100 amps.
There will be 4 4000mah 10s batteries in parallel, a 250 amp turnigy dlux ESC, and a 172kv 120 amp max rotomax 50cc motor. I said less just because in theory with all the batteries connected we should only ever be drawing ~30 amps from each battery. Each battery is labelled as supporting 25C discharge, so a 100 amp connector is appropriate.
I think my problem with the connectors is that I keep getting solder on the outside(wrong tip on soldering iron doesnt help), which is where the snap together segment is, and the tolerances are already crappy in the plastic, so any amount of solder means the connector wont snap into position no matter how hard I push.
@Brandon_Green I recommend using the Castle Creations 6.5mm Polarized Bullet Connectors. Those are the ones I have installed on the ESC already. Here’s a link for a place you can buy them…
1 Like
Just ordered an axle kit (bearings, collars, keys, flange, wheel hubs, sprocket), will be using a 60 tooth #35 chain sprocket. When that comes in we can stick it on something and see if it will move, testing the motor just clamped to the table was not conclusive.
The current big question is if the sensorless brushless motor will be able to start the kart from a stop, we can always throw on a centrifugal clutch if needed, which would get us going but take away some of the appeal of an electric drivetrain (the theoretical instant response)
Anyone have any suggestions on how to couple a 10mm output shaft to a 3/4" keyed shaft? We want to put the small sprocket on an intermediate shaft, but then the question is how to attach the motor to that internediate shaft.
It seems like milling someting on the lathe will be requied.
I must confess not understanding the setup, but am I mistaken that the Rotomax is actually intended to be attached to the workload via the pre-tapped hub, with the shaft itself being more of a centering shaft? To ask another way, do you need this coupler to bolt to that hub with a hole for the 10mm shaft, or are we planning to use a set screw, or…?
Do you have any measurements on the hub, like diameter, bolt size, bolt pattern, etc.? Y’know, same questions as you’d expect of you were cutting wheel adapters for a car road wheel.
No matter, sounds like a job for the machine shop. If you want this to be the “clutch”, i.e. the part that breaks so none of the others do, make it from aluminum on the HAAS. Then you crank out another whenever you want. If you want one to last, one-off from chrome-moly or similar seems like the way to go to me…
I am not clear on why you want the intermediate shaft. If you need it to achieve the desired gear ratio, great, but if your using it because the sprocket you want is too big to fit the motor shaft, there are better ways.
If the latter I suggest,
- Mill a woodruff key slot on the motor shaft
- Weld a spacer/hub into the sprocket, turn an new bore on the lathe, then cut a keyway to fit the woodruff key.
If you need the intermediate shaft to achieve the gearing you want then I would still do the prior two, just with the additional sprocket needed. Then your intermediate shaft would have two sprockets, one driven from the motor, and the other driving your output shaft.
We have a machine shop!
1 Like
Exactly.
plus other stuff to reach the limit.
BTW, If the item (sprocket, etc) has a hub, you may be able to get away with a set-screw; however, I strongly suggest milling/filing a flat on the motor shaft prior to using a set-screw.
The reason is that set-screws WILL raise a bur on the shafting and make it impossible to remove the hub without damaging its bore, or damaging the shafting. The flat also helps transmit the motor torque with less likelihood of slipping.
I’ve answered my own question, I believe. Here is video of the same motor (or same family at any rate) being used for the same purpose.
You can see he’s bolted the drive pulley to the hub.
I think the gear is actually just a bearing carrier, and he attached a brace to the outside of it in other videos, presumably to try to lend some rigidity to the whole setup and keep the belt taut under load.
So, back to regularly scheduled programming. I would need more info to be of any help.
1 Like
Interesting question not answered by the video. How did he attach the hub to the shaft?
The hub is there by manufacture.
It’s pretty visible (if you’re on a computer) in the link he posted above.
Here’s the pic from that.
http://cdn.hobbyking.com/hobbyking/store/catalog/17987.jpg
1 Like
I don’t remember seeing that hub on the motor we purchased.
Ah. Having not seen the actual in-house motor, I cannot say. I was going off the picture. 