
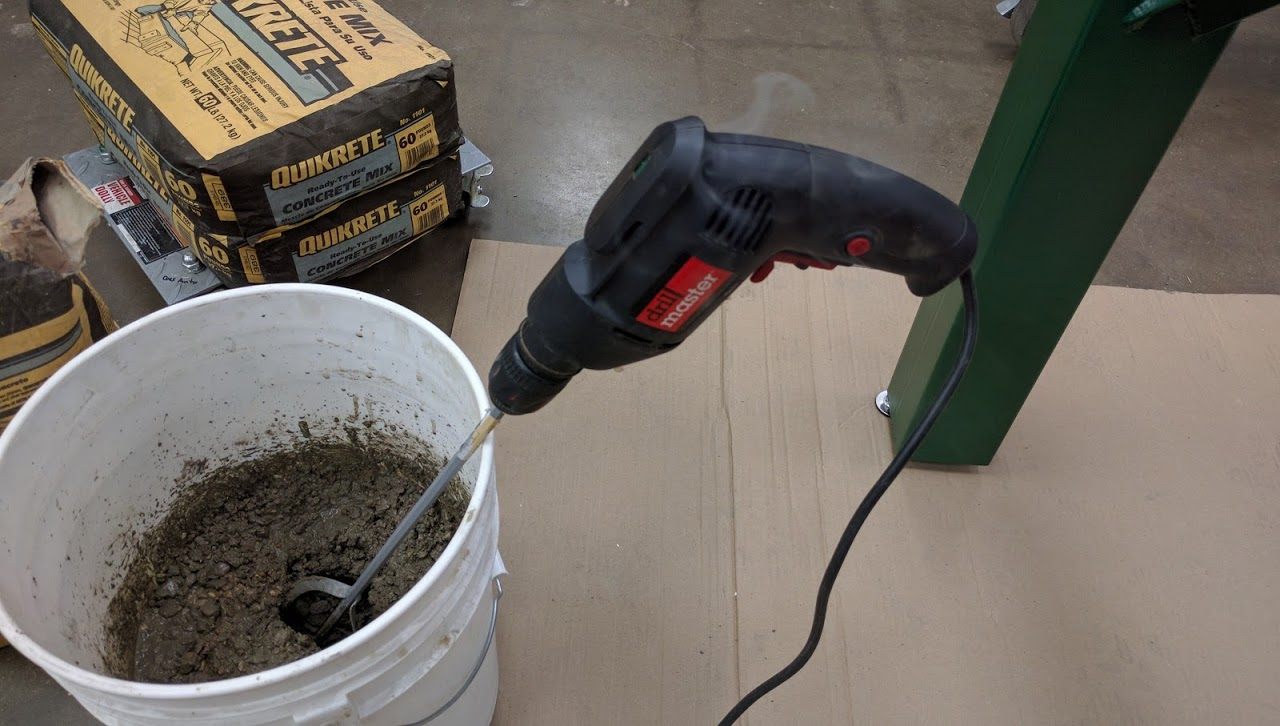
How to destroy a harbor freight drill in about 30 seconds:
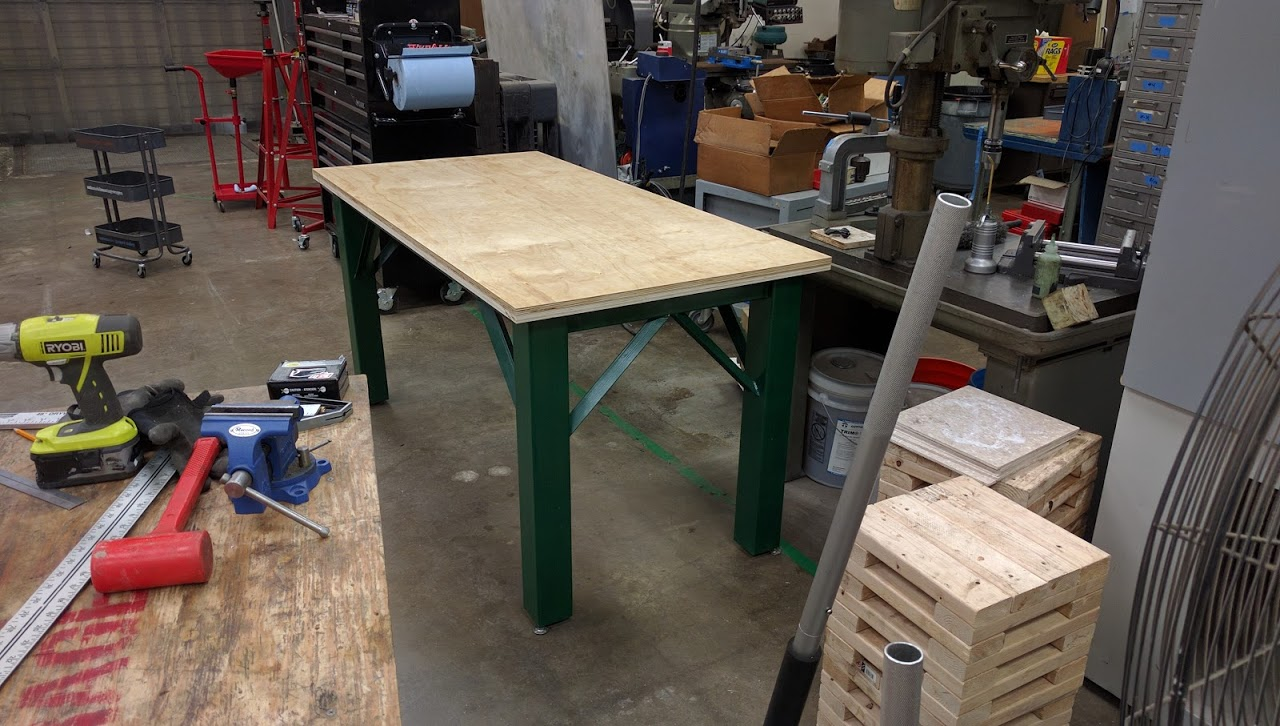
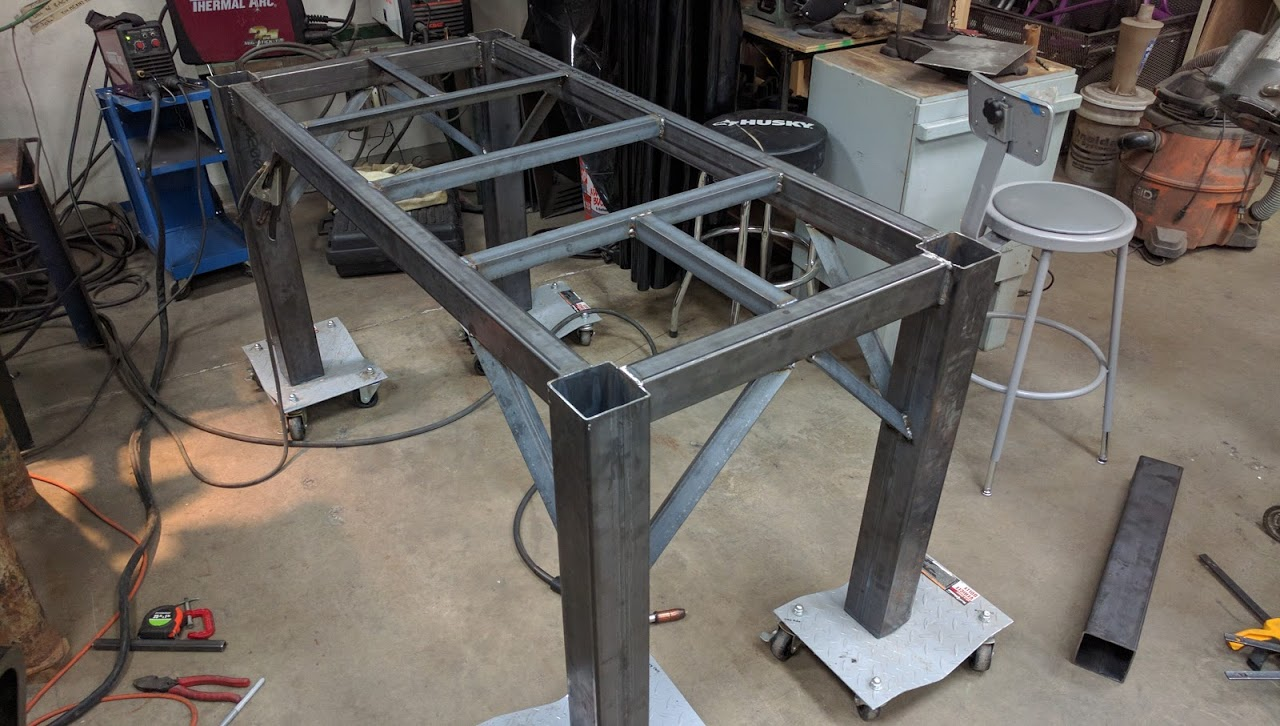
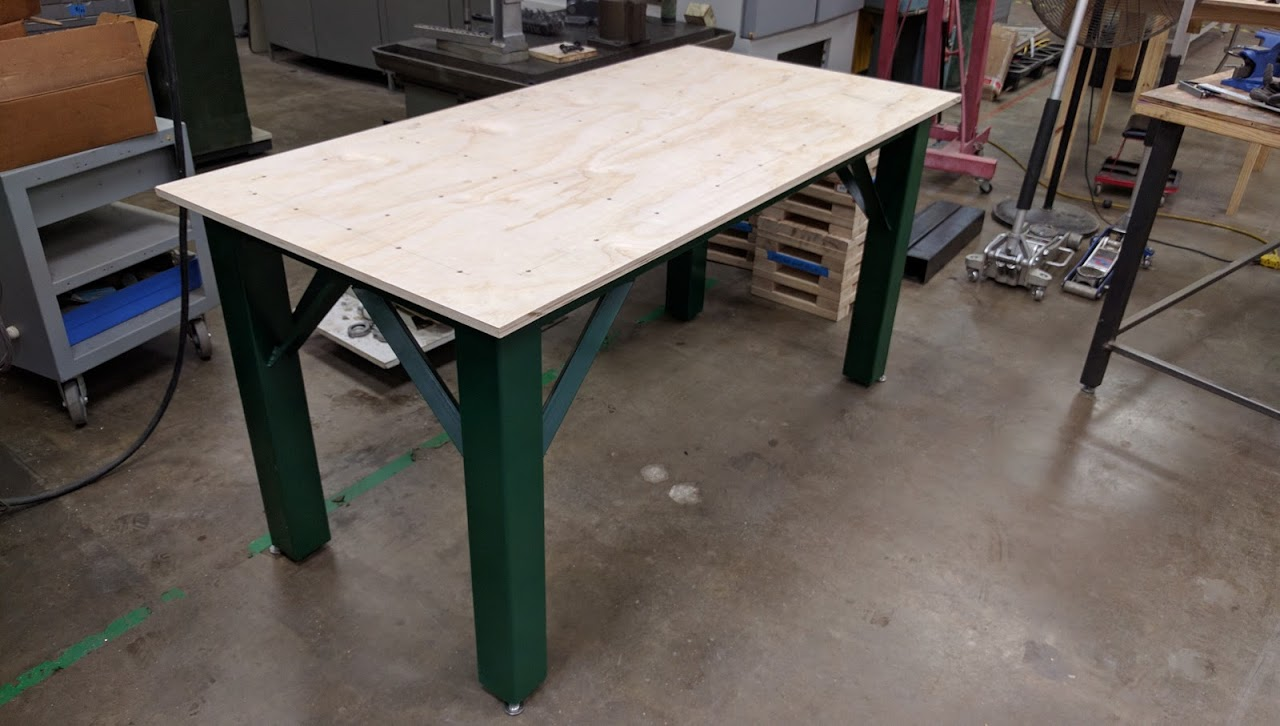
Skookum auto workshop table, about $350, made in 16 hours:
The plan:
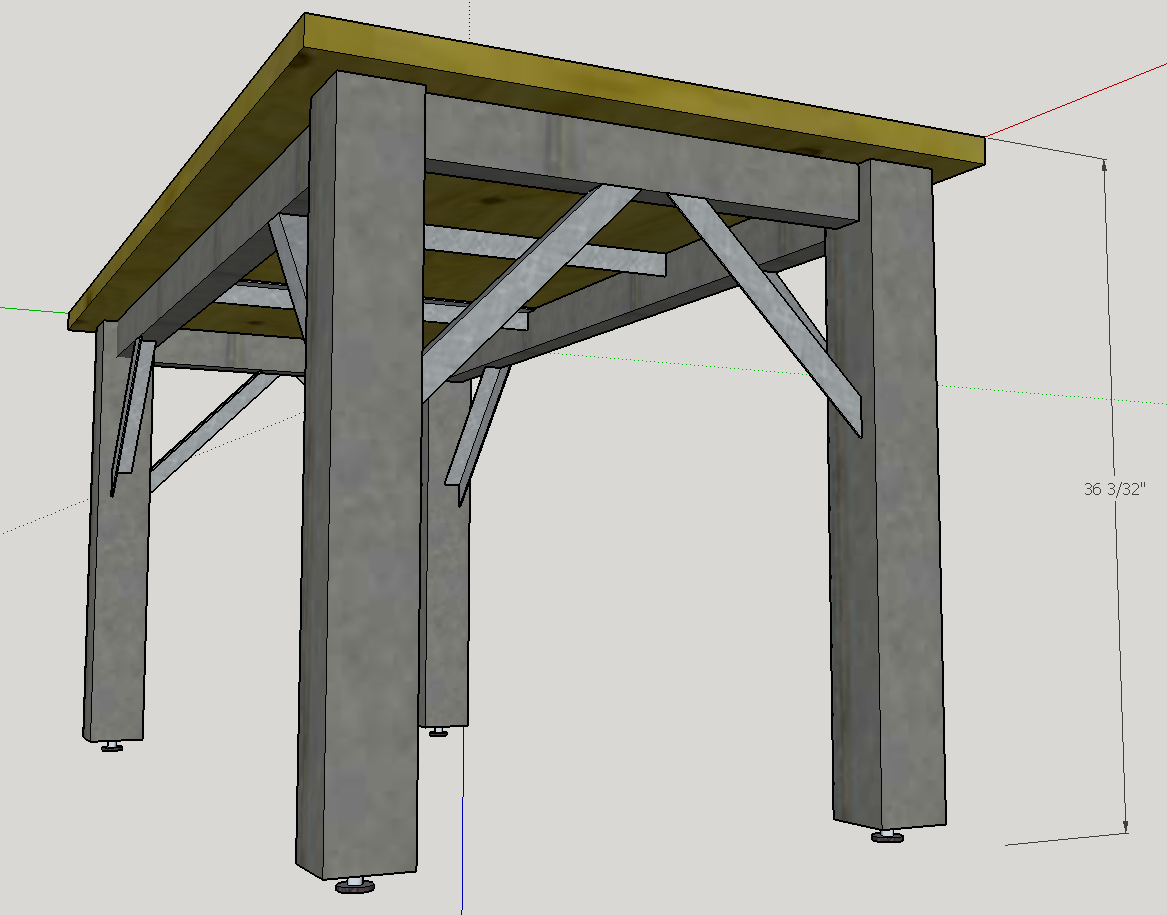
Raw materials, 4" x 4" 11gauge (~1/8 inch) steel tube for the legs, 3" x 2" for the horizontal supports, and 1.5" angle for the bracing, plus two sheets of 3/4" plywood and 3 60 pound bags of concrete

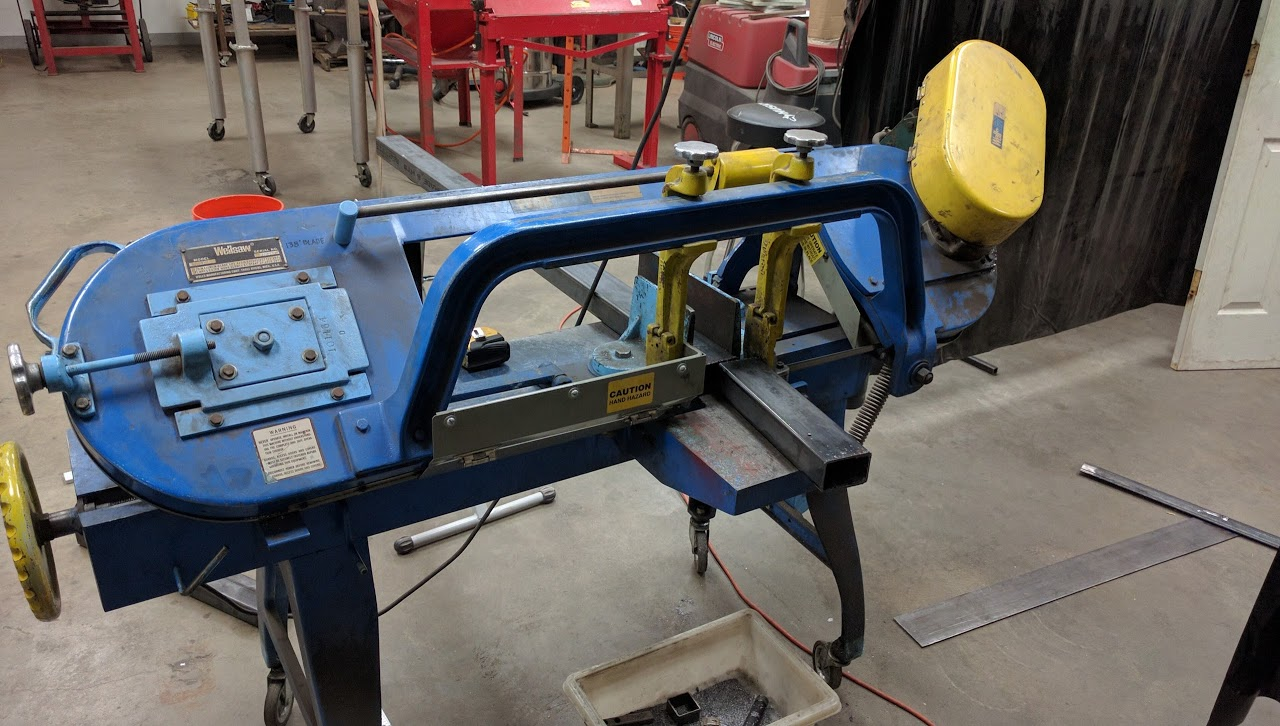
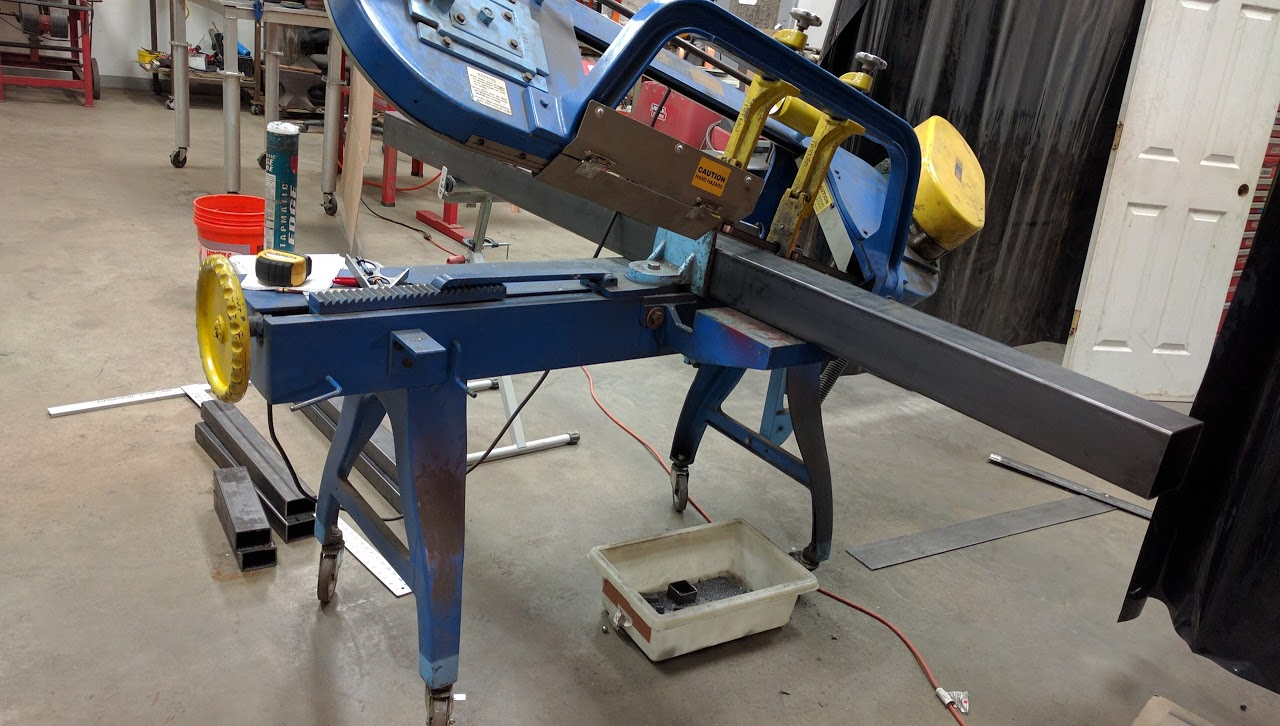
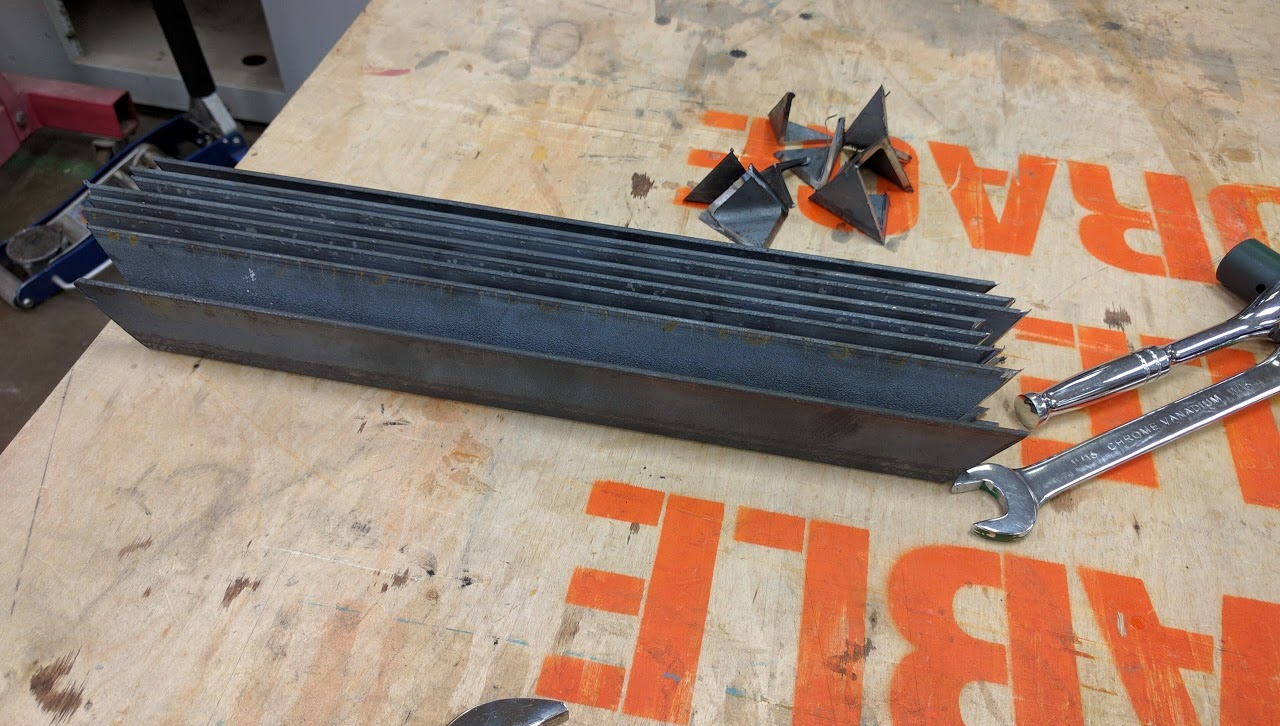
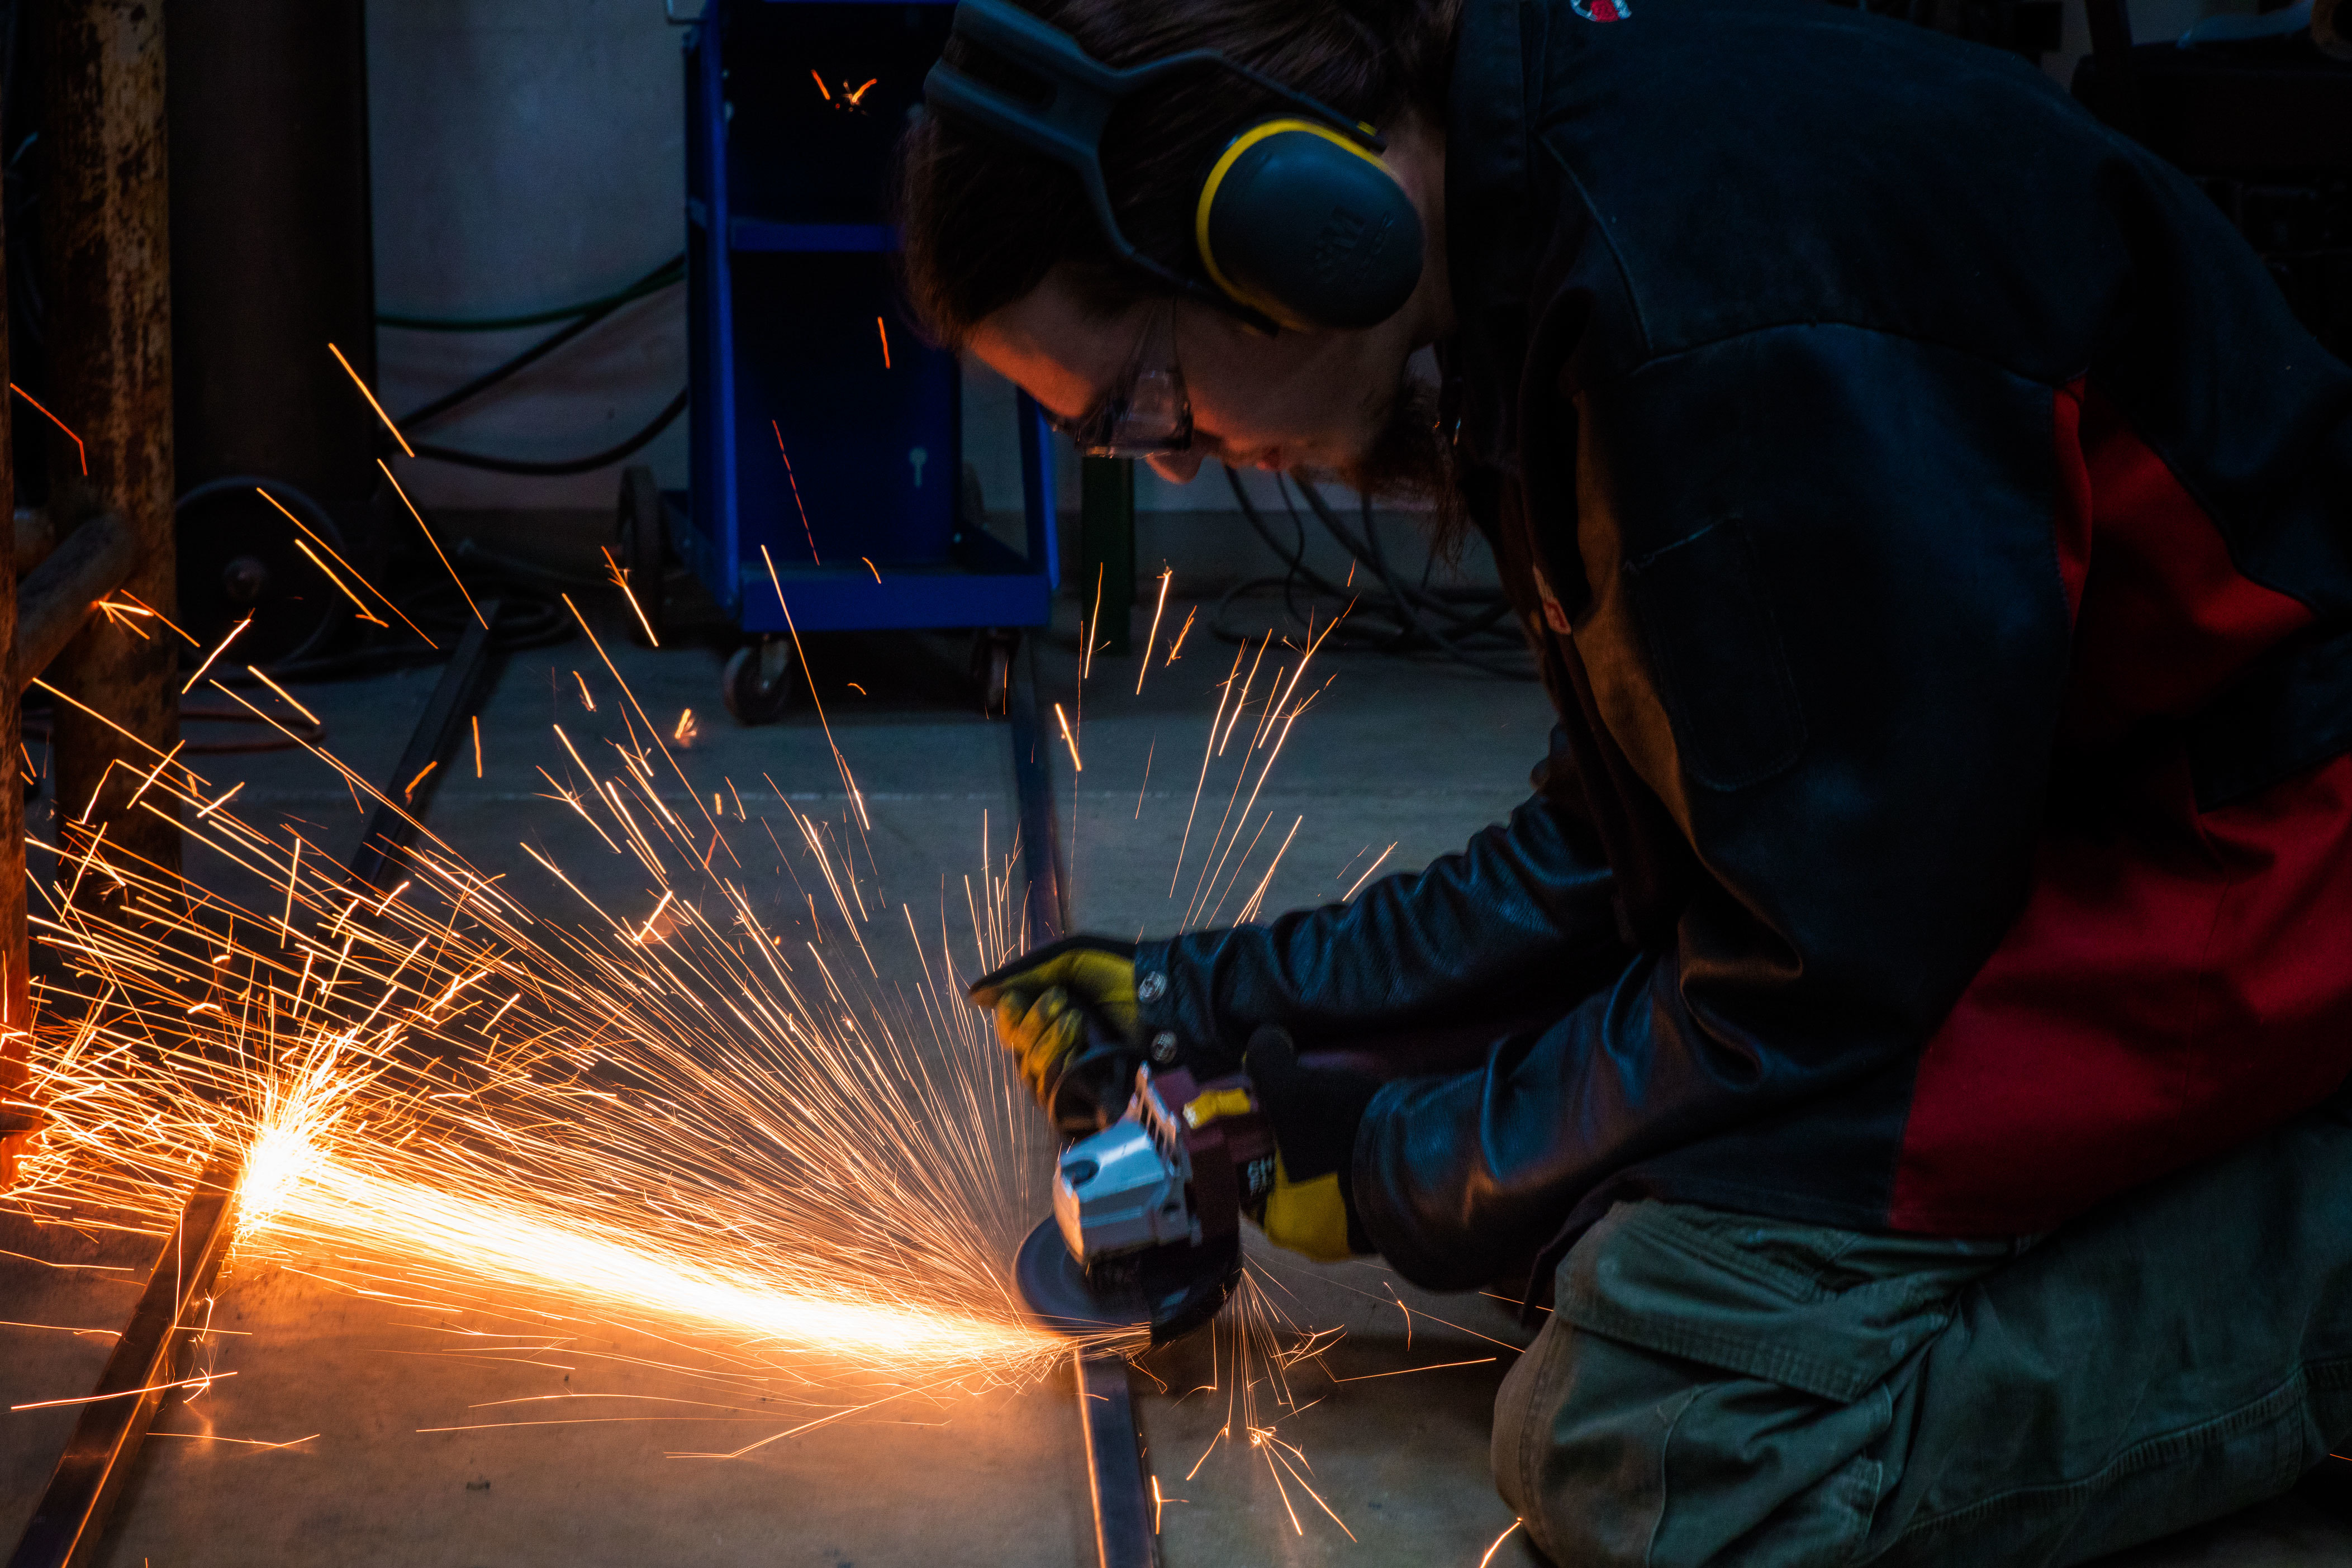
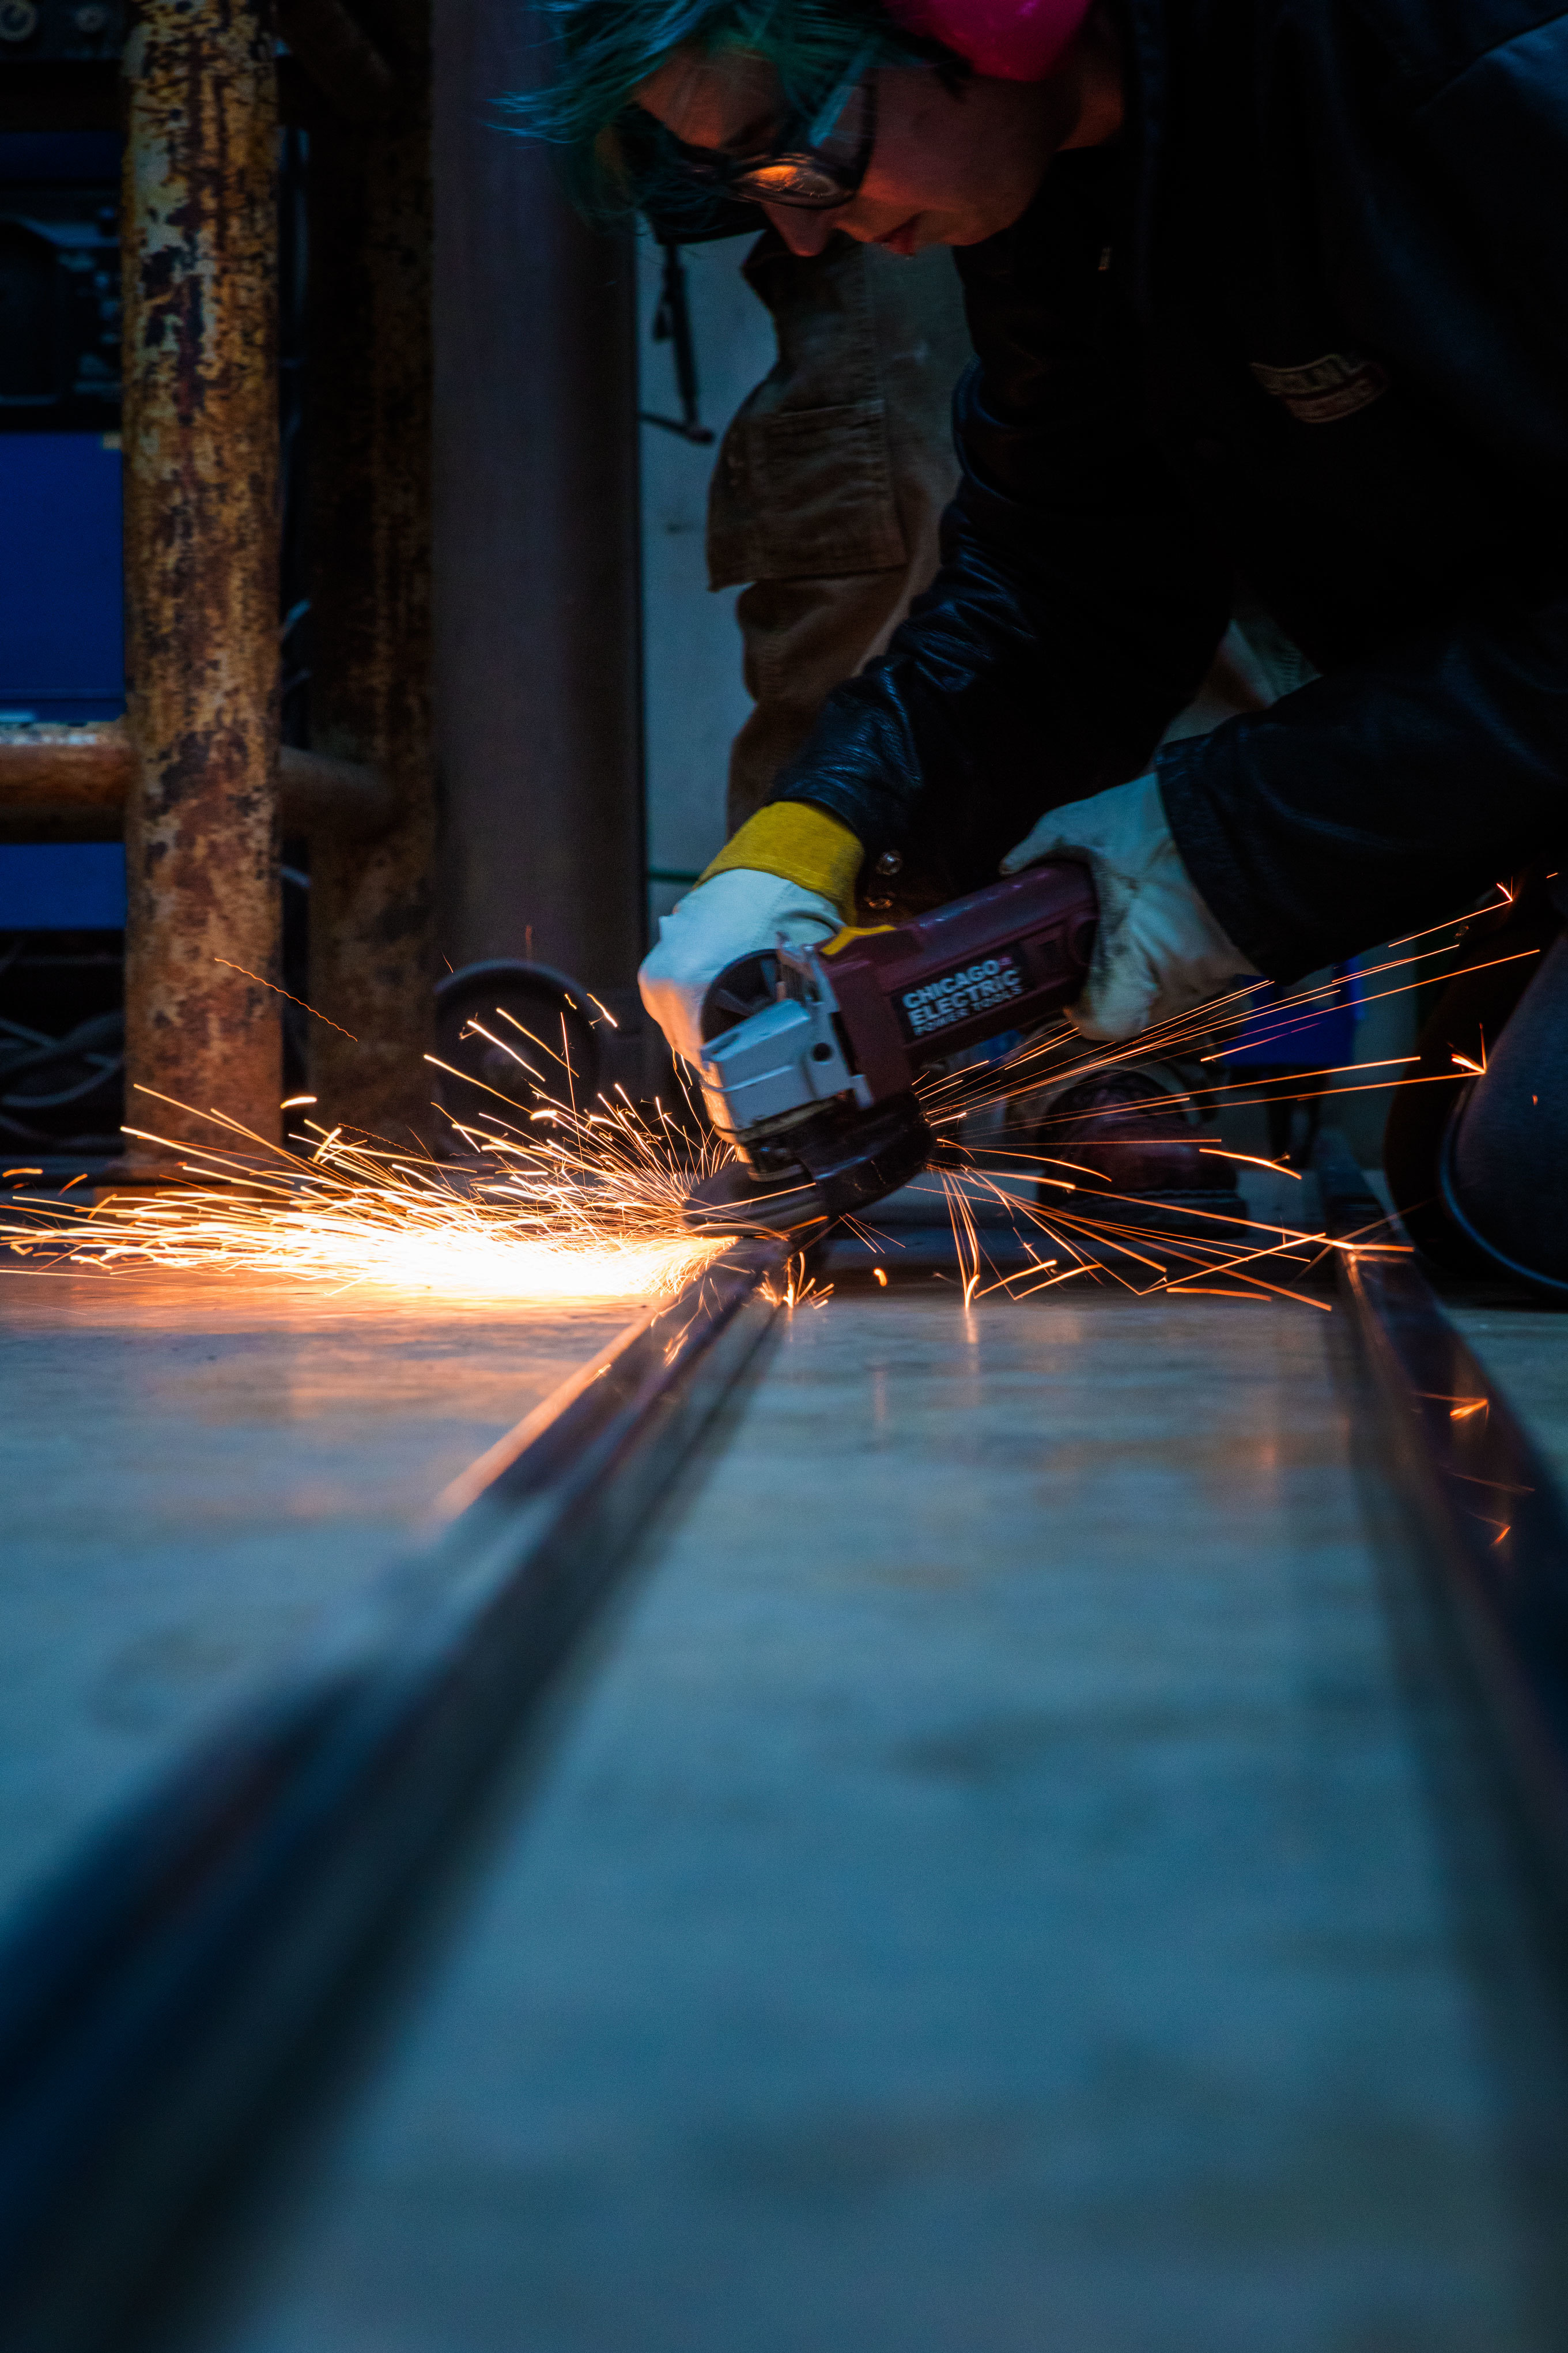
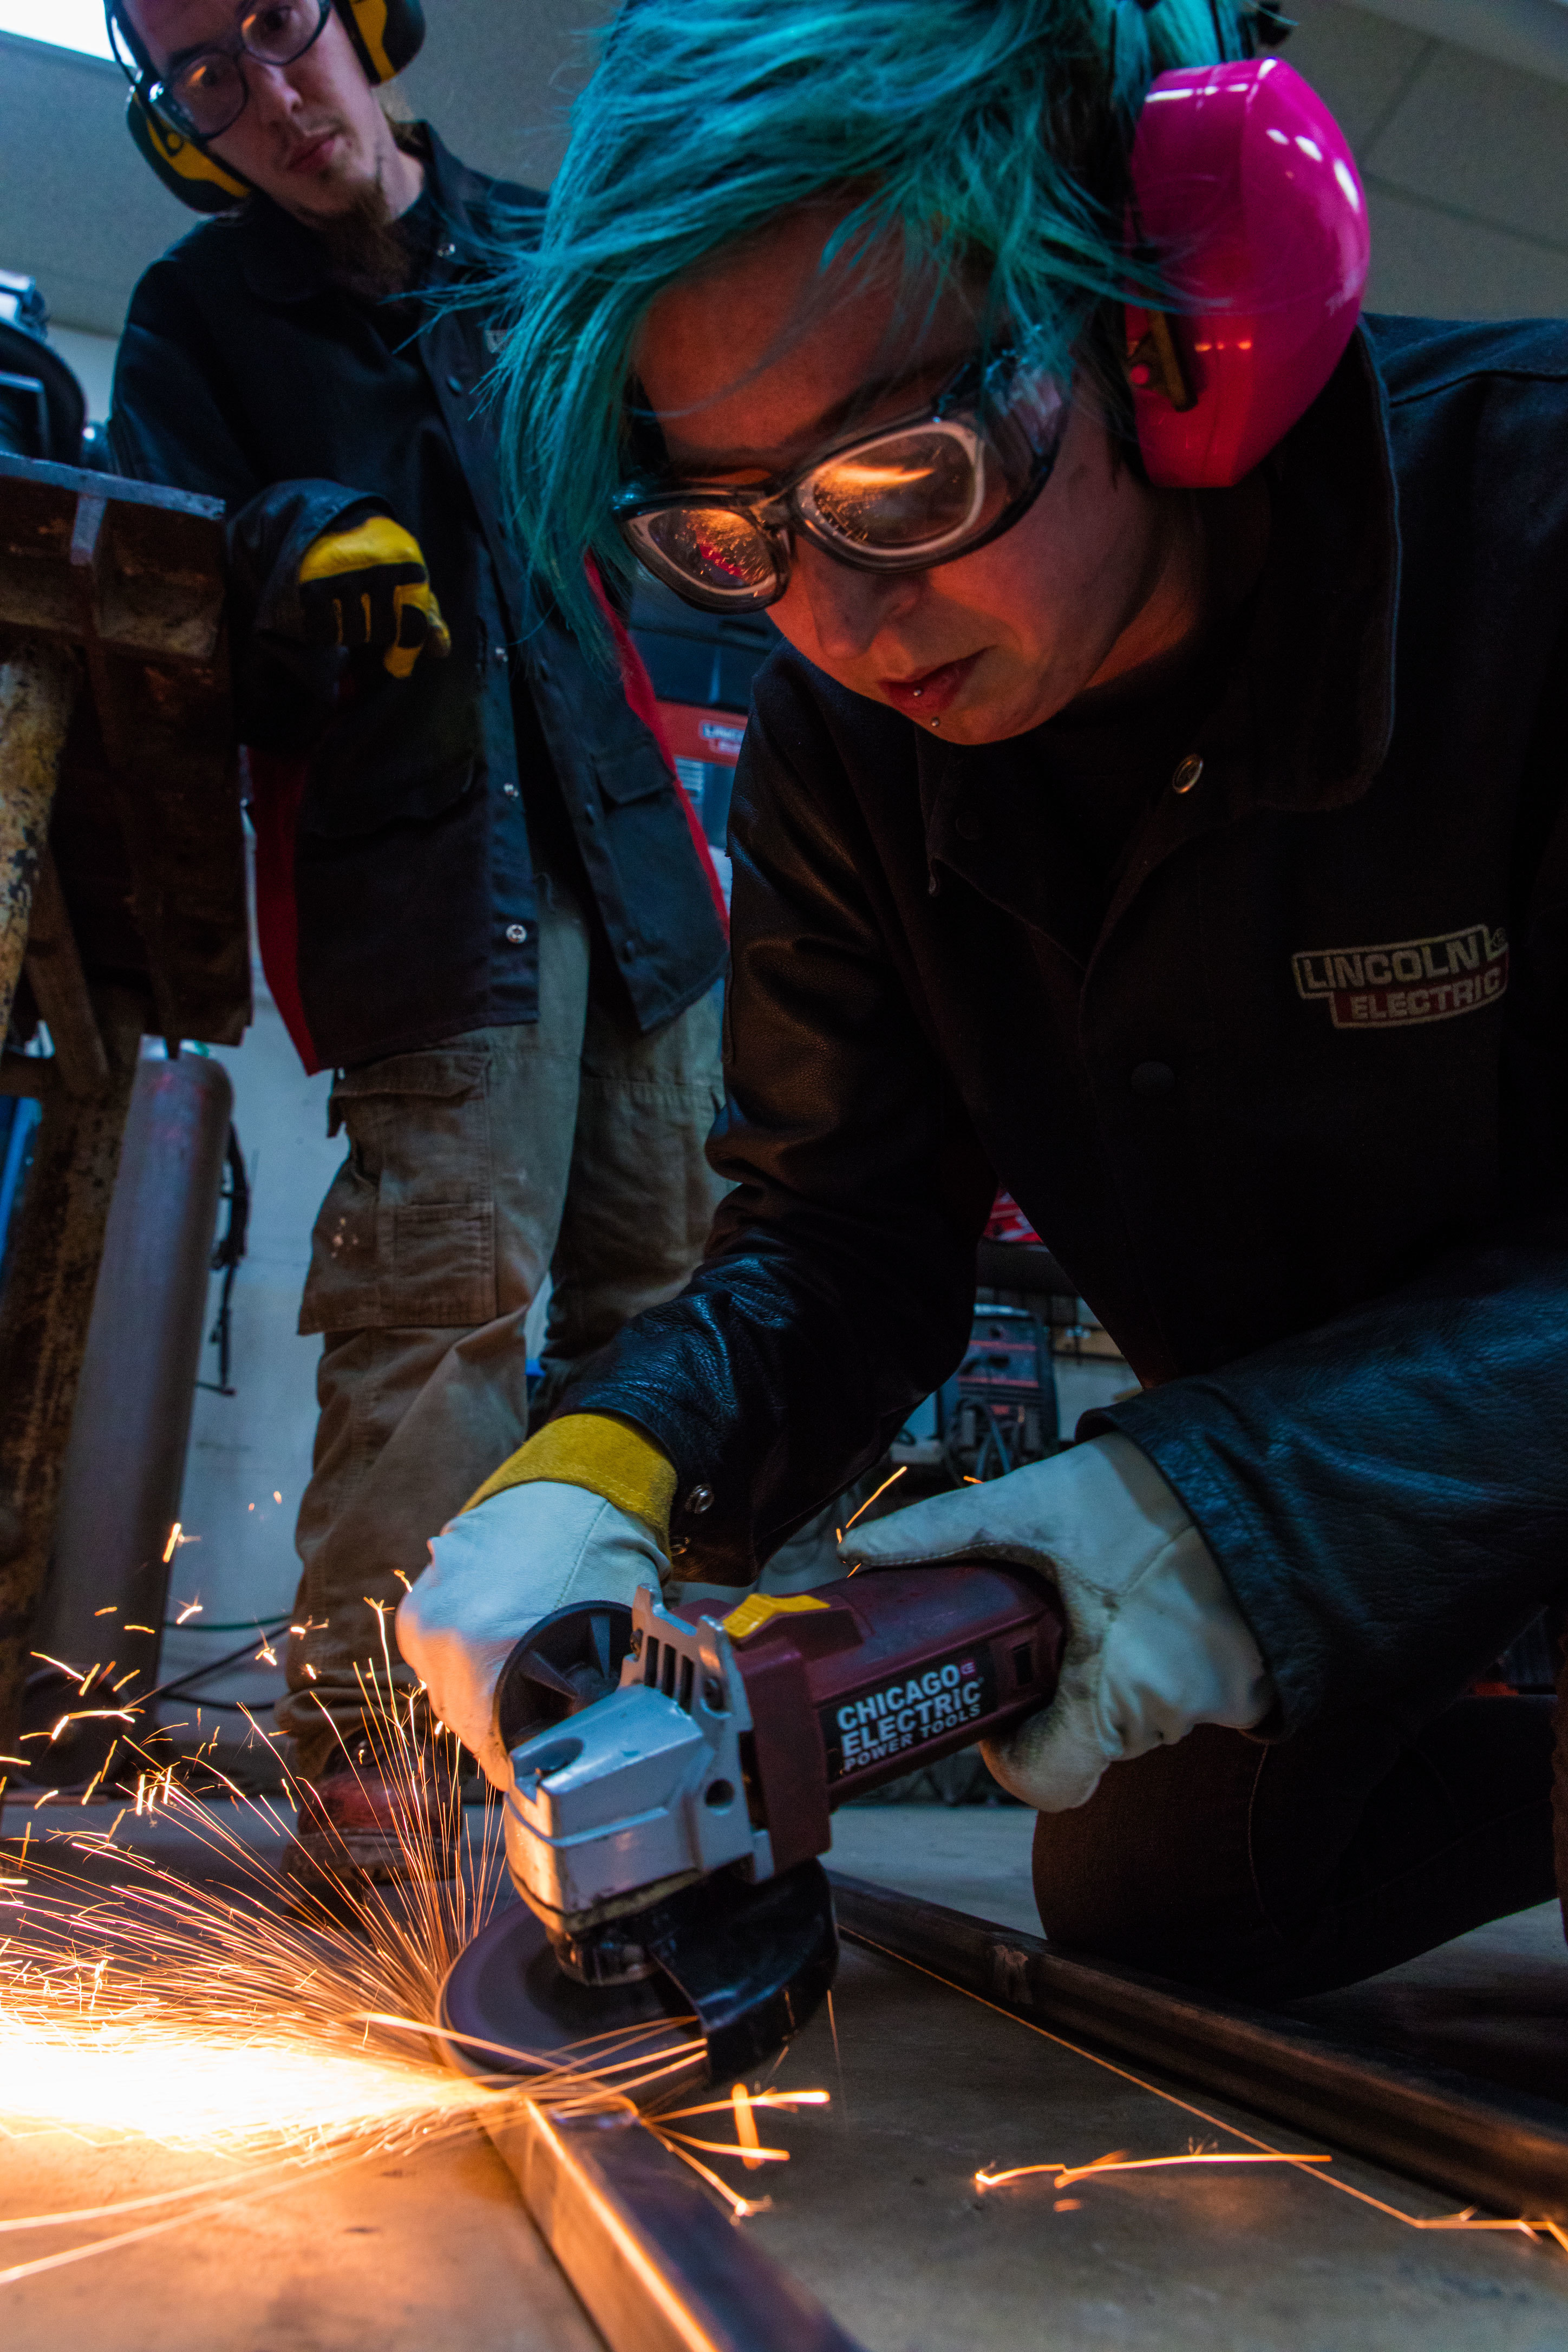
Cutting all the legs and horizontal braces to length, used the small cutoff chopsaw to cut all the angle at 45 degree angles. Not shown is the hand grinding to be sure all the pieces are the same length.
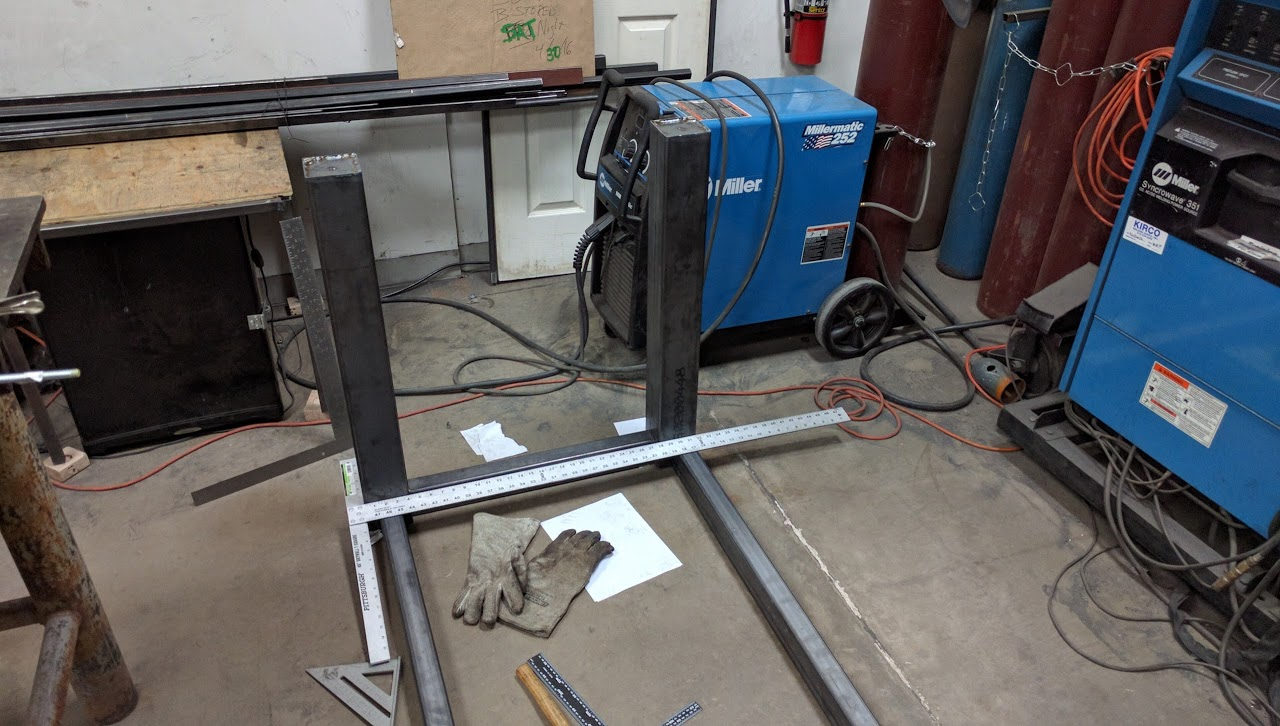
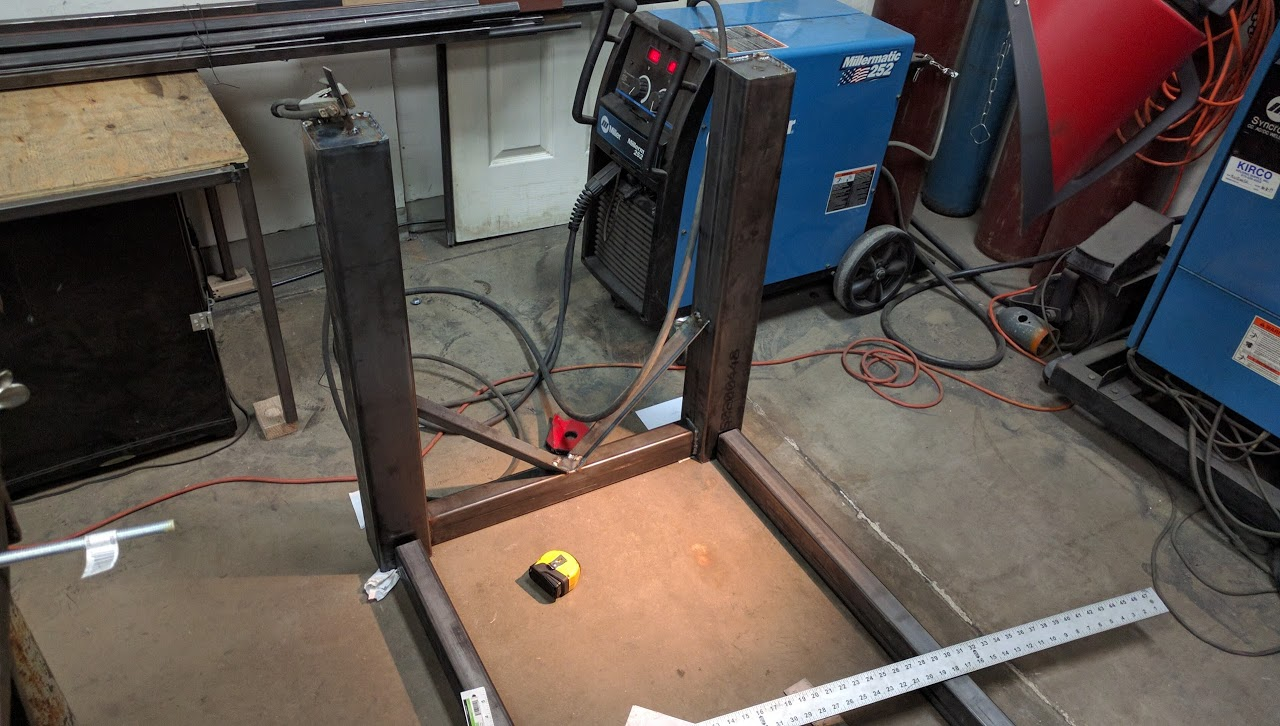
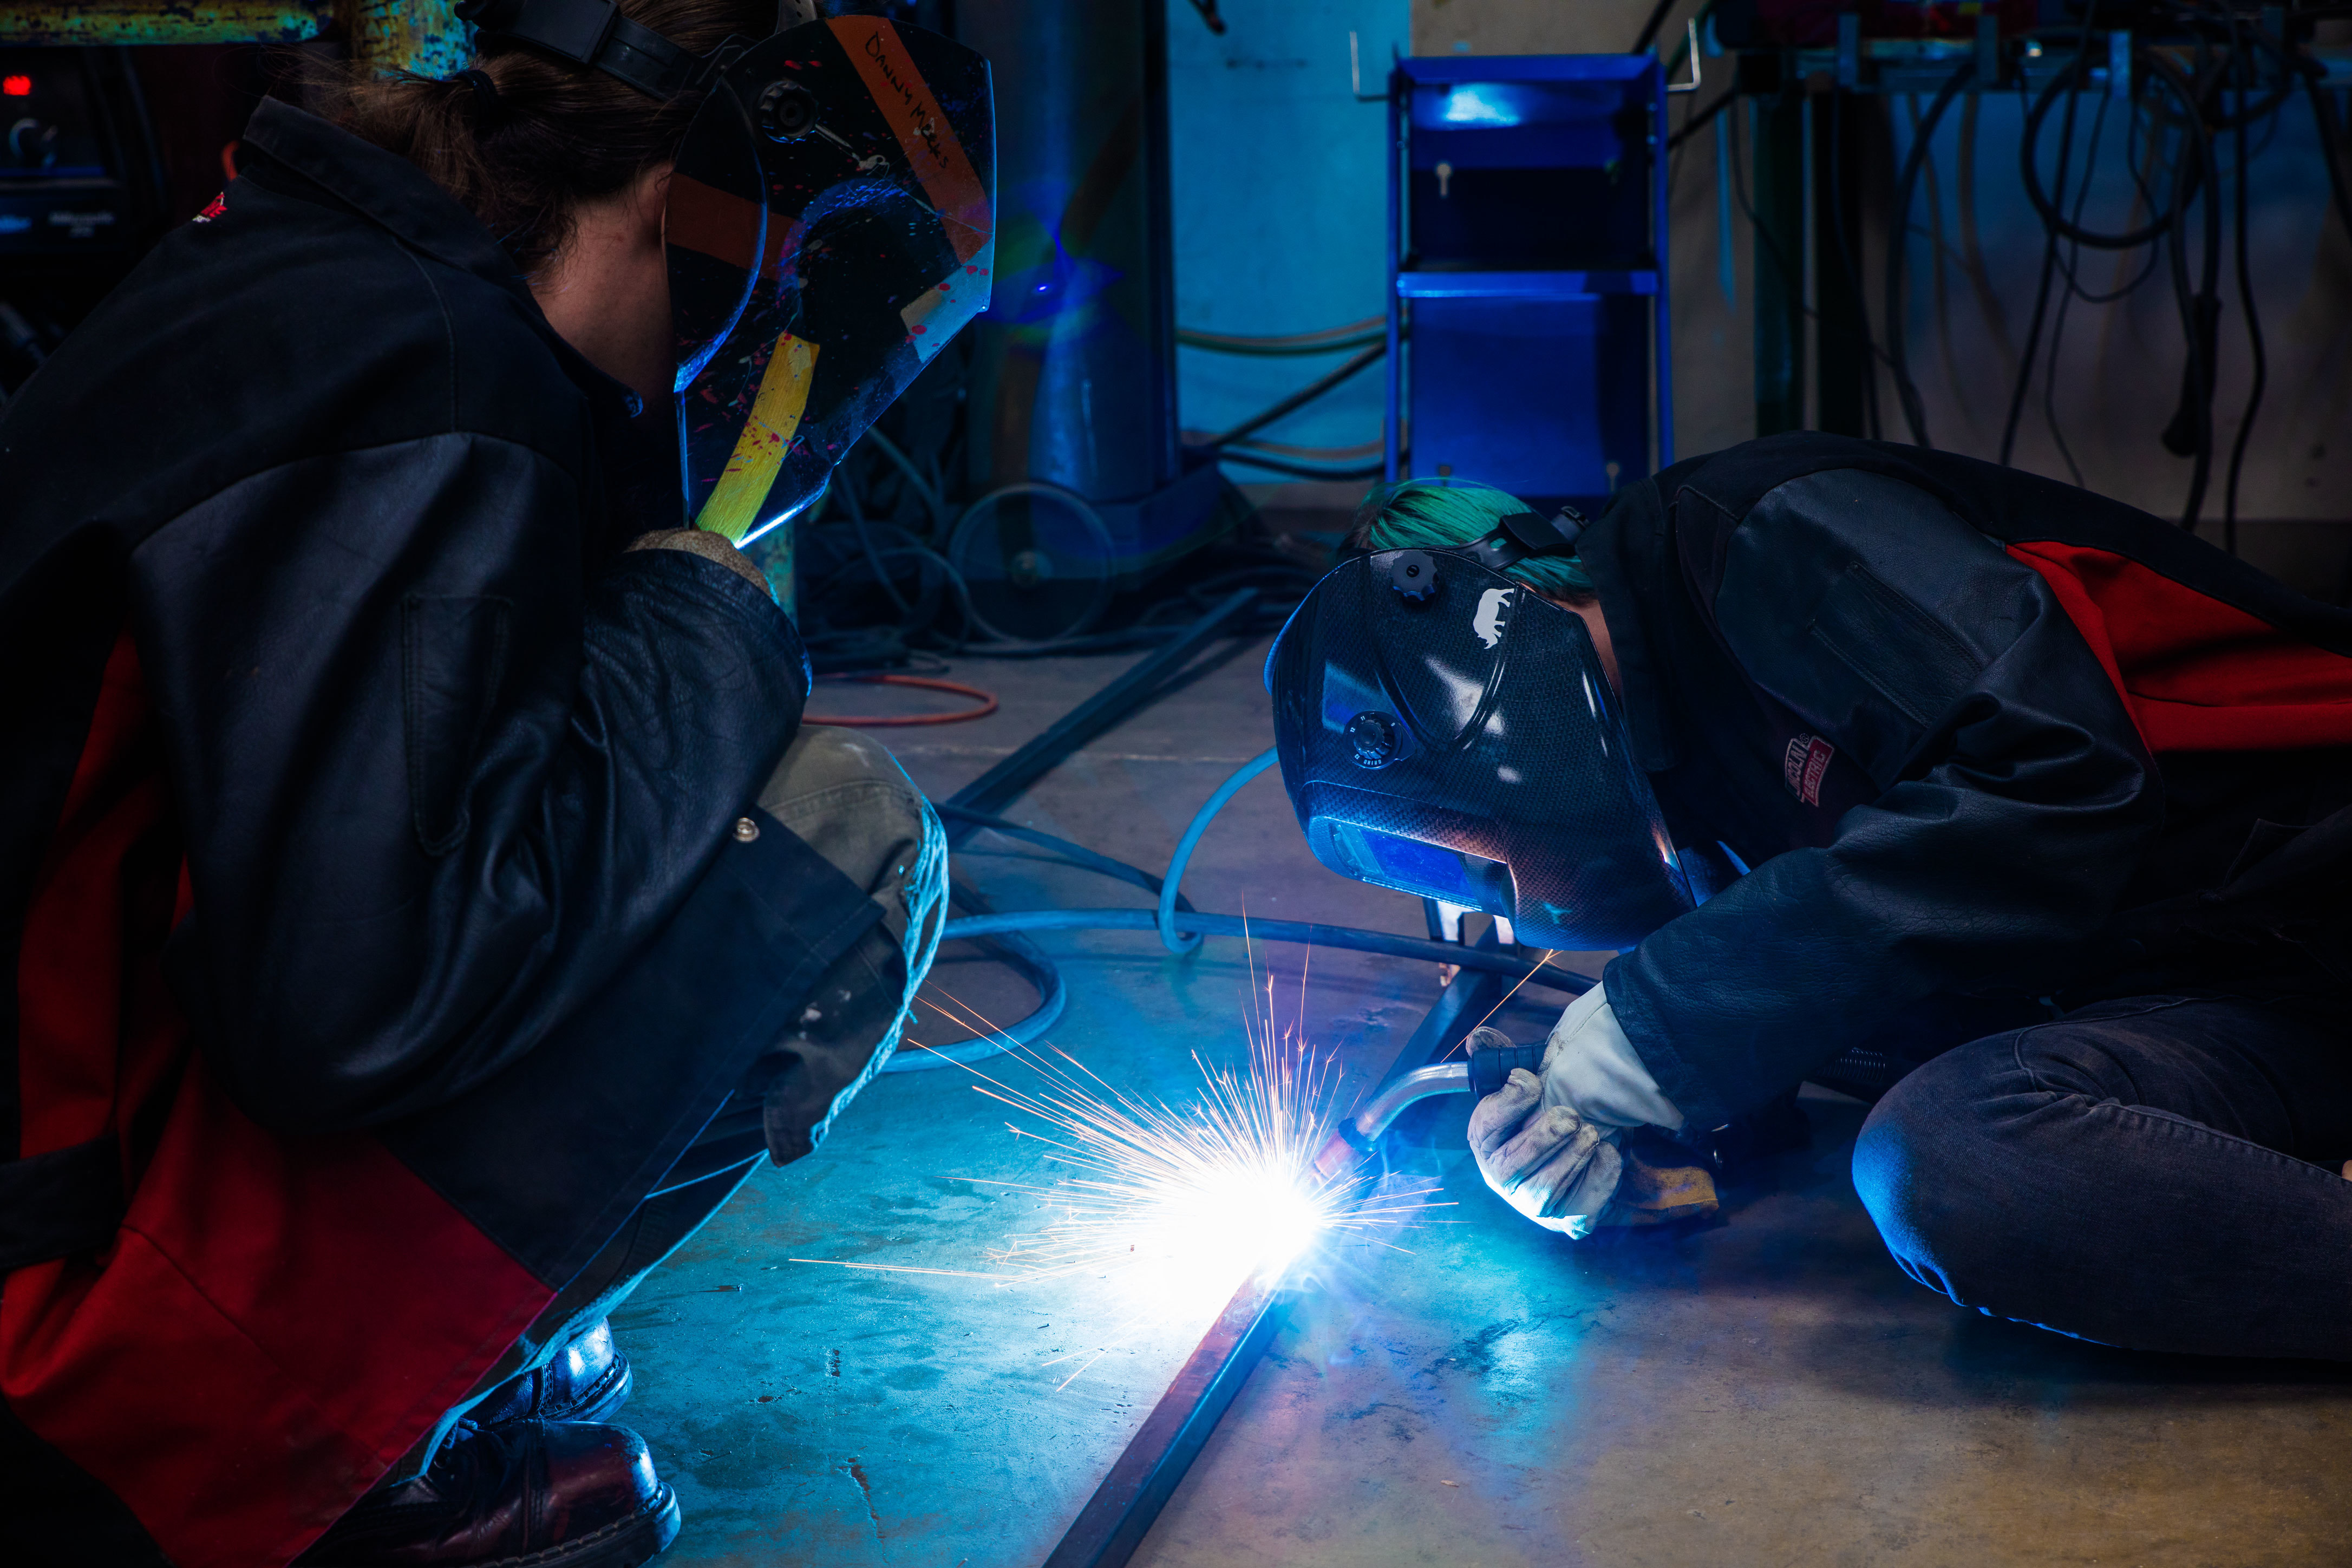
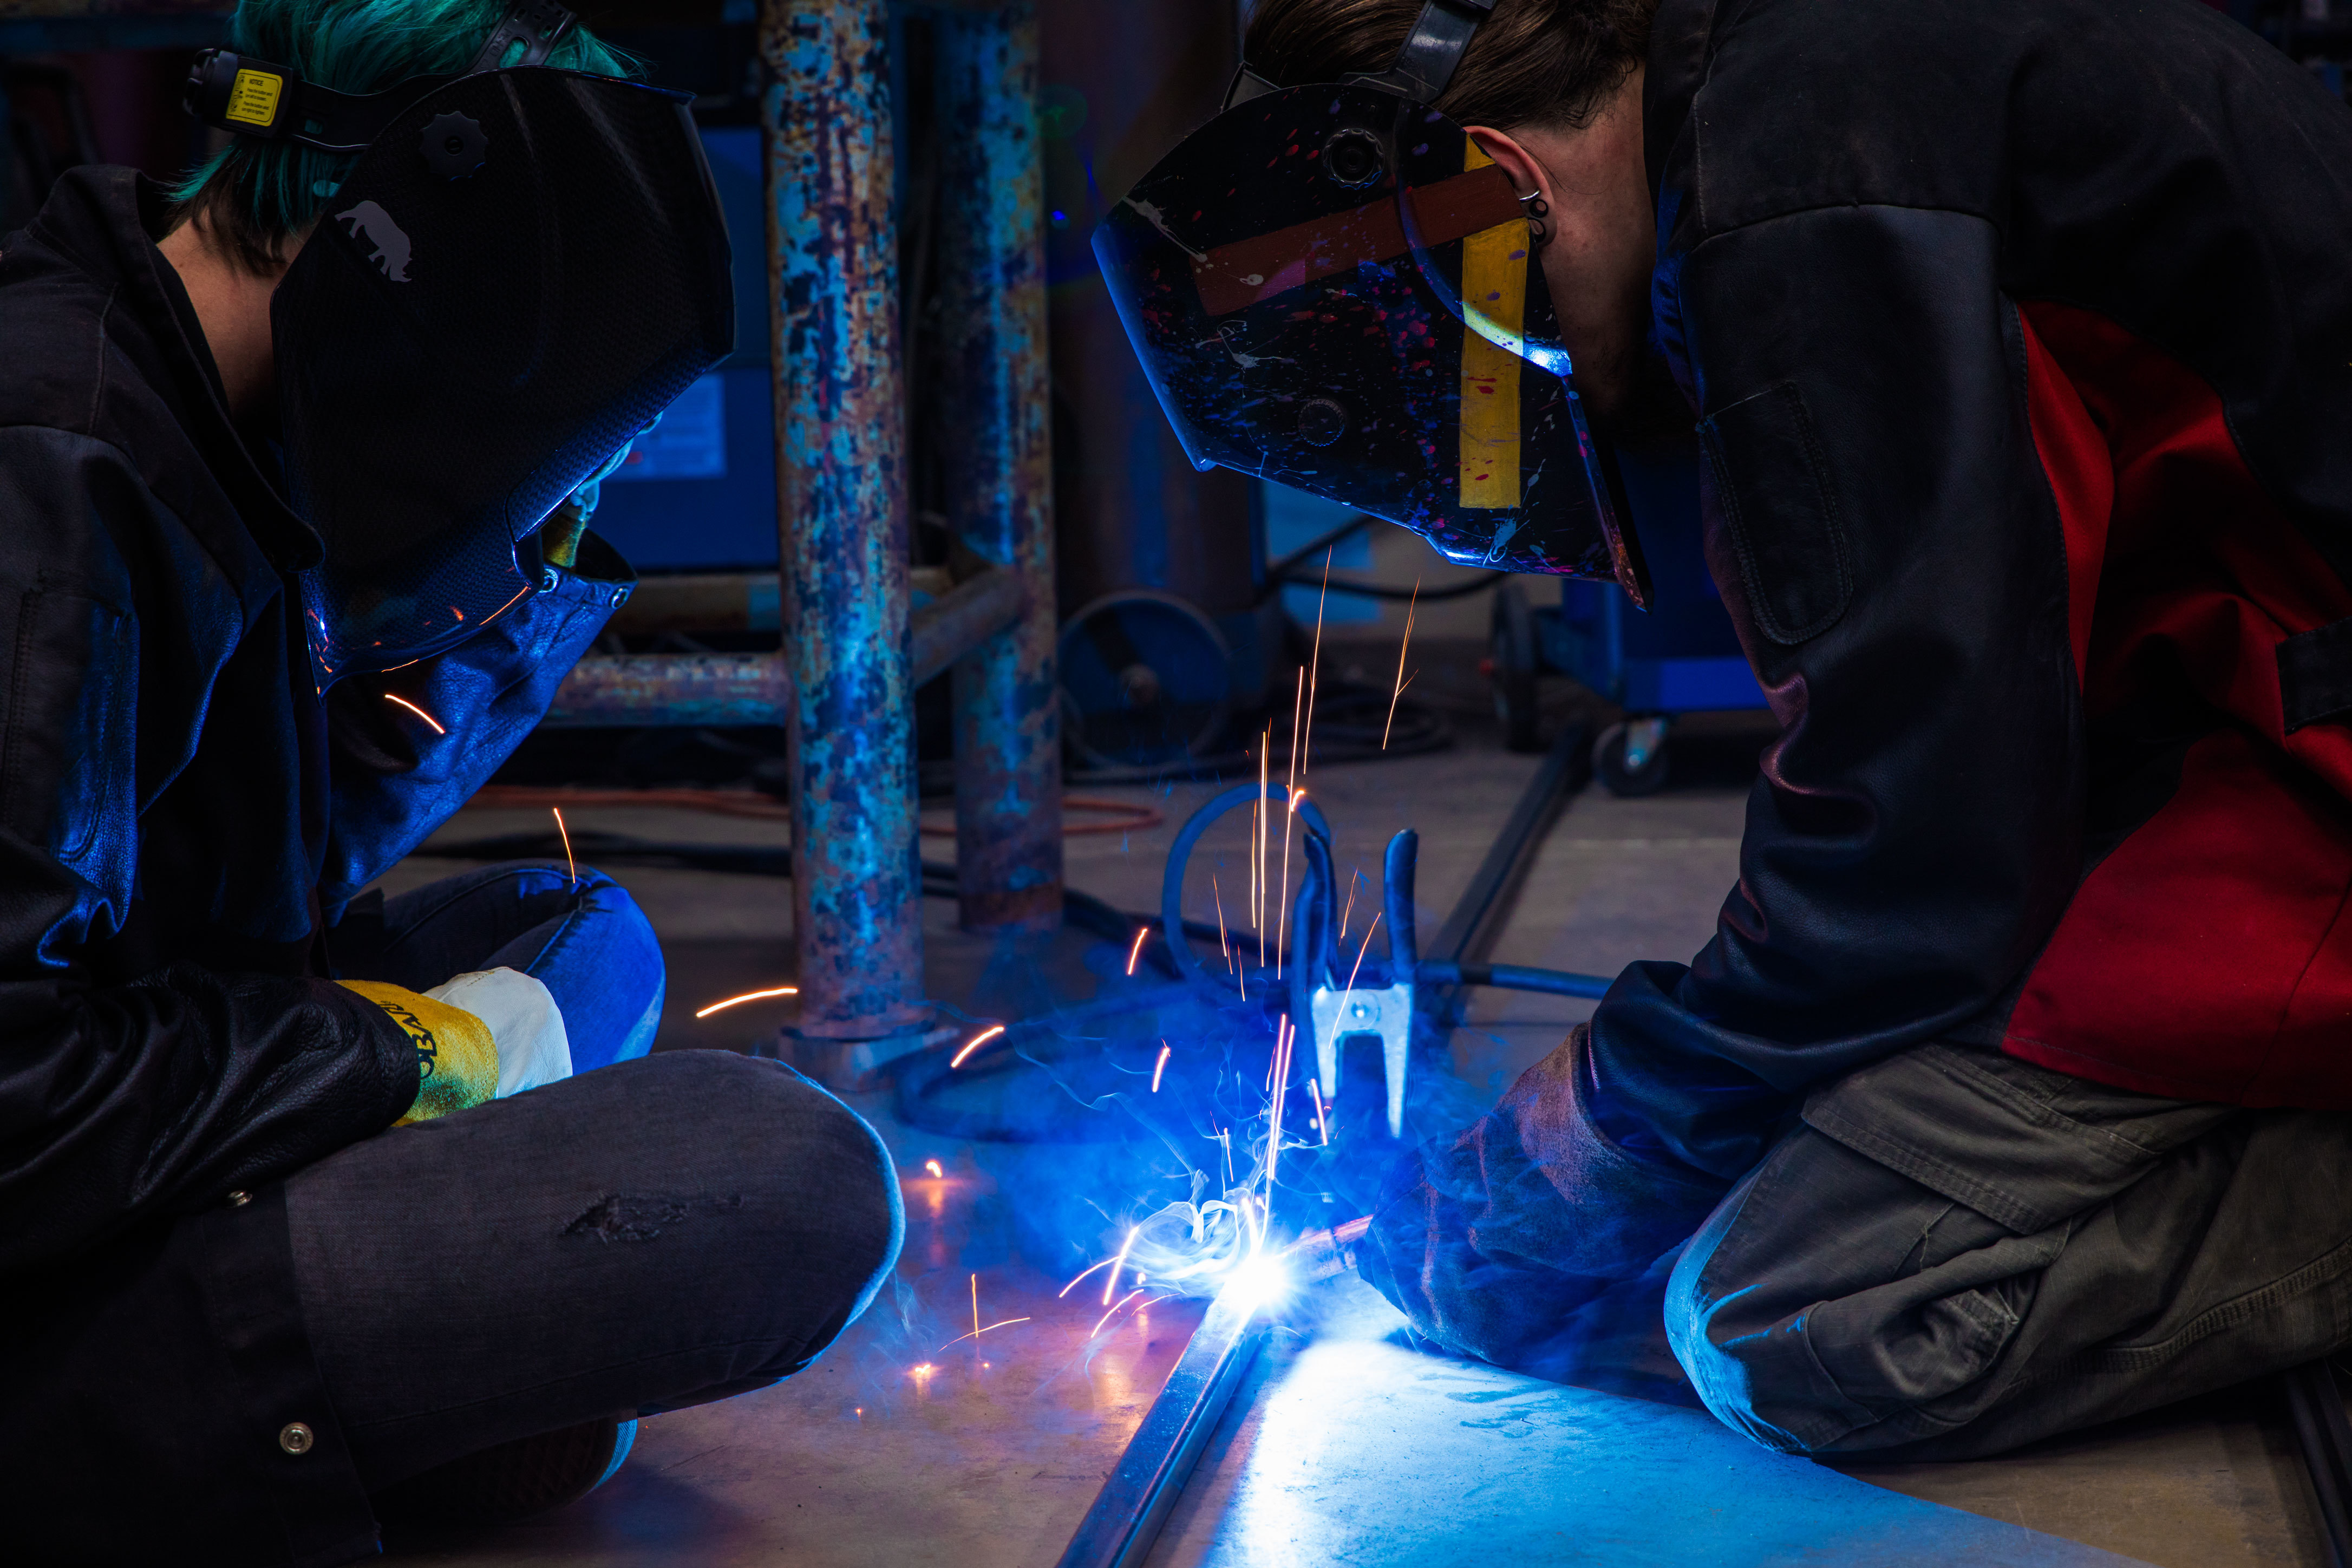
Welding, the coupling nuts were welded inside the legs for the feet to attach to, be sure to grind the zinc off. It would have been better to clamp the legs in a jig before welding to be sure they stayed parallel.

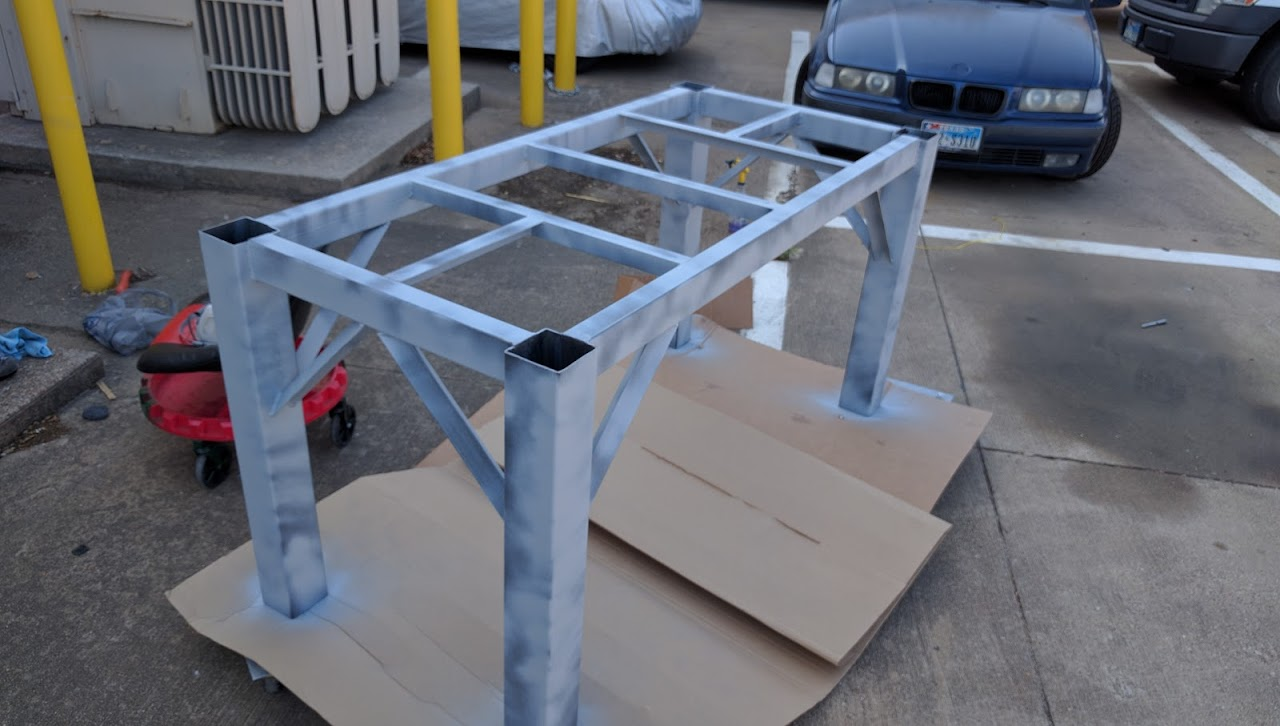
Painting:
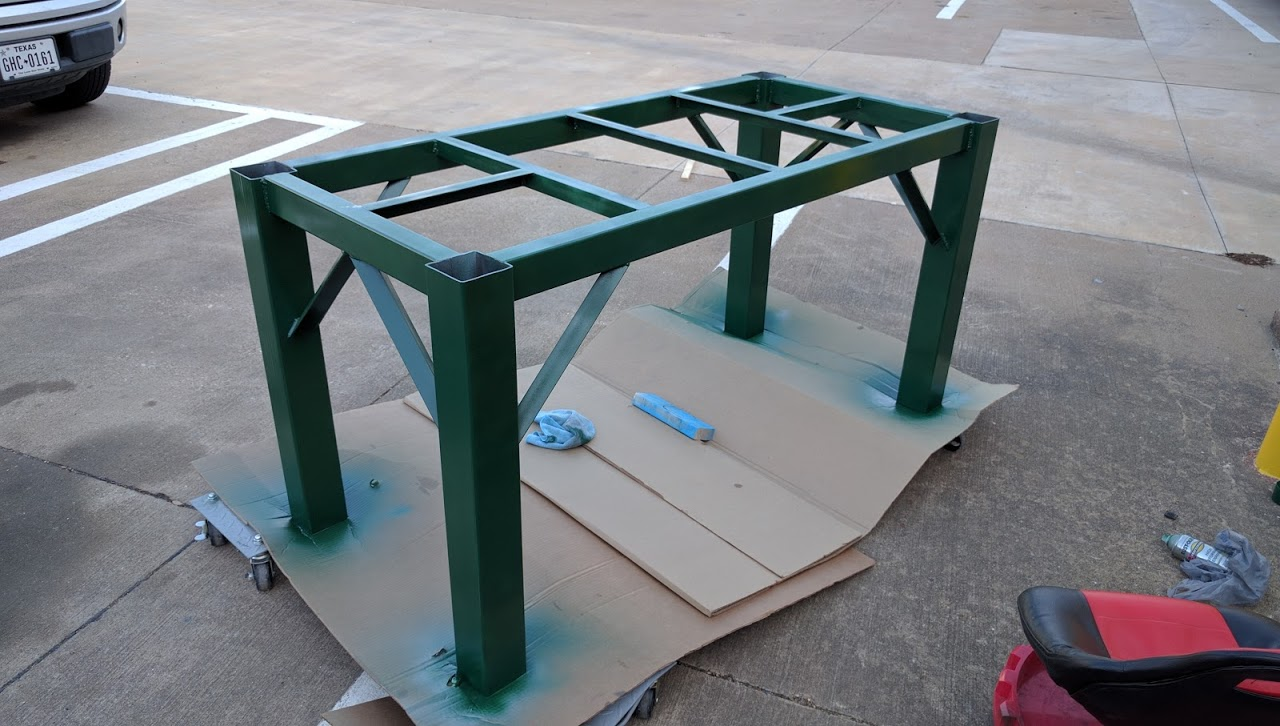
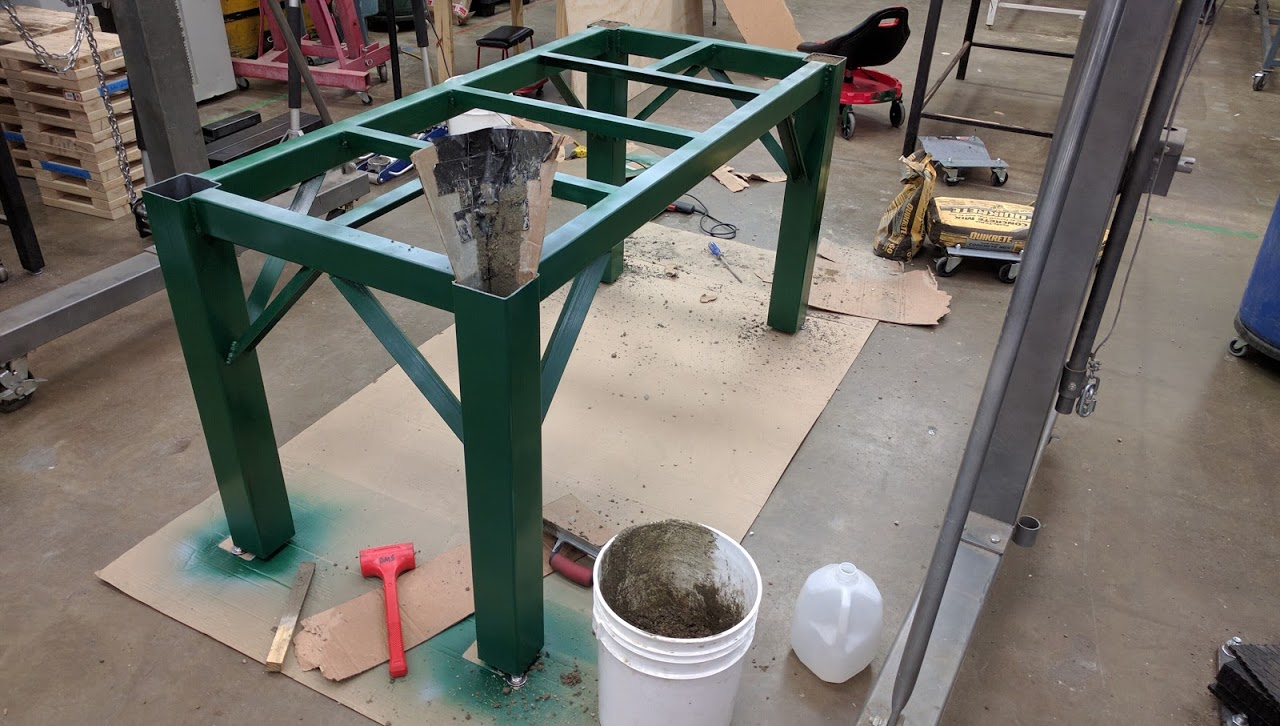
Pouring 130 pounds of concrete into 4x4 legs, base without top is about 300 pounds
Attaching first layer to frame, when you have a box of 100 self tapping screws, might as well use a bunch. The top layer is screwed to the bottom layer from the bottom with 1.25 inch screws (top is ~1.4 inches thick)
7 Likes
You do that by using a harbor freight drill. Most harbor freight tool are designed to be single use.
1 Like
To be fair, mixing concrete like this will destroy ANY drill, especially any that are 1/2" chuck or smaller (given ordinary proportions of chuck size to power capabilities). People don’t realize how thick concrete is when properly constituted…
I smoked a 1/2" Bosch hammer drill this way. Well my uncle did but it was my drill!
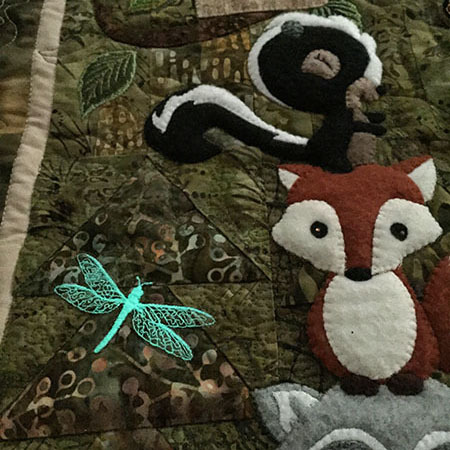
Using the Laser cutter for an appliquéd baby quilt ……
May (finally) brought the completion of this wall-hanging baby quilt (which was awaiting the birth of said baby). You can guess that I used the Babylock embroidery machine, but the laser cutter was also invaluable in making this quilt.
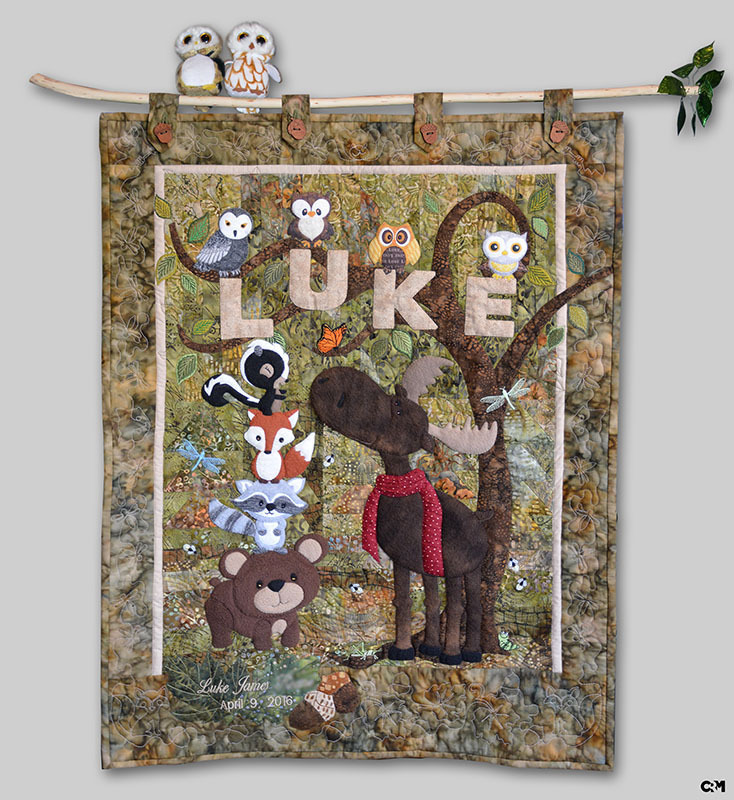
Yes, Virginia, you can use a laser cutter for quilting! Laser cutter was used for:
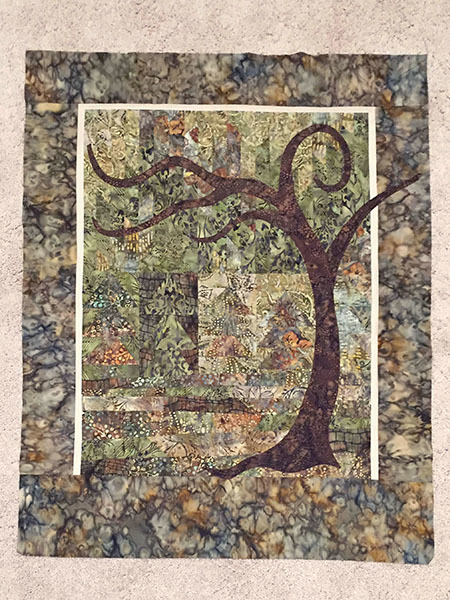
- acrylic cutting template for parallelogram-shaped fabric pieces (batik background)
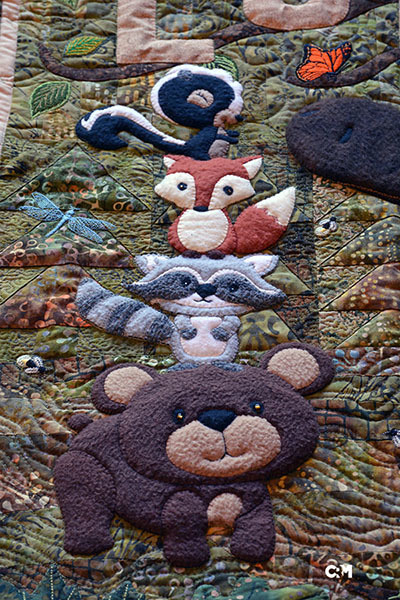
- freezer paper templates for the fabric appliqués (tree, letters, owls)
- fleece appliqués for the (furry) animals
- extra batting behind the animals to make them stand out
- cherry wood acorn buttons (with a lot of hand sanding)
I used the commercial fabric printing service at spoonflower.com to print the owls that I designed.
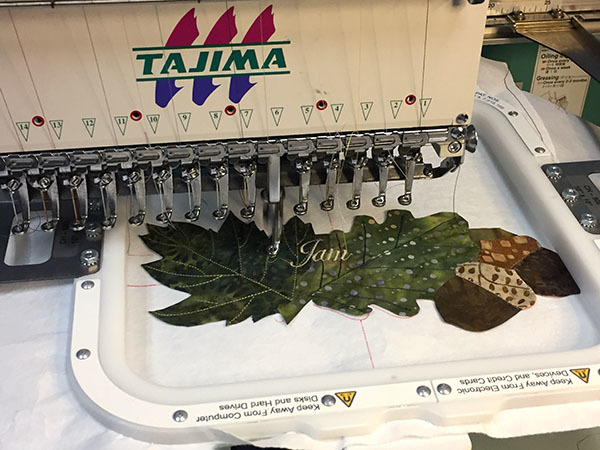
I programmed the embroidered leaves using the SewArt64 software on the CA computers. The various bugs were downloaded for a (nominal) fee and embroidered at DMS. The fireflies and dragonflies glow in the dark (this is the same blue dragonfly that you see in the photo above).
Many thanks to @Nick who programmed and embroidered the baby’s name and DOB onto my leaf appliqué at his shop – it was a hair too big for our machine and he did a very professional, beautiful job!
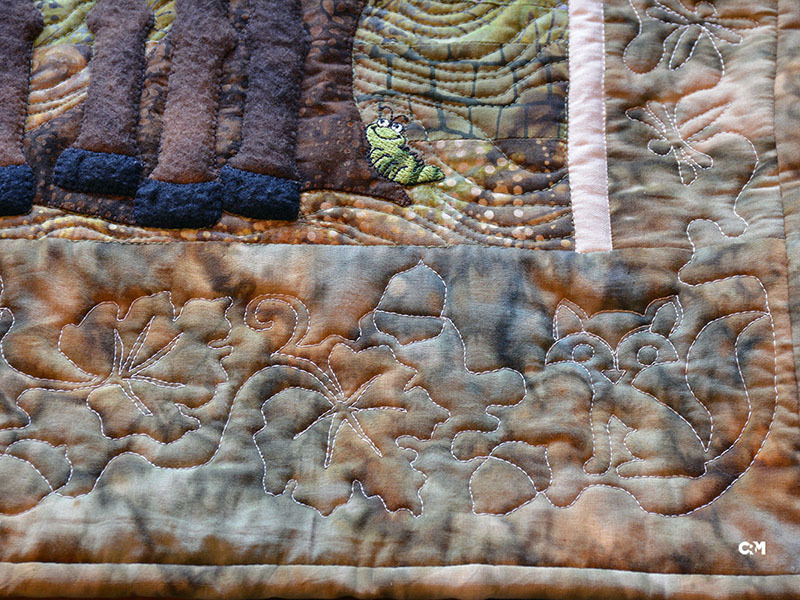
I freehand quilted this on my domestic sewing machine (that’s the fancy quilter’s term for a plain old regular home sewing machine).
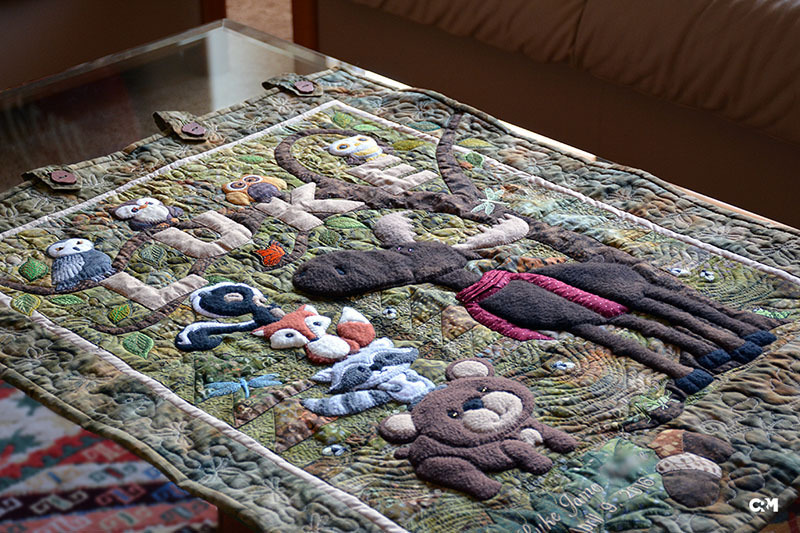
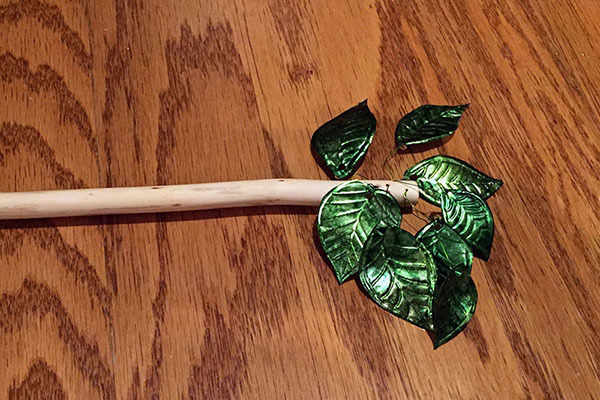
It will hang on a branch that has aluminum leaves from a disposable pie tin, colored with alcohol inks (technique thanks to @Cairenn_Day).
And yes – we have started calling the baby’s father “Vader”.
21 Likes

Is there anything you aren’t superlative at?
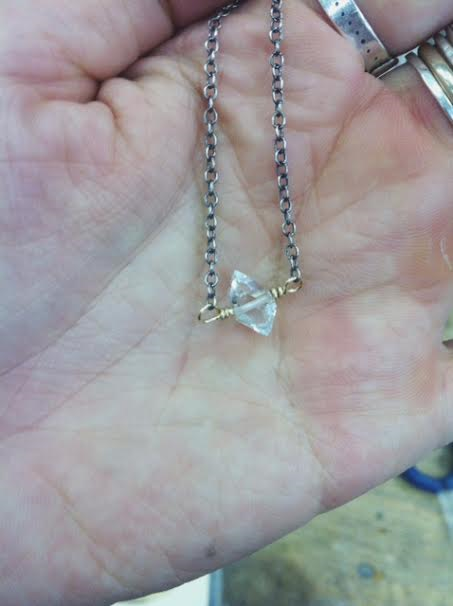
Finally playing with some of the goldfill I purchased awhile back. Sterling chain, goldfill wire wrapping, herkimer diamond.
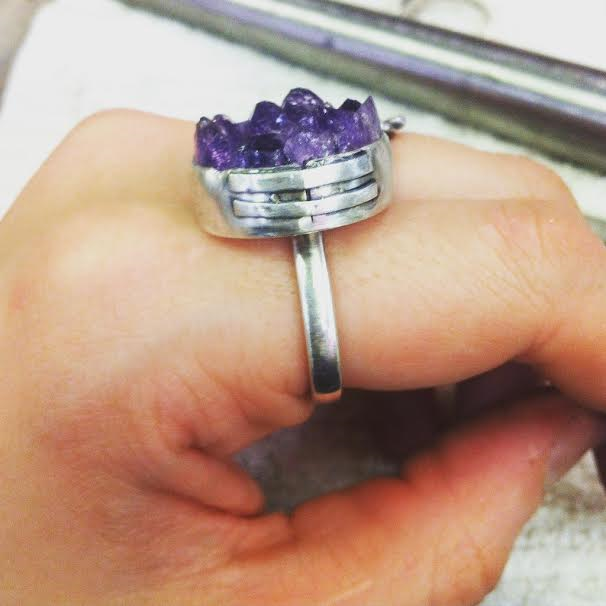
And a Mother’s Day ring for my mama.
7 Likes
That is ONE lucky young man. I hope him and his family will value all the work and art in this one piece.
1 Like
I guess I should show my latest, I worked on this a lot week before last
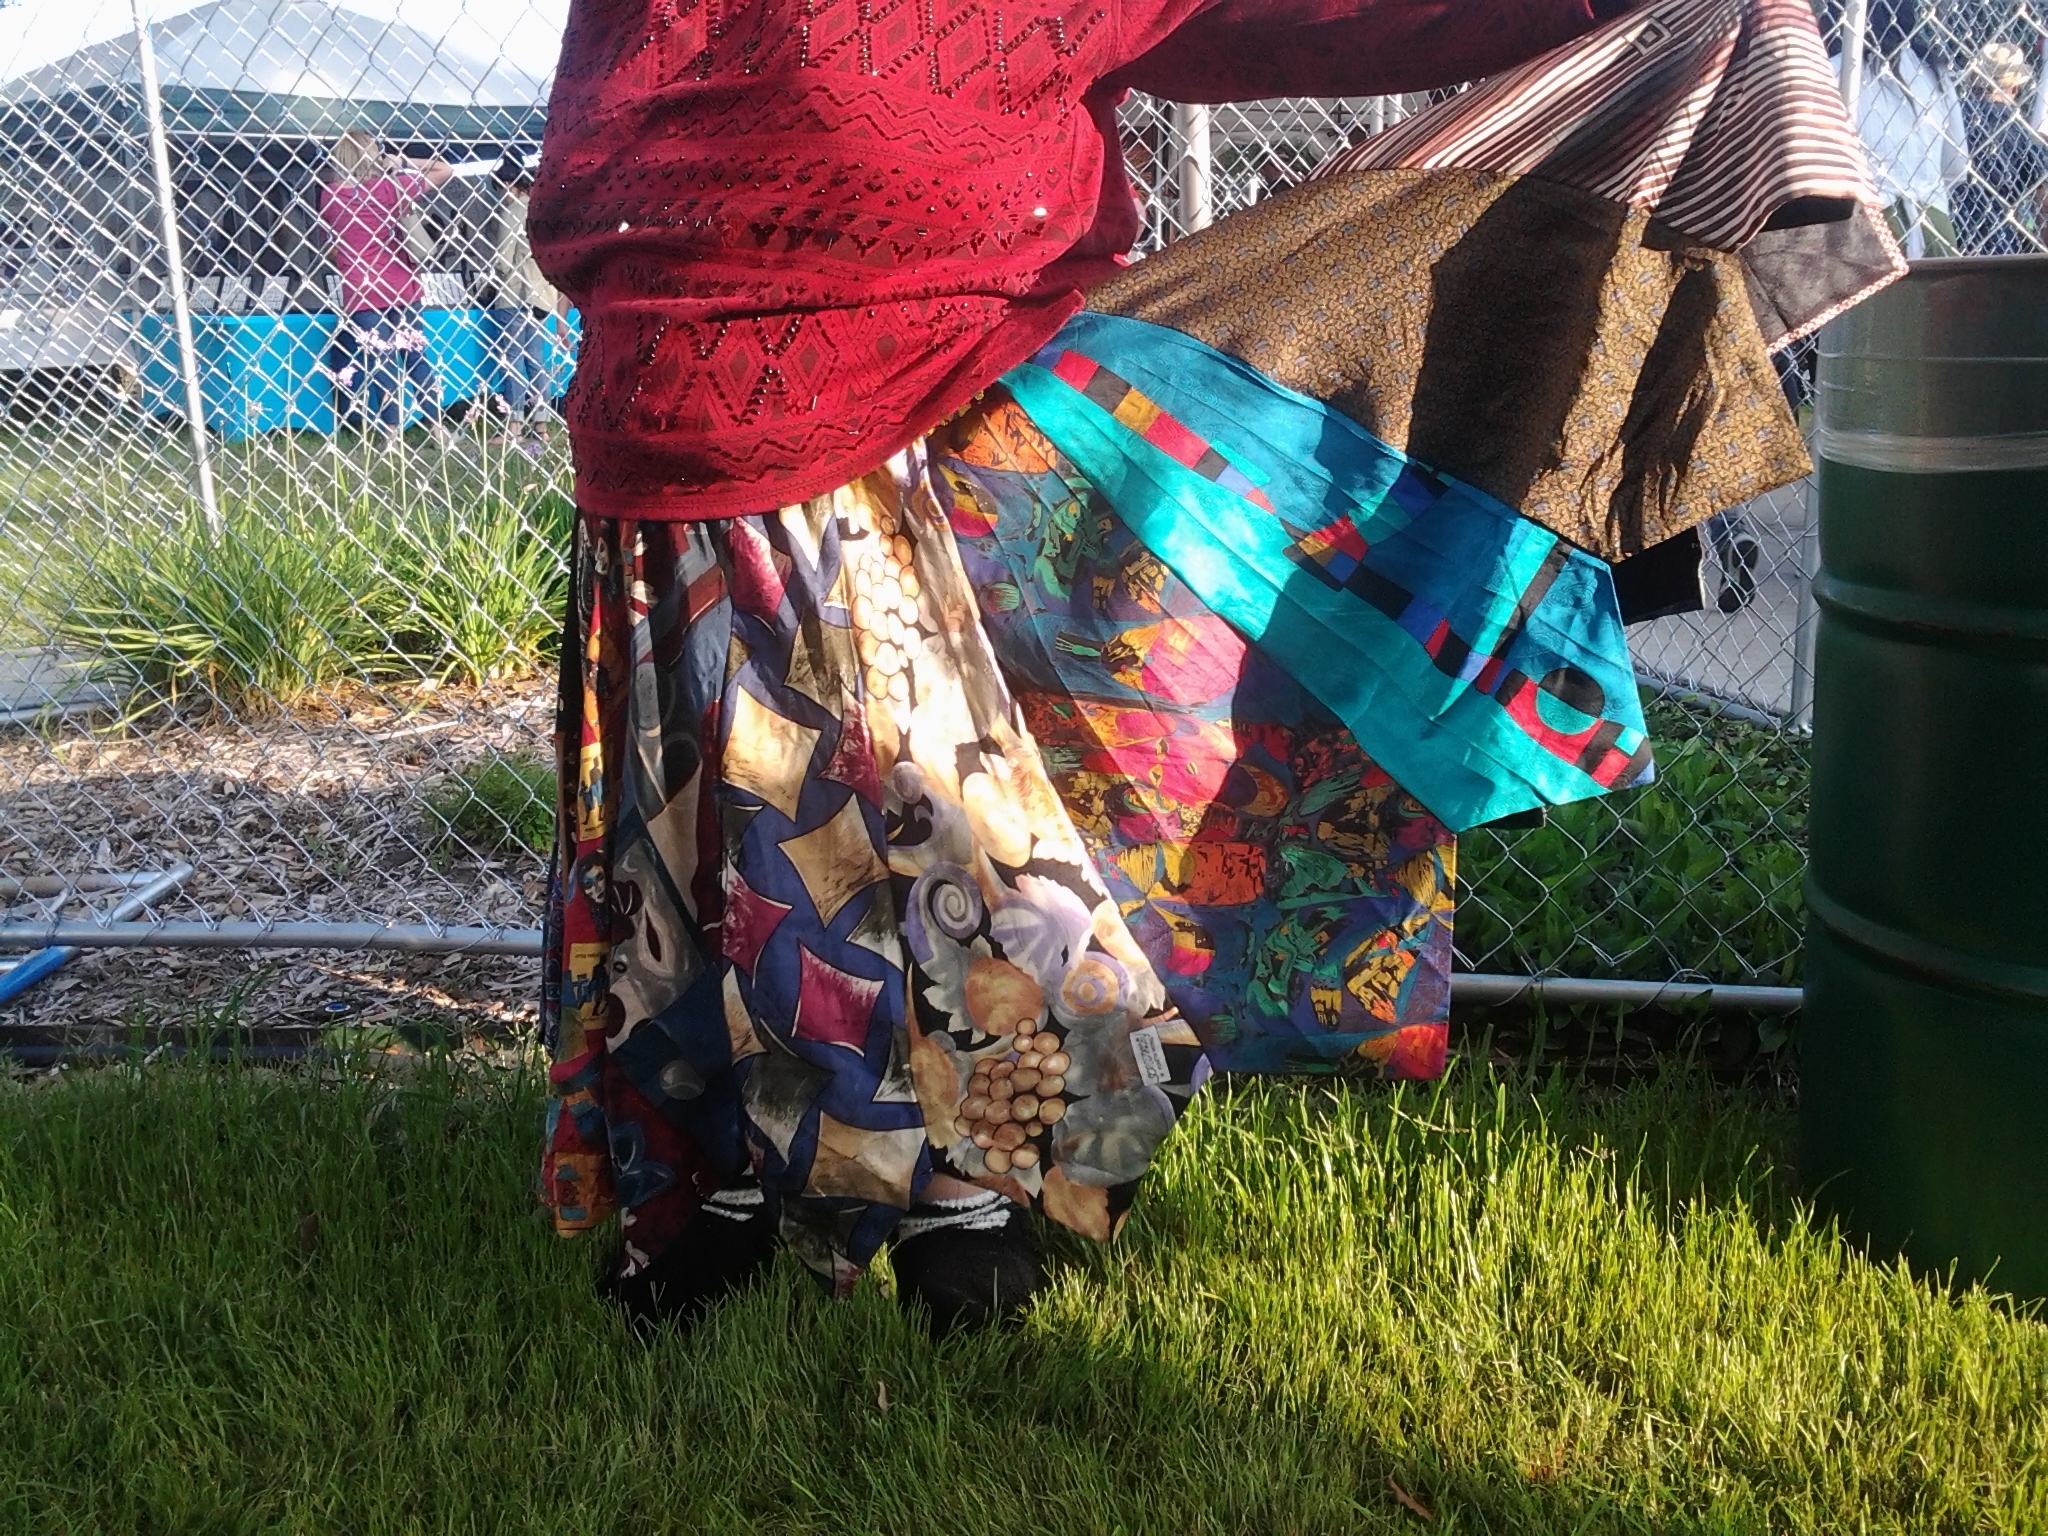
This is made from 22 silk ties from the thrift store.

12 Likes
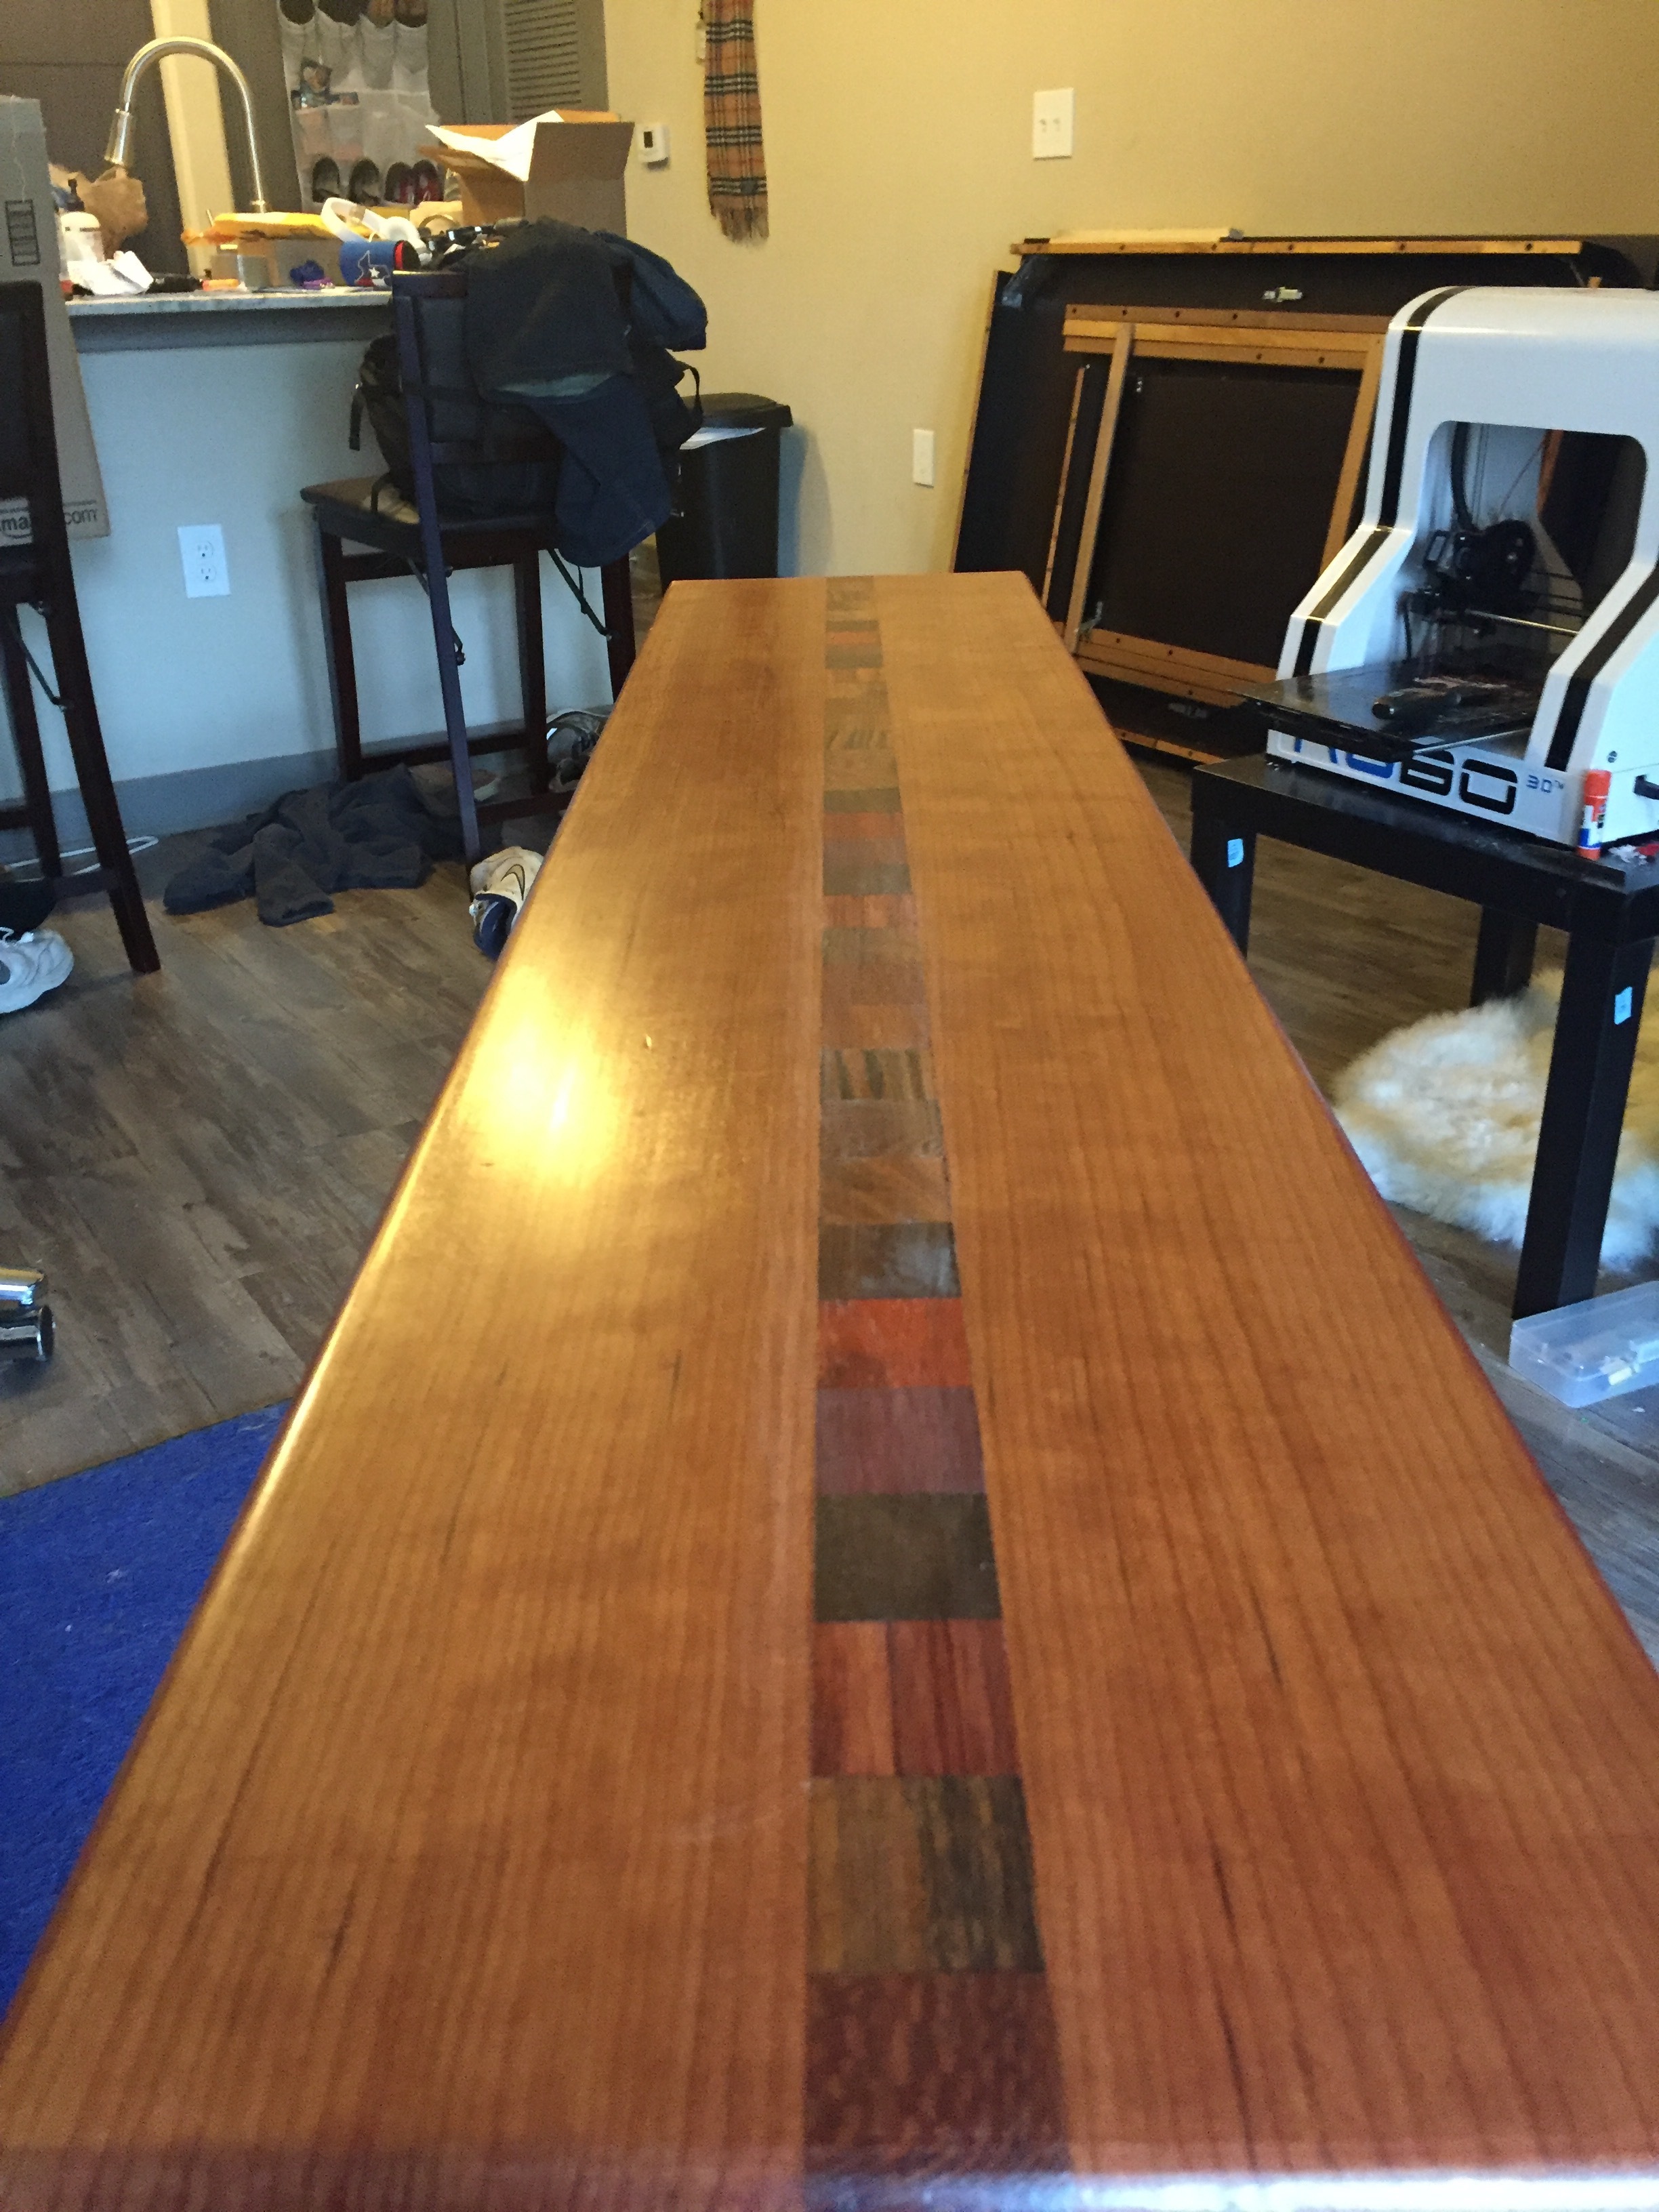
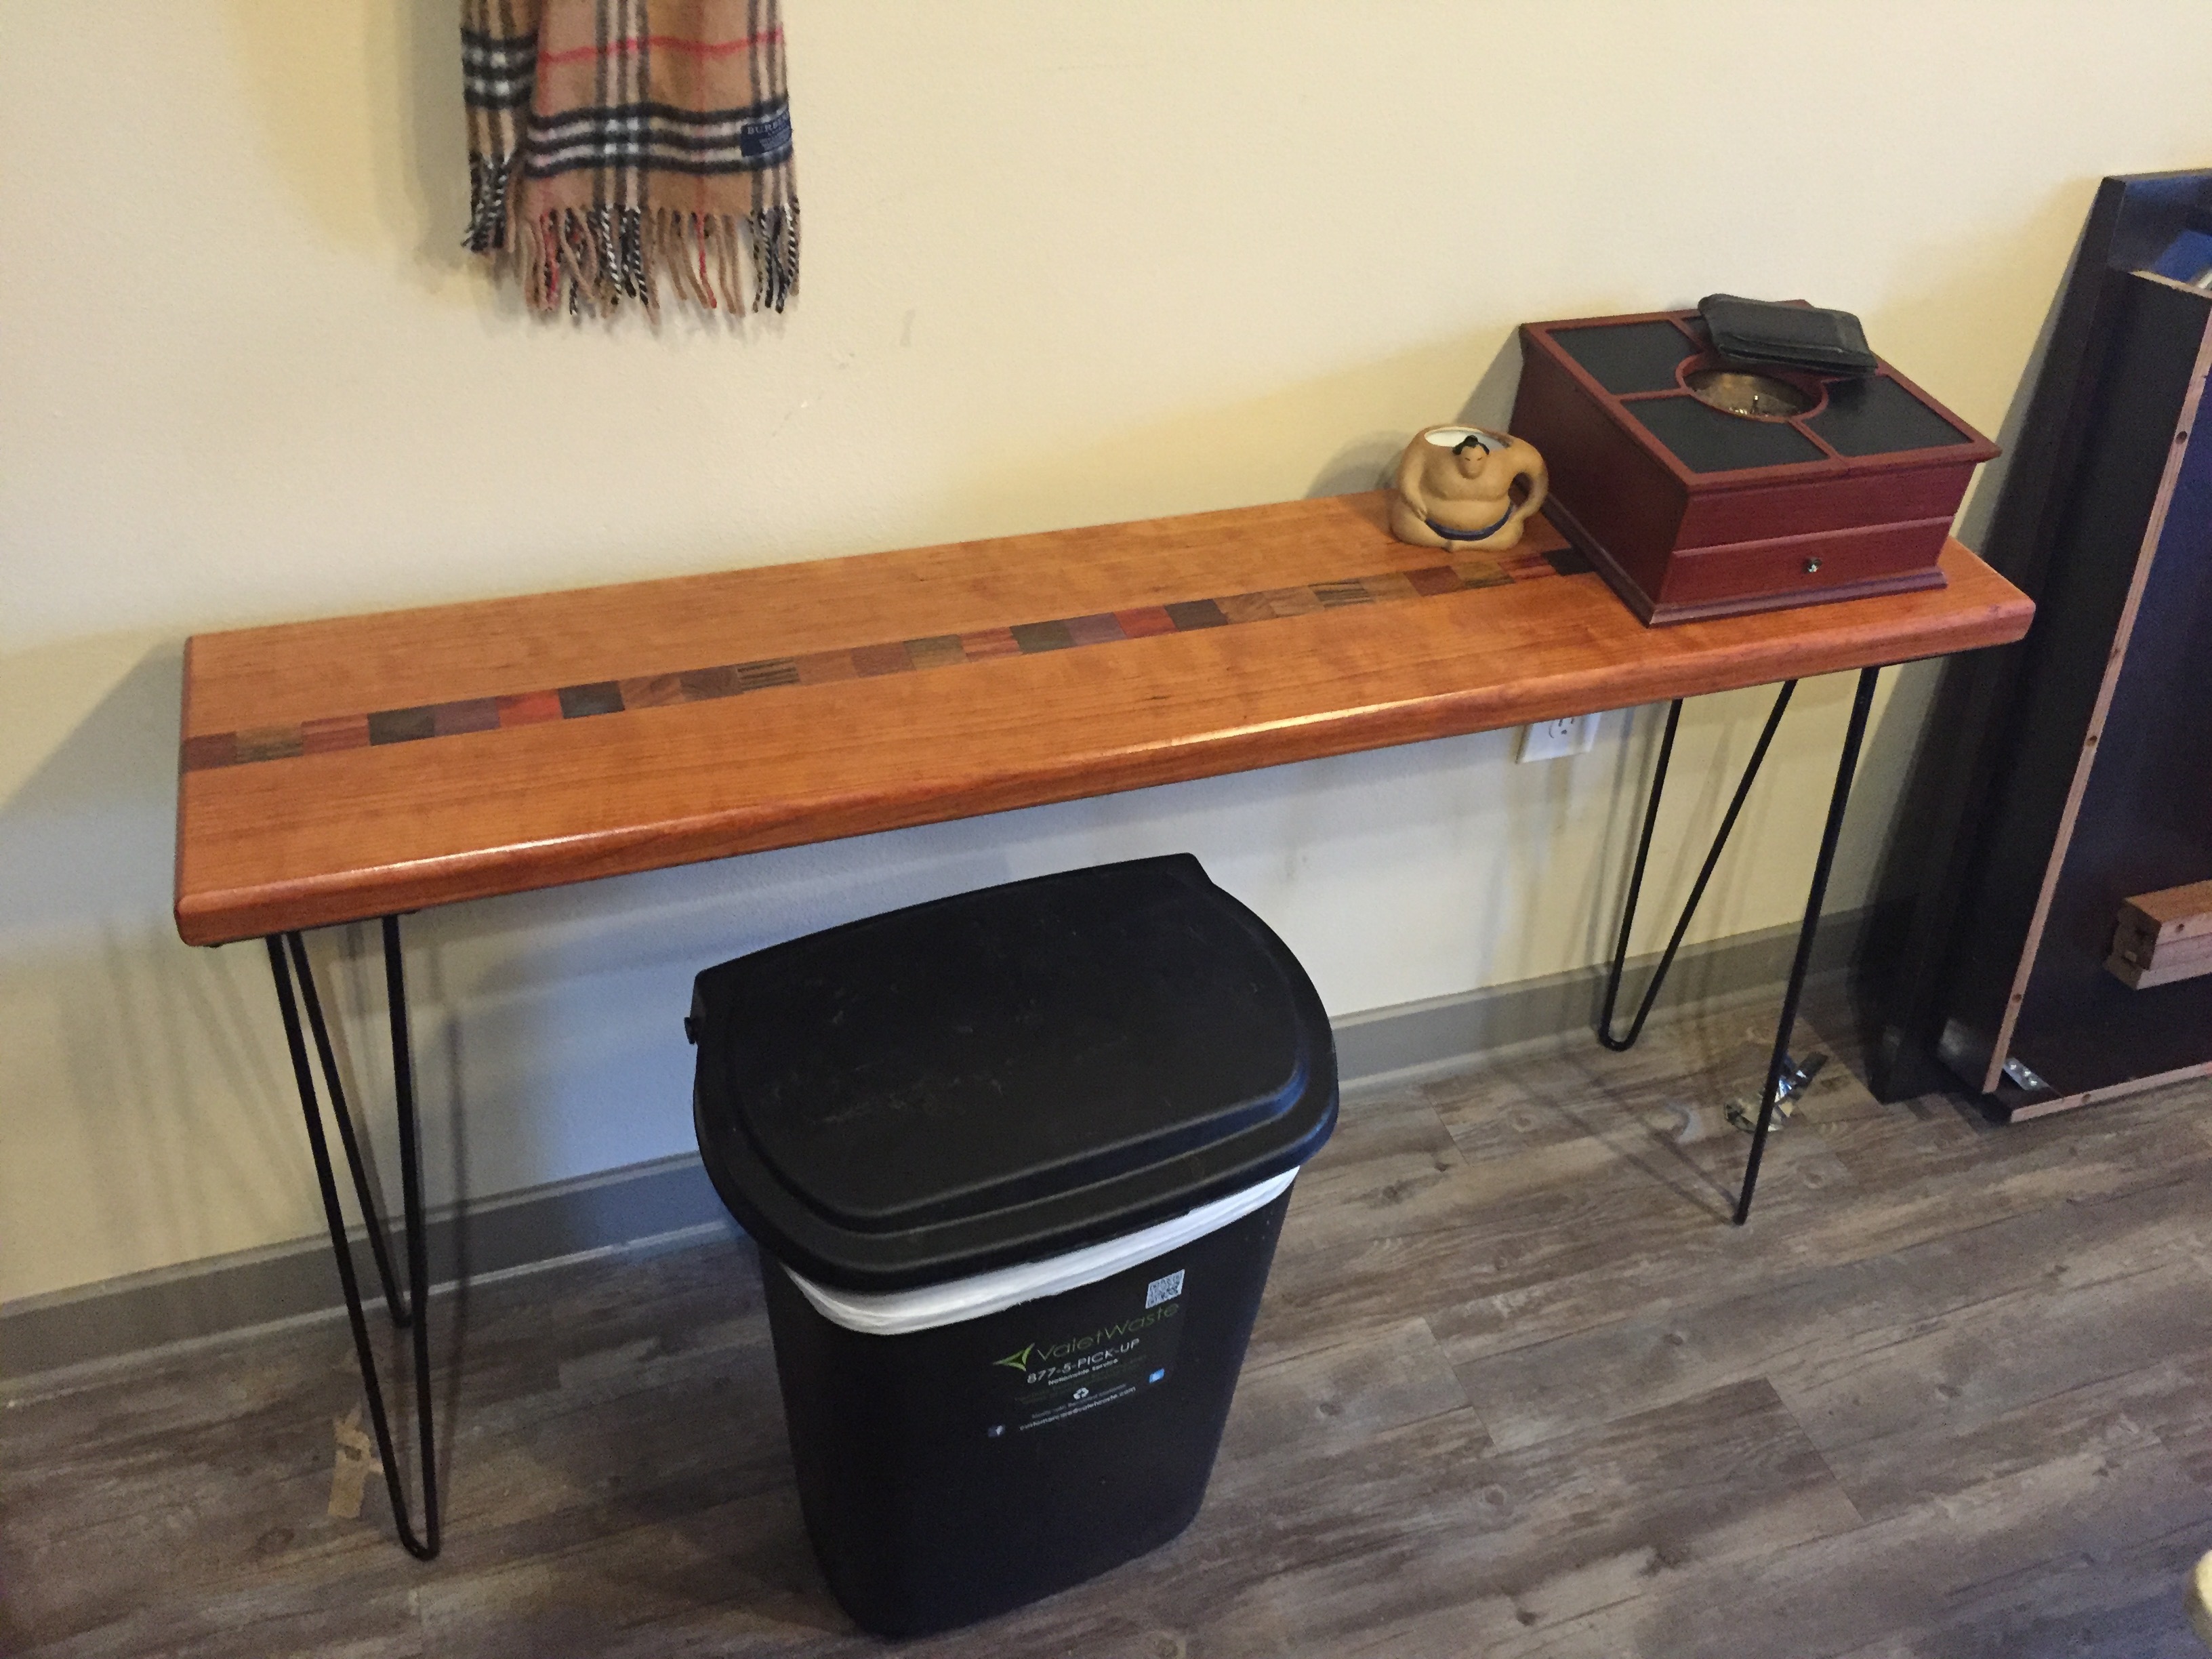
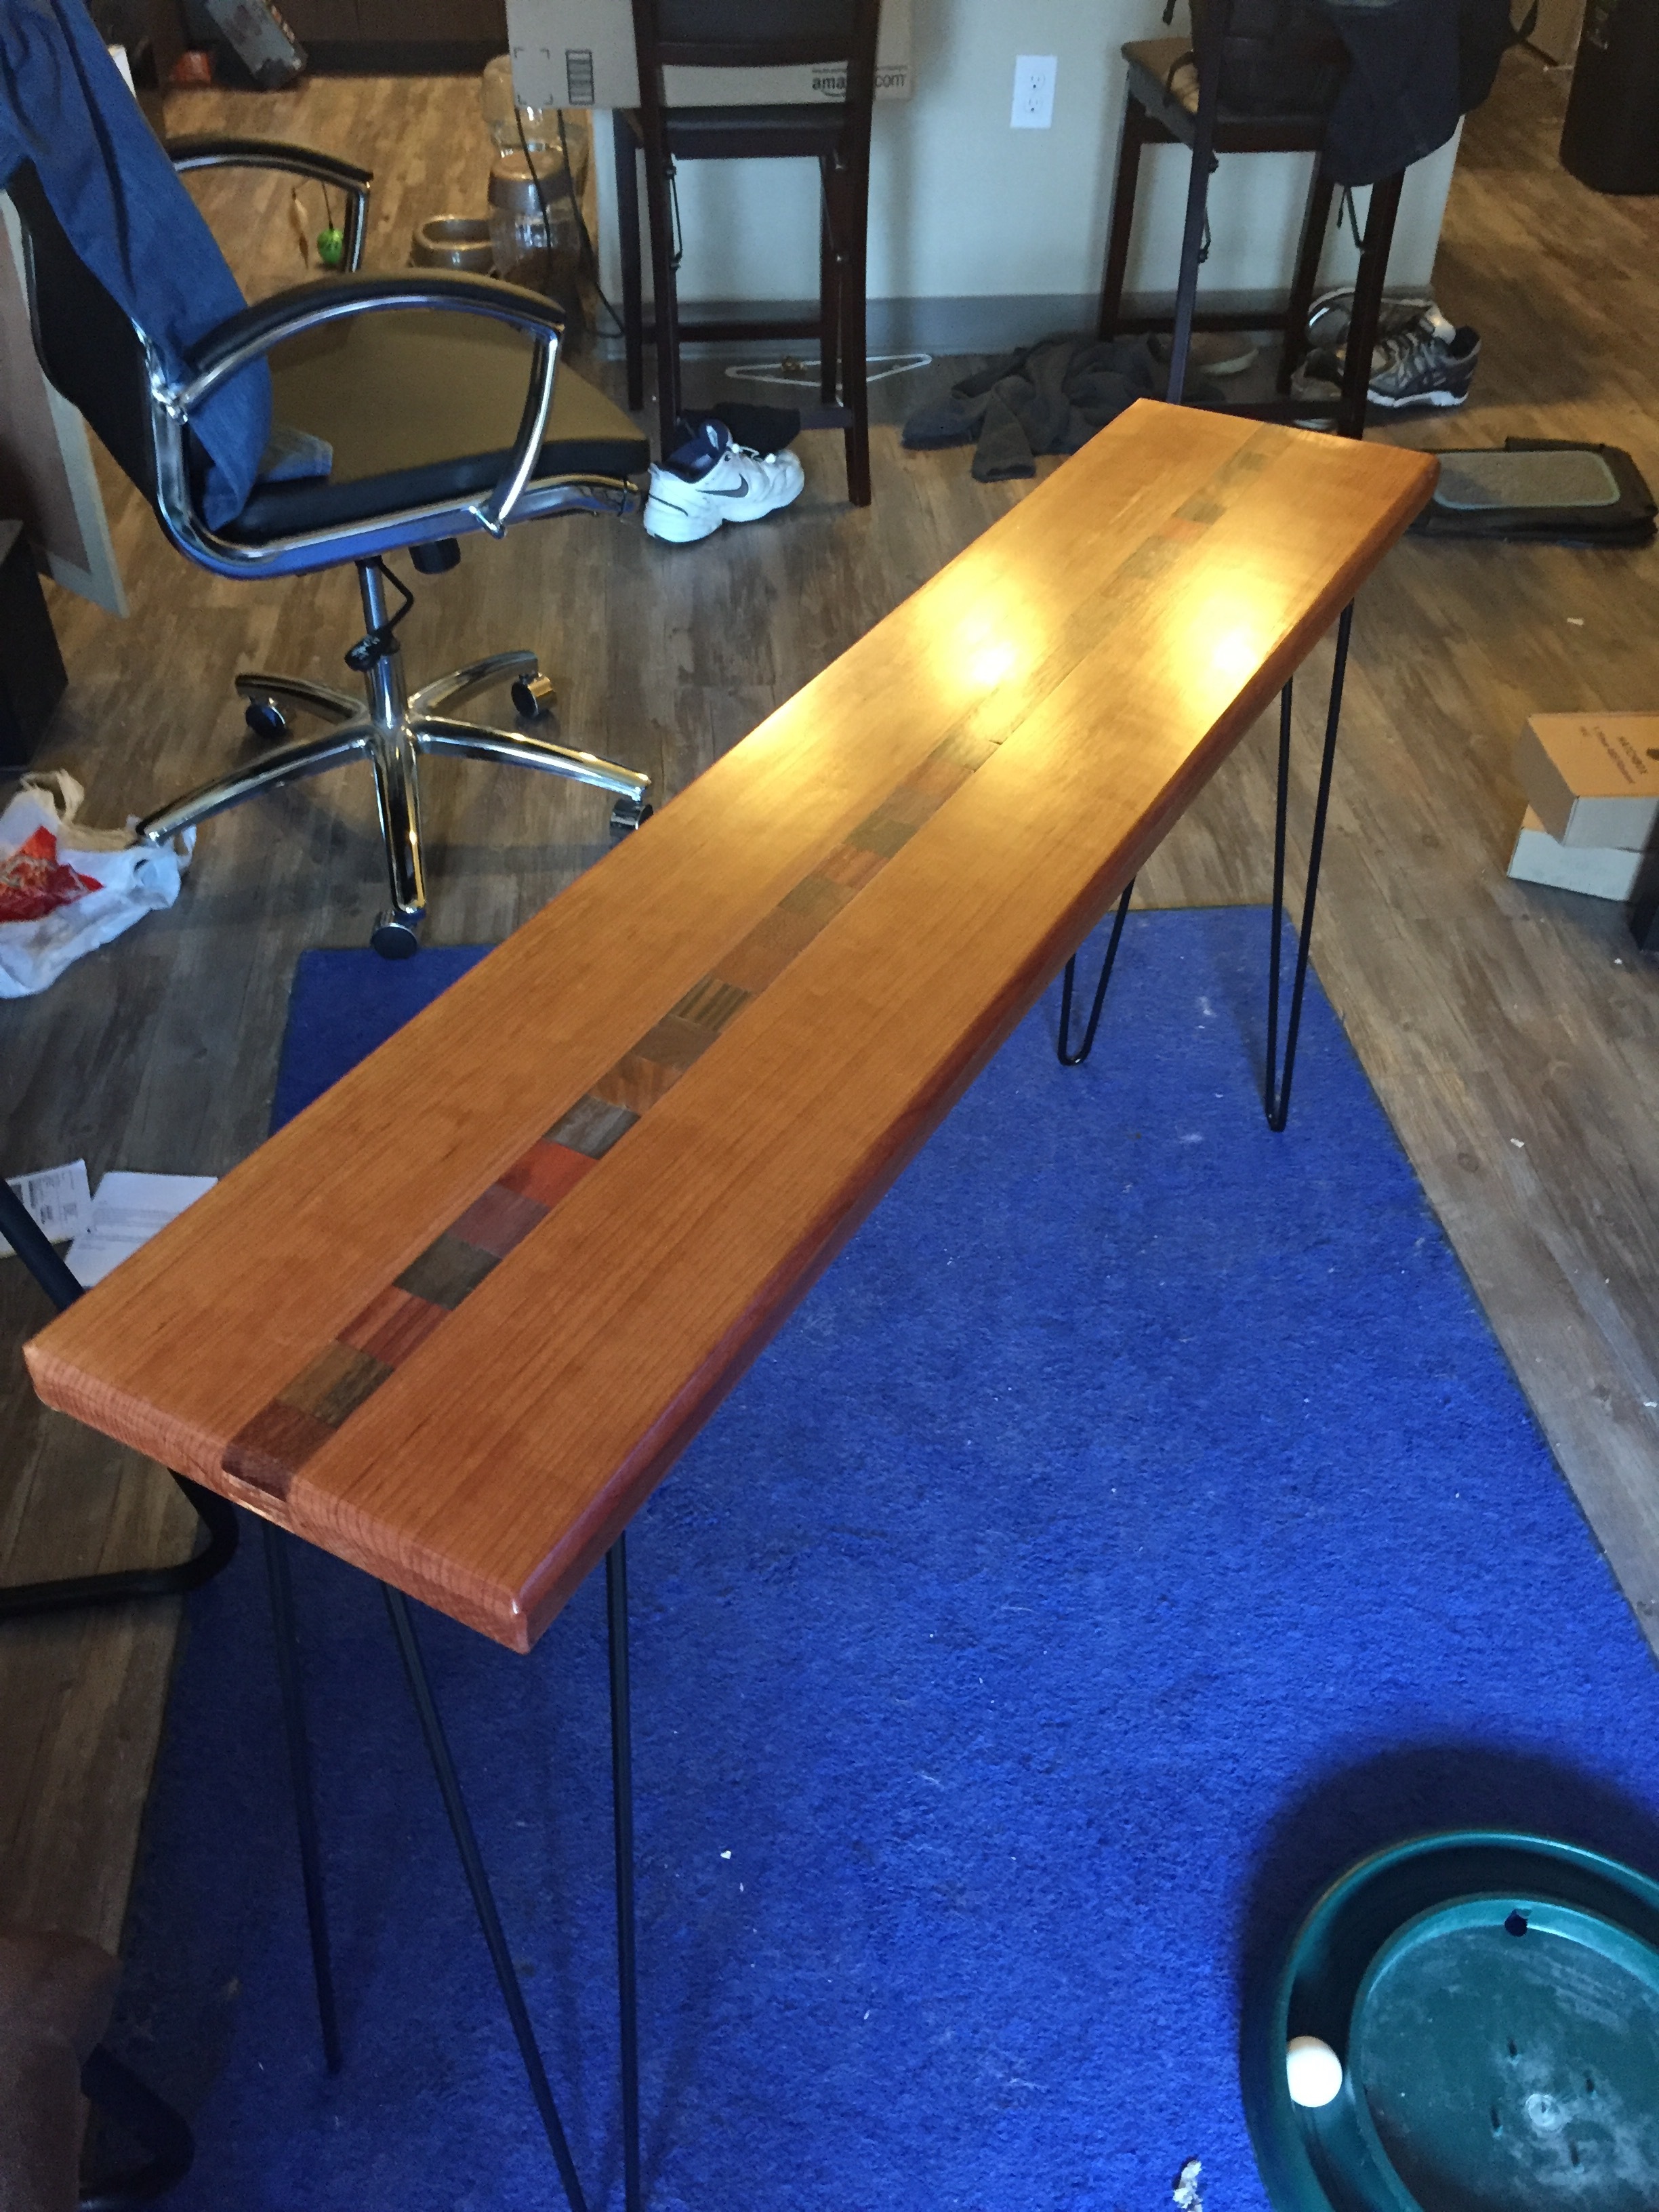
Finally got a chance to finish my hall table and attach the hairpin legs. Not unhappy with the results, but I think in the future I’m going to get a cabinet shop to do a good spray finish on furniture. It’s stinky and I suck at it.
Cherry on either side, with 1.5" squares of leopard wood, indian rosewood, padauk, purpleheart, mesquite, goncalo alves and a couple others I don’t remember at the moment.
16 Likes
Replaced and organized general use toolbox, perhaps the black on clear labels were not the best choice
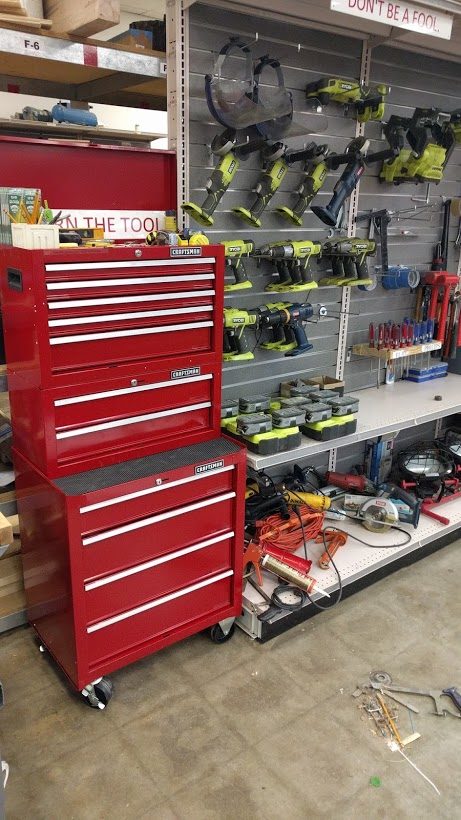
Only you can prevent messy workshops!
11 Likes
Finished a carving mallet and a jointers mallet early in the month
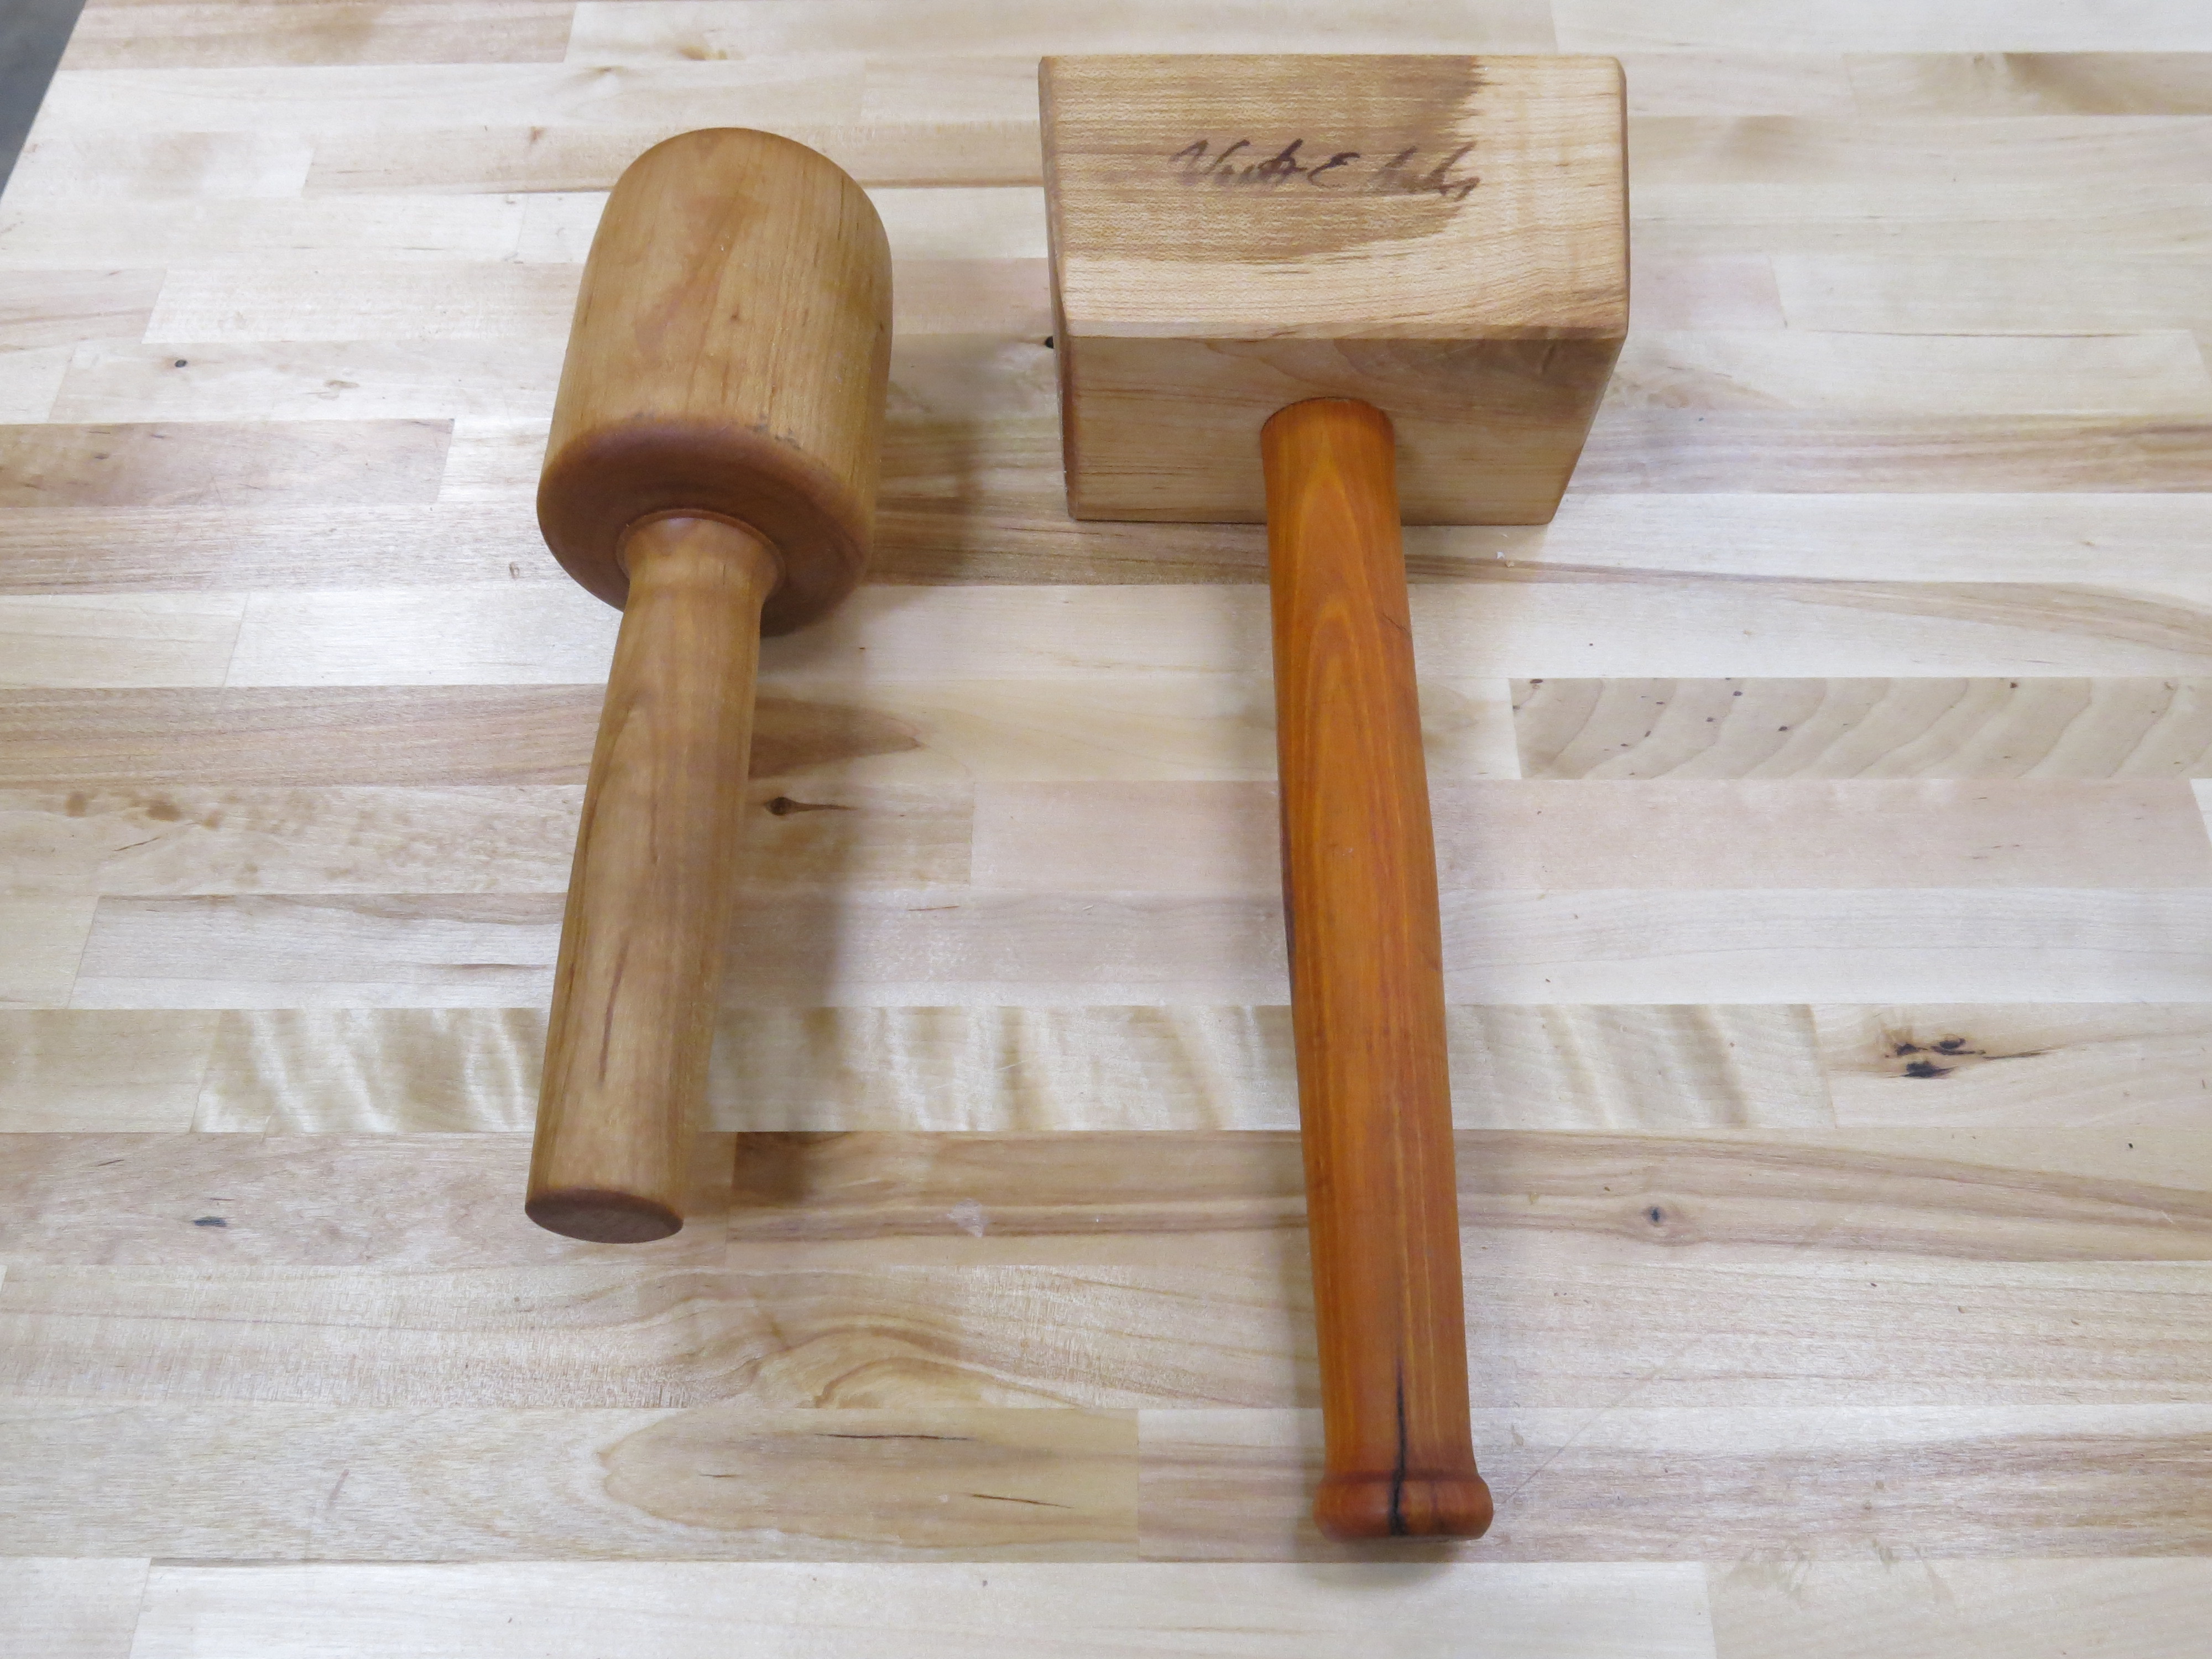
And created a jig to facilitate making the dulcimer sticks for the class, sadly the stick I made to document the process for the class broke before I completed it…

7 Likes


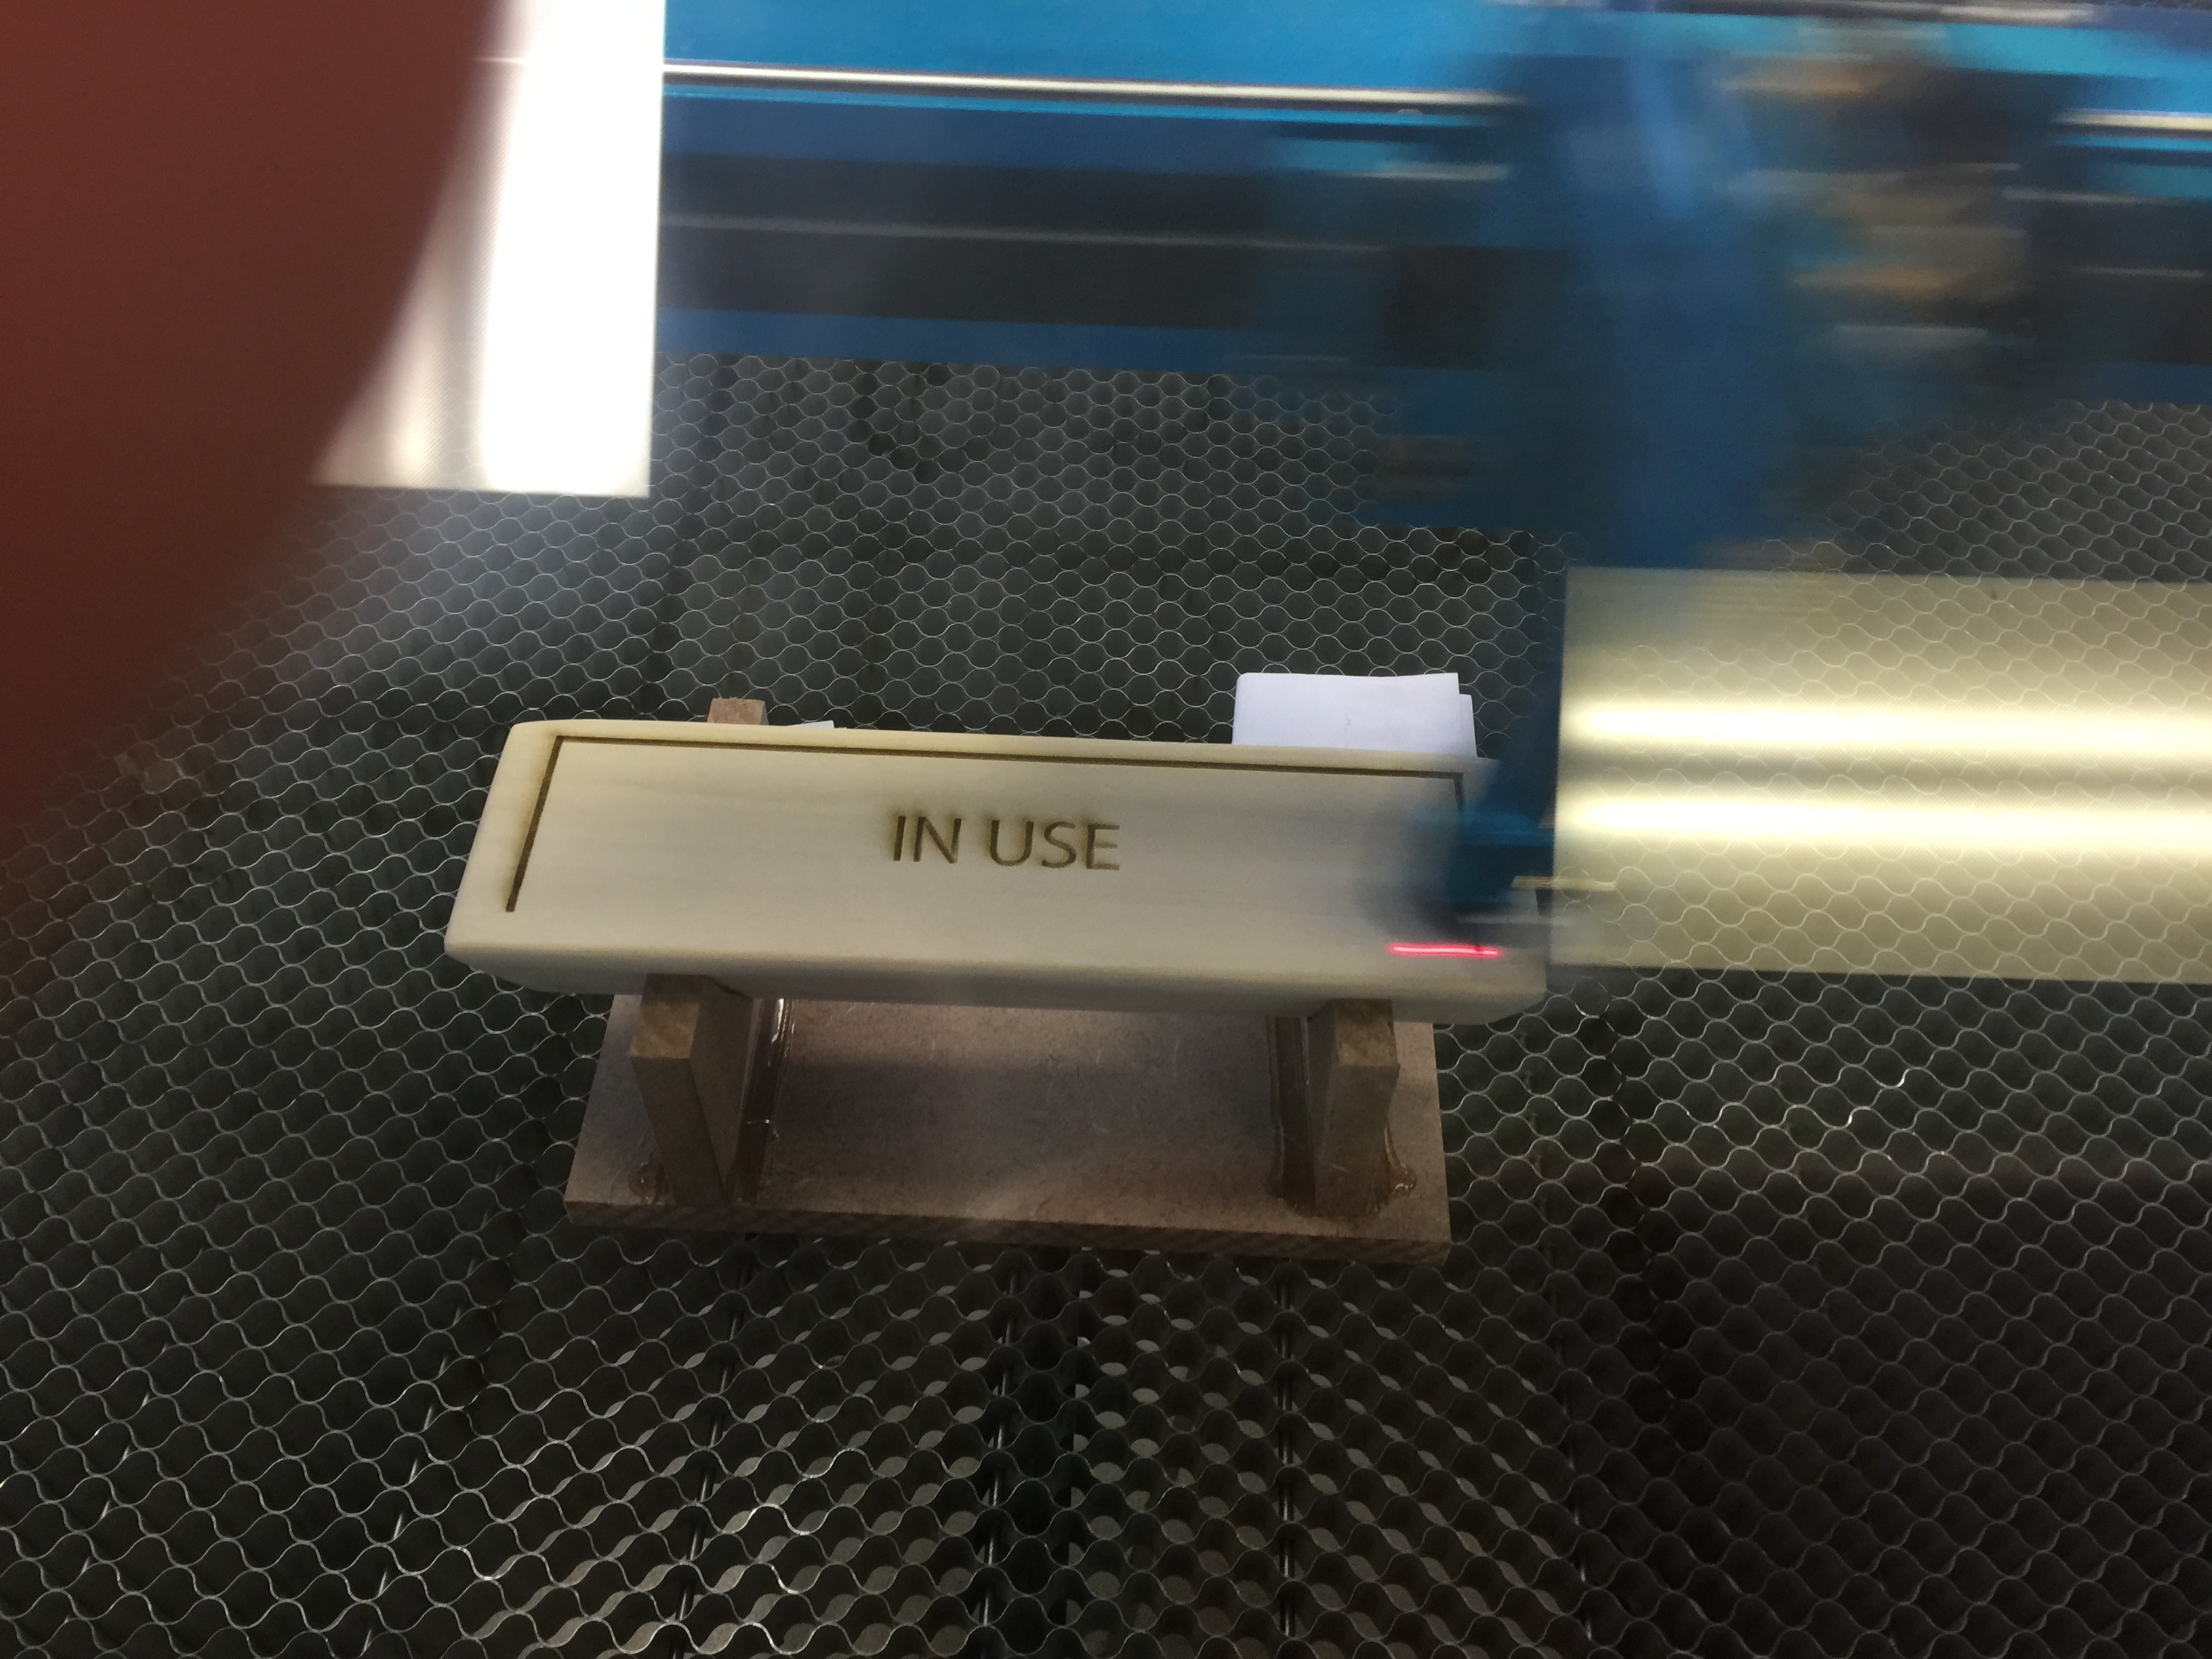
I made some 3 sided signs for my mother’s office.
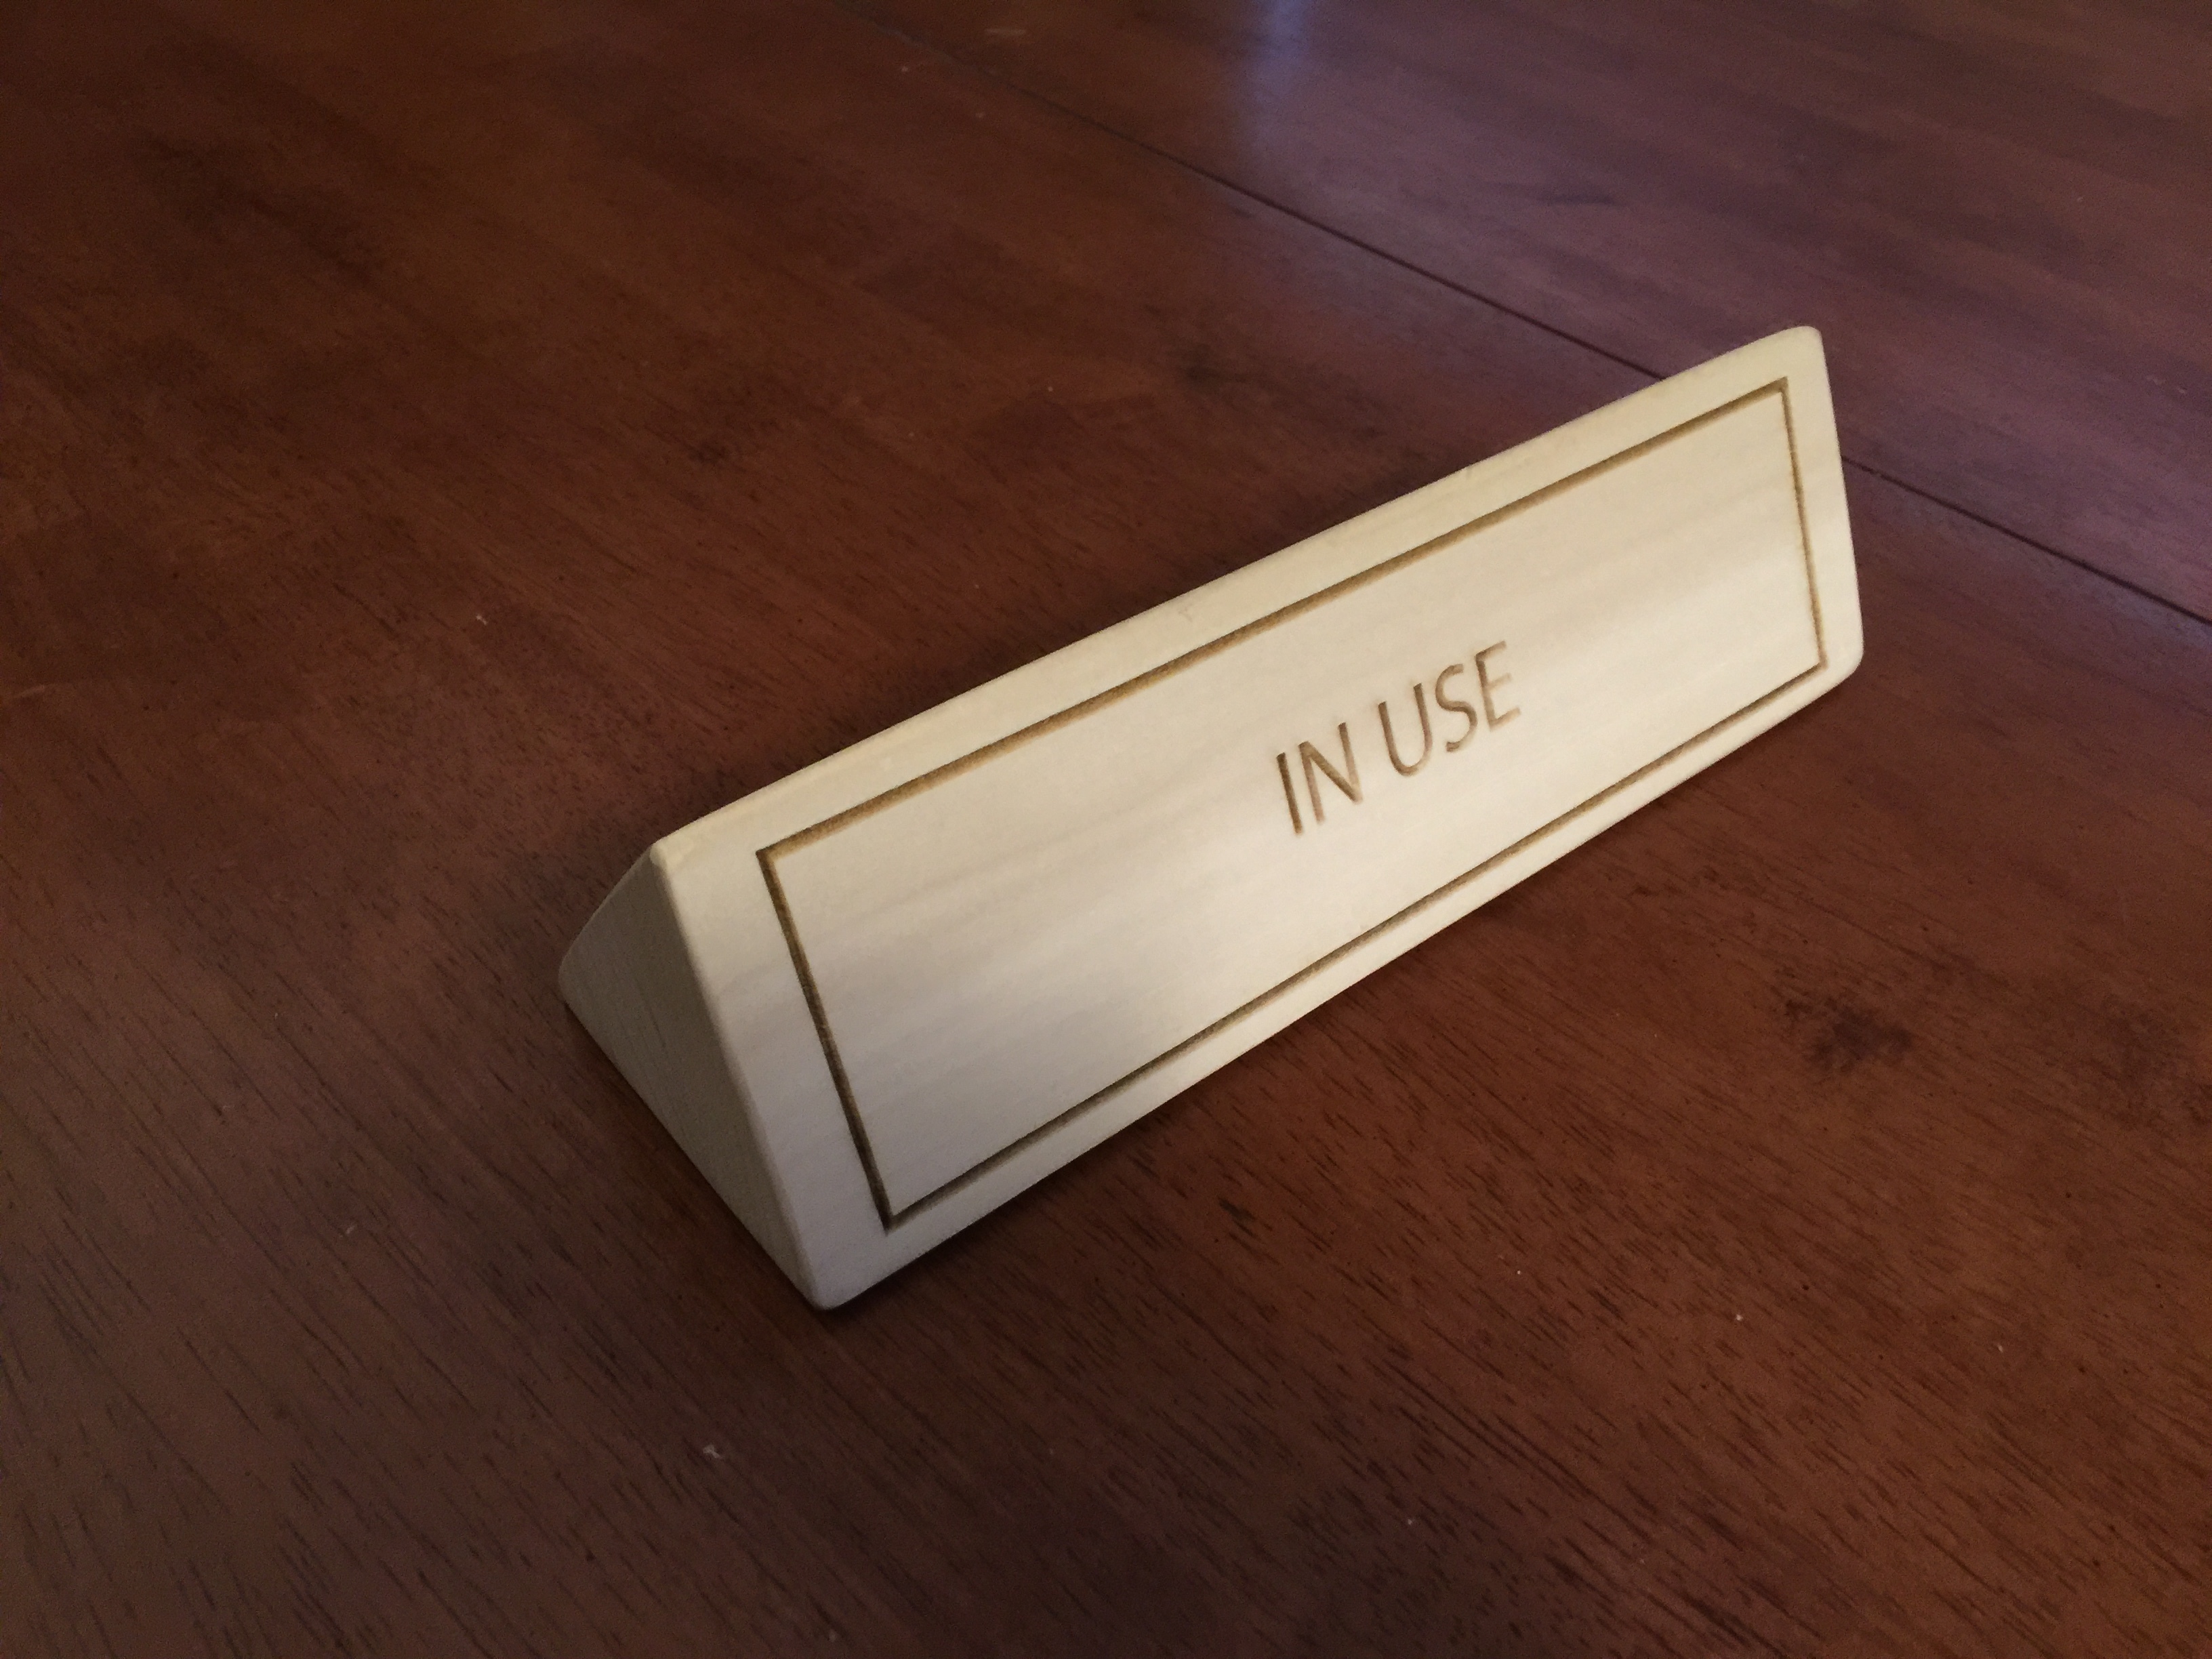
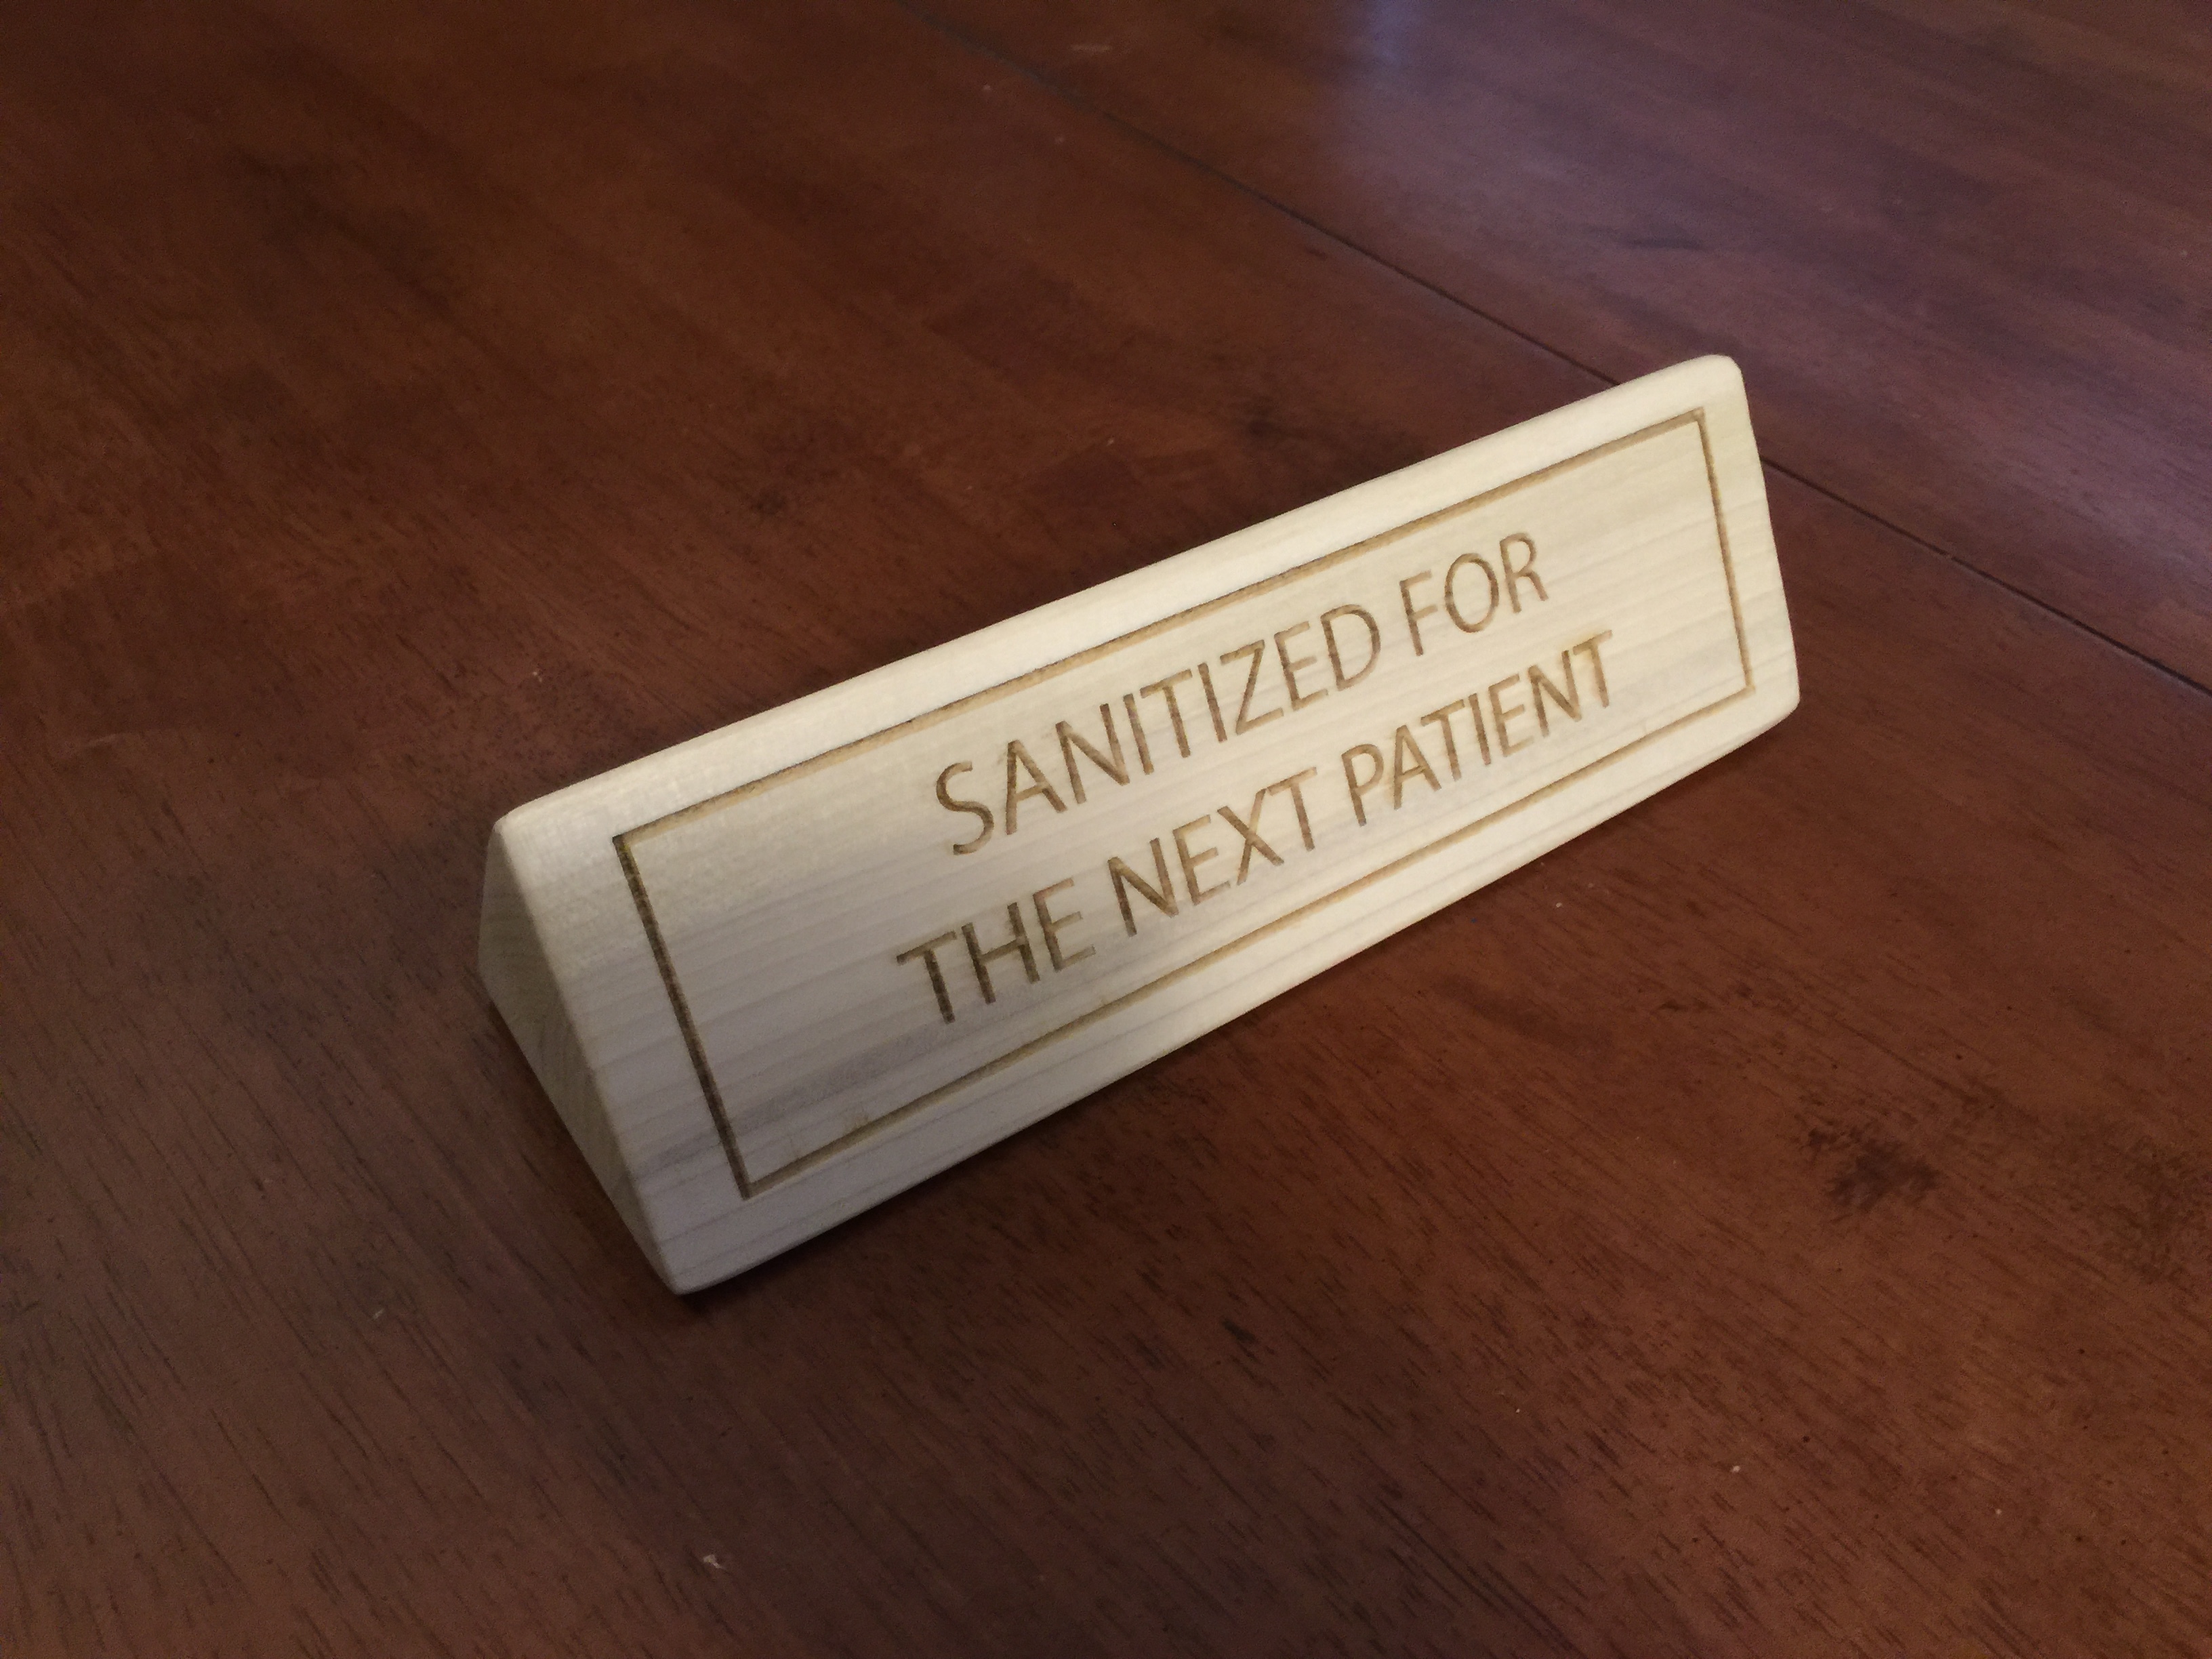

I glued three pieces of wood together to make a thick block, and cut out the triangles on the bandsaw with the angled table. I made a quick jig using scrap to hold the triangles flat, and used the raster function of the new thunder laser  I’m in love with the new laser!!
10 Likes
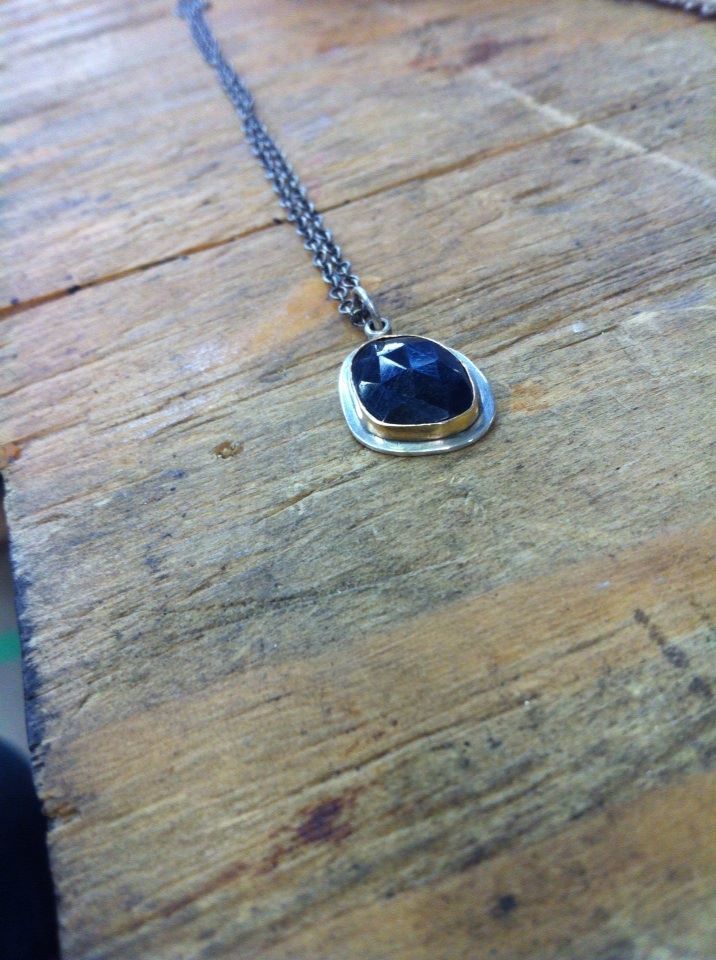
Finished up a couple of pieces yesterday. I started playing with some of the rose cut sapphires I acquired - love them!
Custom order with a green sapphire/sterling:

Dark blue sapphire with 14k gold bezel (the rest is sterling):
And a pair of ruby/sterling earrings just because:
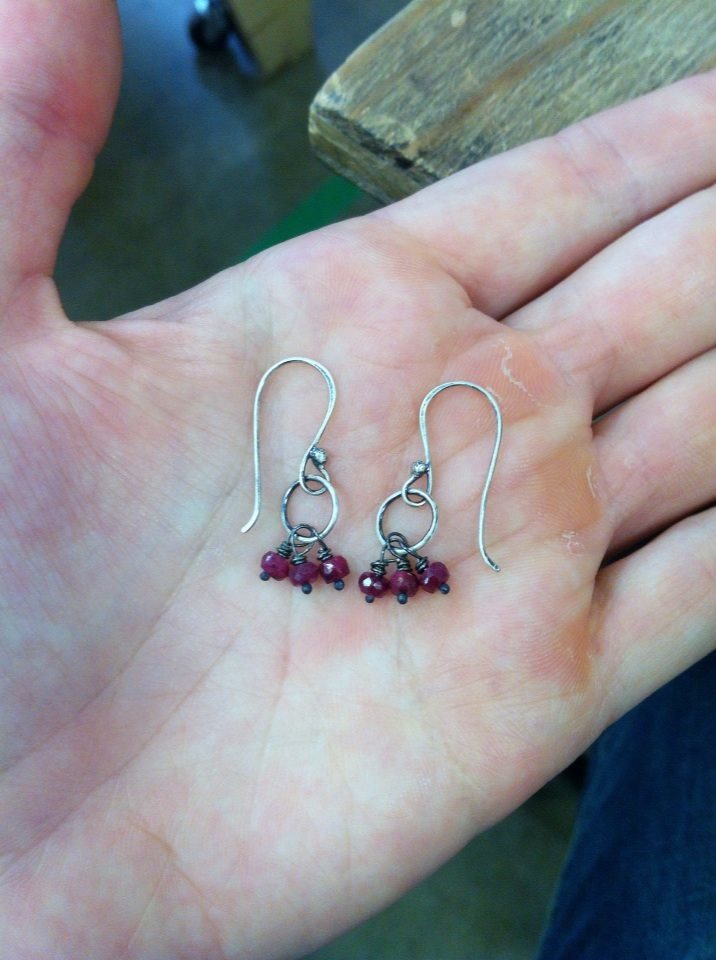
10 Likes
I needed a spare key for my bike. Ordered two cheap blanks from Ebay. Used the hand vise and pattern files in Jewellery to cut a copy of the original. Worked nicely.
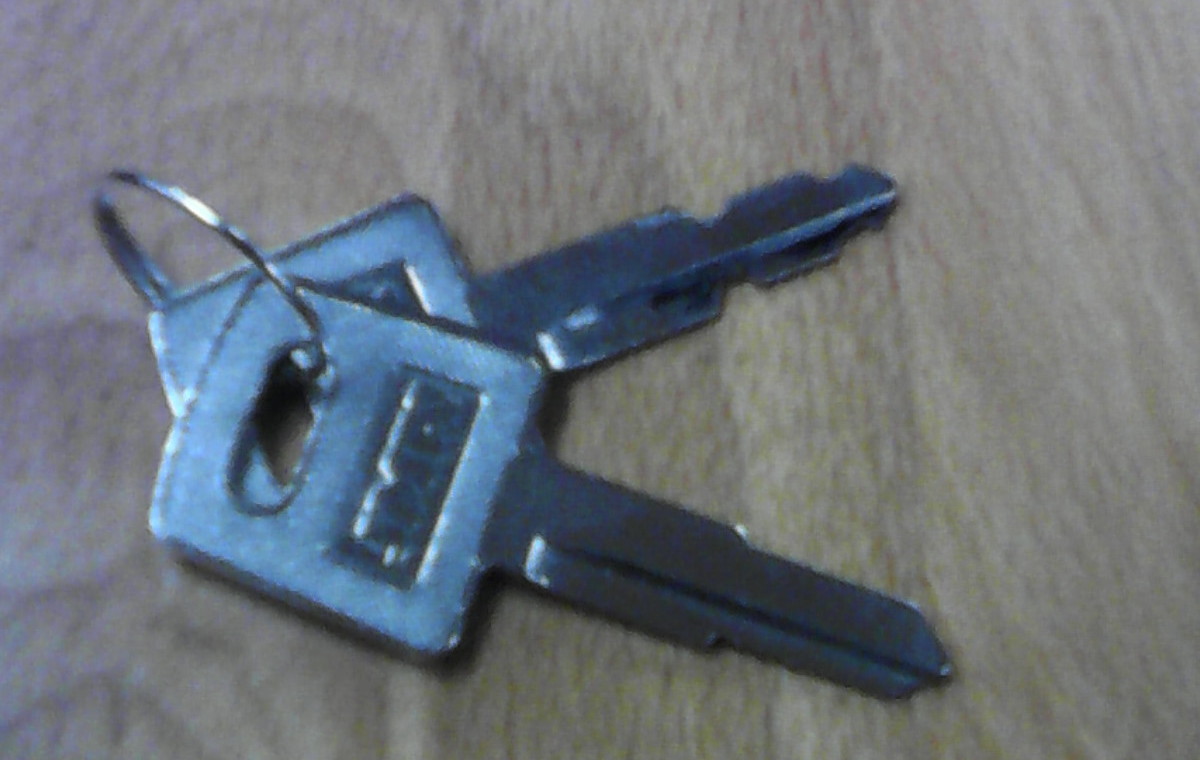
9 Likes
So, inspired by @coloneldan knife sheath class last week, I purchased a small knife sheath kit for my sloyd woodworking knife (came with a plastic sheath, yuk!), and produced this ugly thing. May not be well done, but I am please with what is only my second leather working project. Love the makerspace, I would never have even considered branching out into leather working with the space!
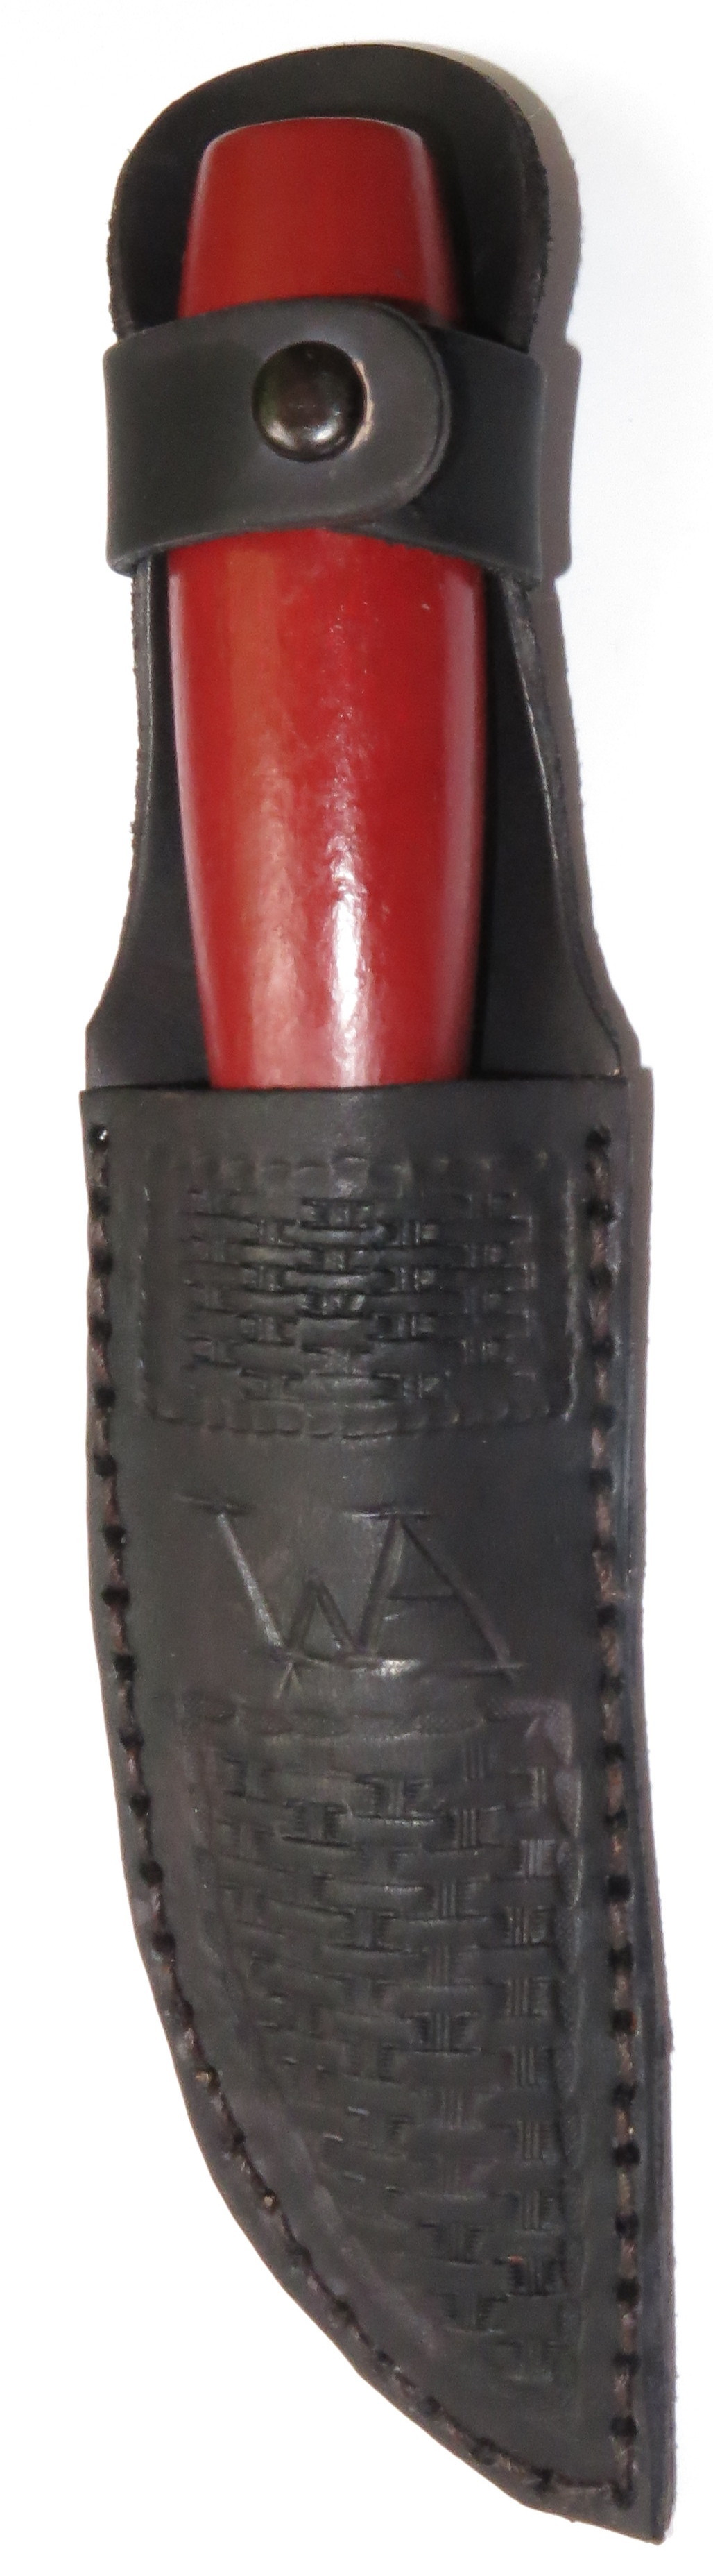
BTW, I experimented with using some woodworking dye in an alcohol base for dyeing the leather. Seems to have worked fairly well.
8 Likes
Looks great Walter. How may leather tools did you buy? Like me when you get into a new hobby, which is often for me, you go all crazy and buy a lot of the tools. Later you realize there are even nicer higher quality tools that do a lot better job and you go crazy again.
As you said in class, the person with the most tools wins 
2 Likes